Troubleshooting comment to be aware of: How To: Adding Columns to Existing Kinetic Grid - #52 by hmwillett
This one was interesting to get going.
Thanks @askulte for the challenge and thanks @Ishkaran for the slight tweaks to get this polished.
This “How To” segment is going to cover how to add one or more columns to an existing Kinetic grid/view.
Note, that this initial method iterates through each line of the view to populate the columns and likely isn’t the most efficient, but I will update this post as I find more methods that work.
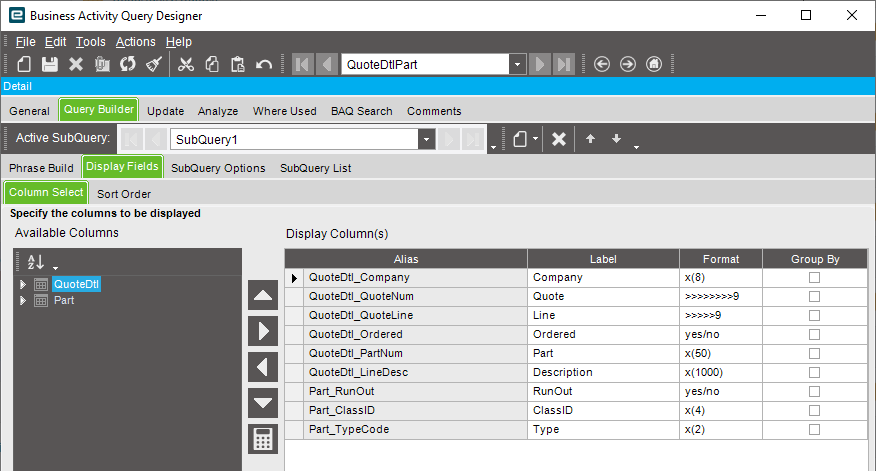
For this example, I’m adding Part.RunOut and Part.TypeCode to the Quote Lines panel card.
*** Check out “Version 2” for a faster, more efficient iteration. ***
- Step one is to add your related columns to the native DataView.
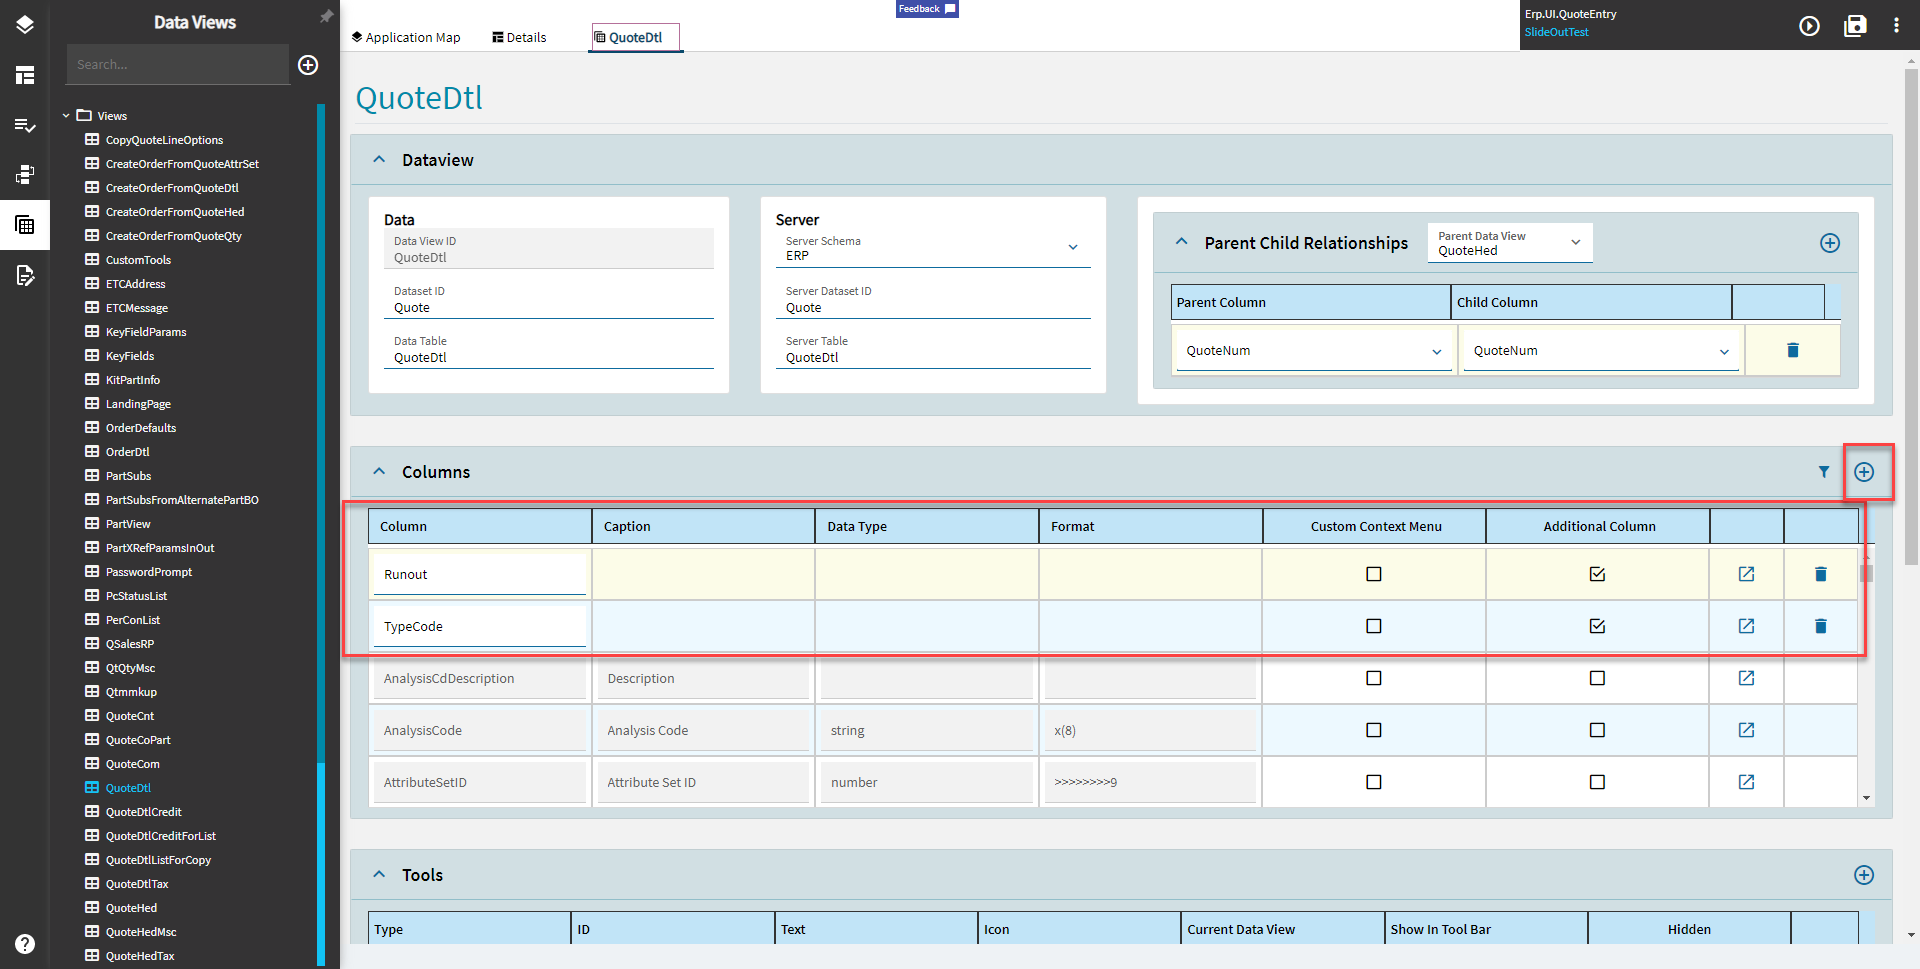
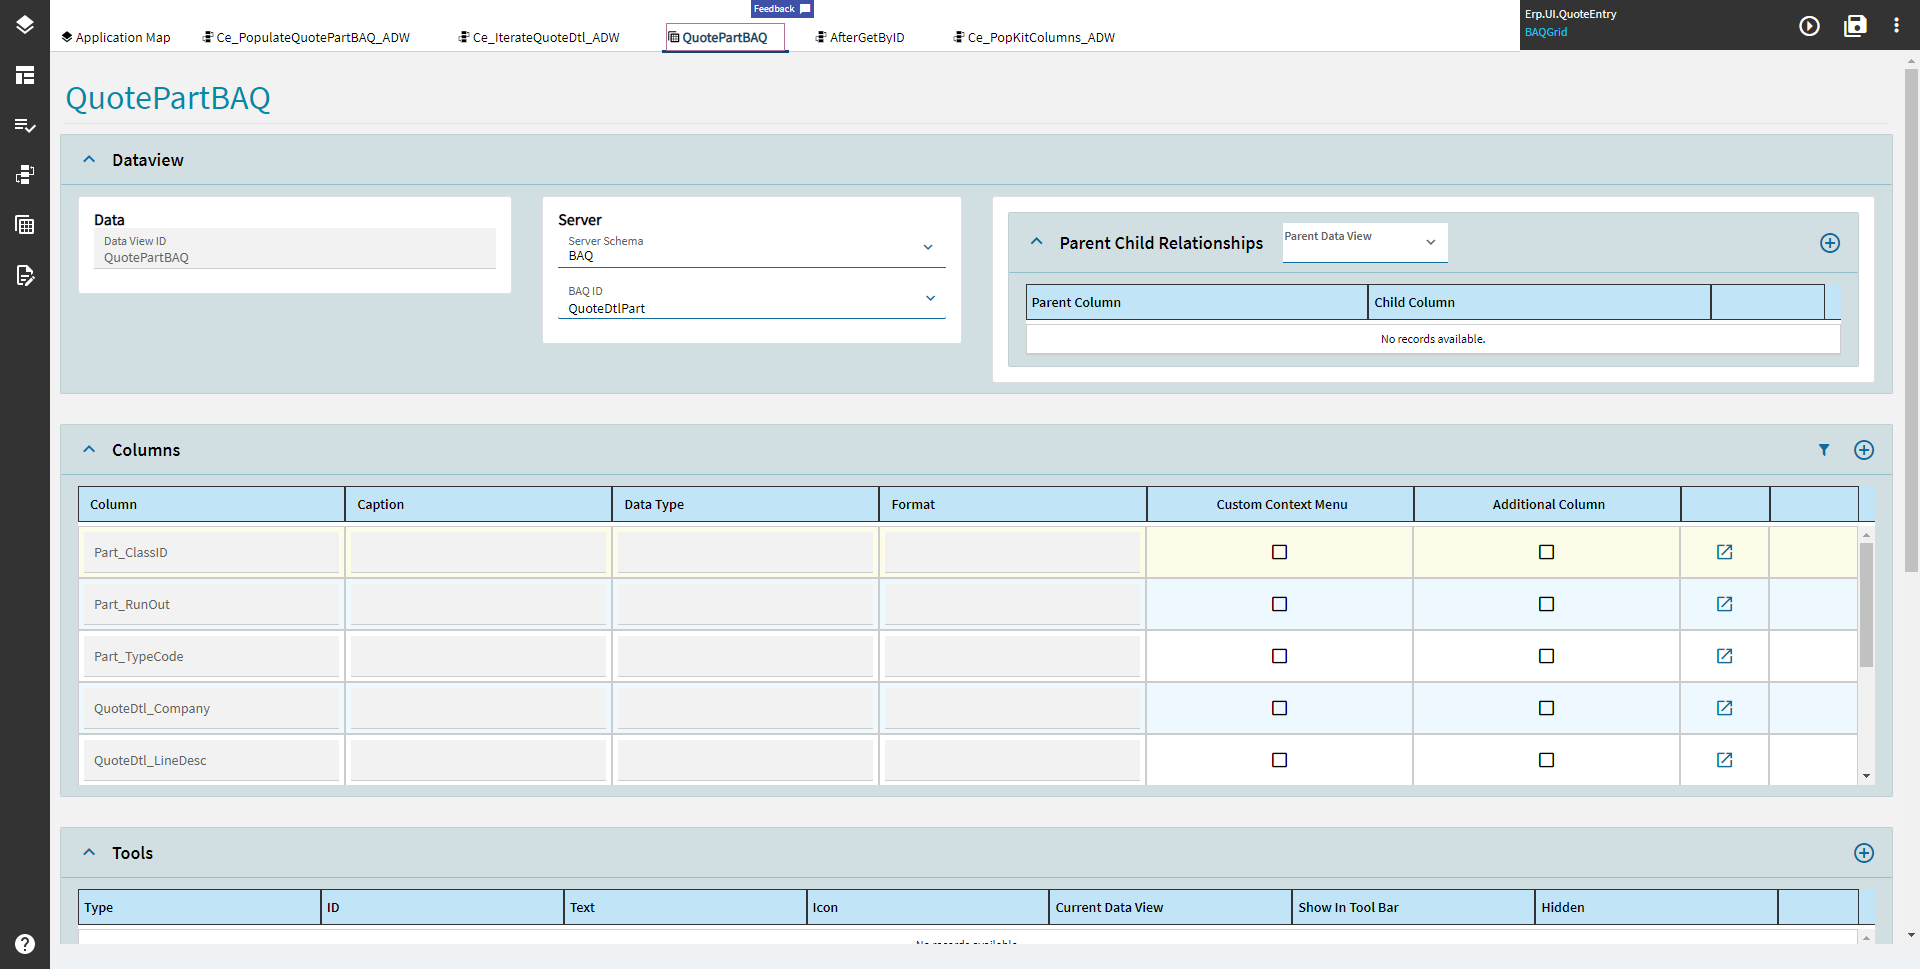
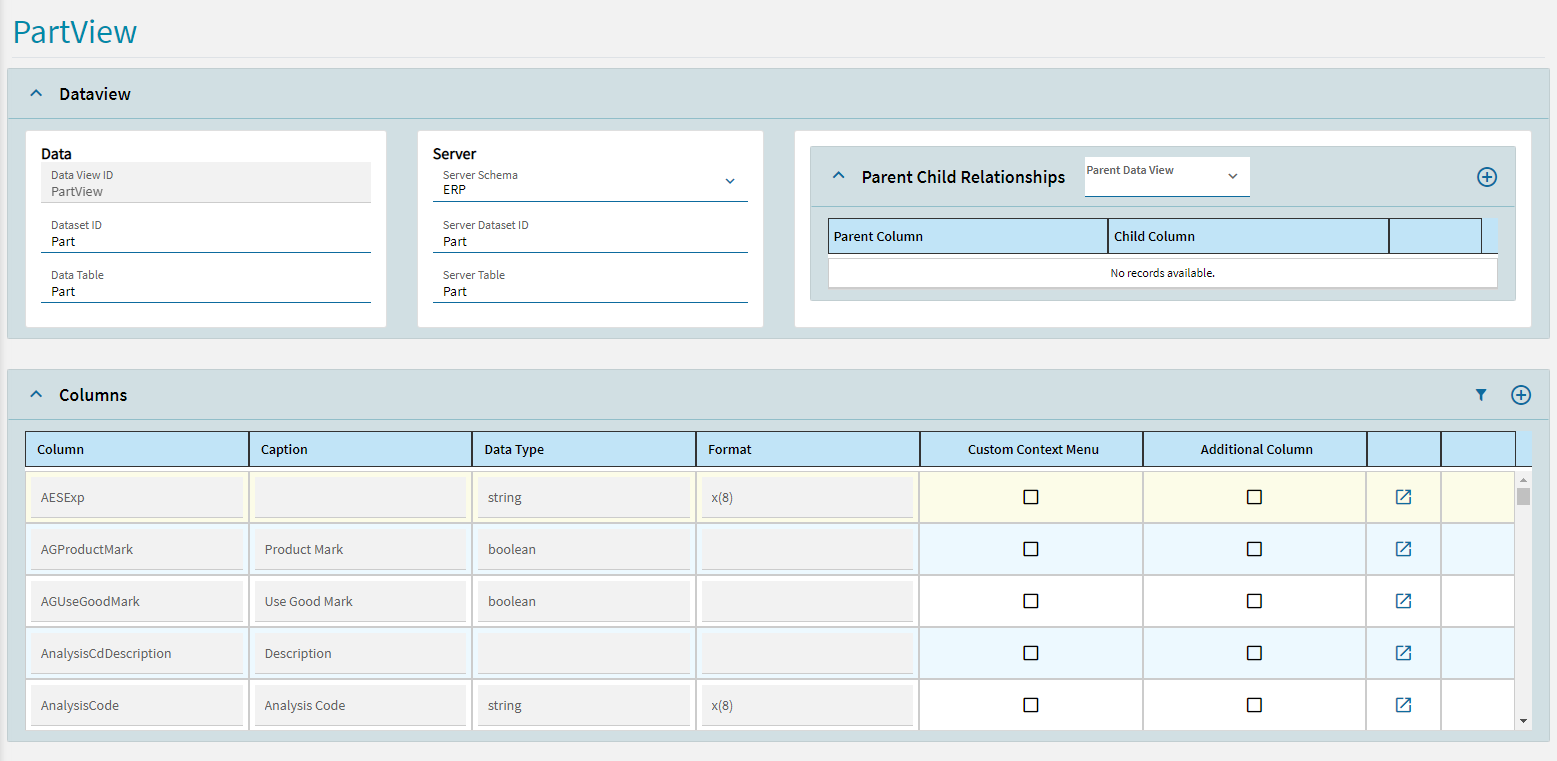
- Create a View to hold the rows from the REST call you will make. If you’re calling a standard BO, then then the columns will come in automatically when you define the Data Table. I entered “Part”, so all of the columns in Part came in for me. If this is a more custom table, then you will have to add the columns yourself.
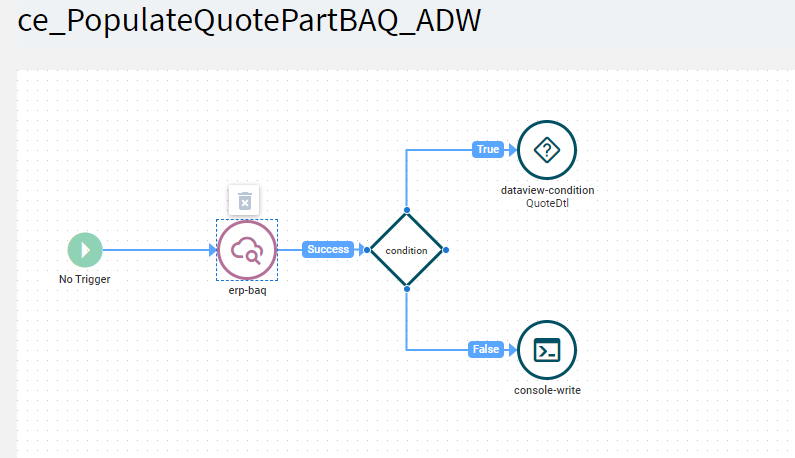
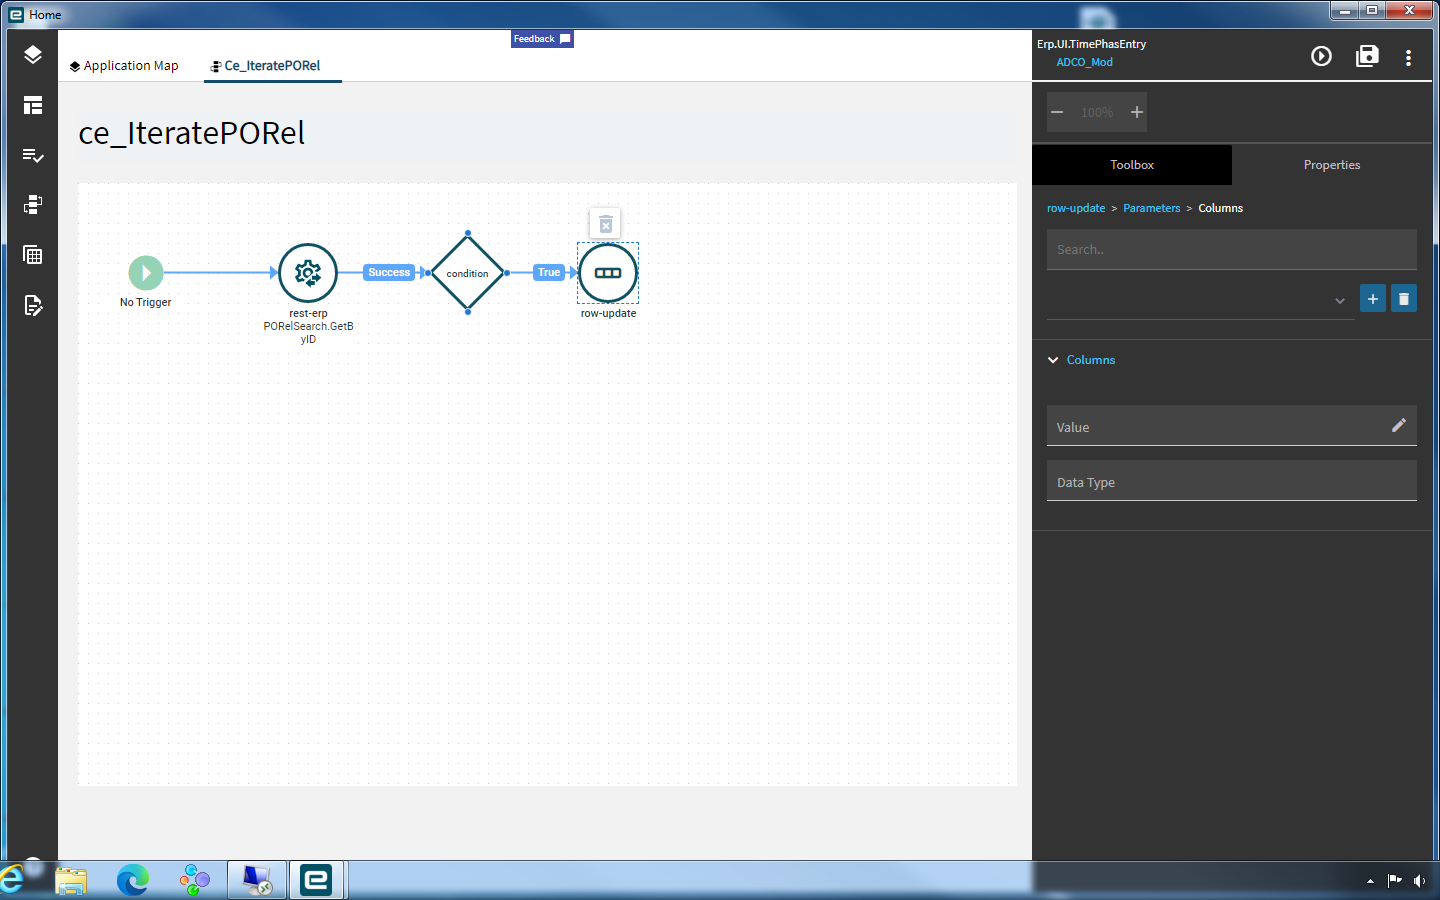
- Next, create a new event that’s going to iterate through the rows. This event will have no trigger and a single “DataView-Condition” widget.
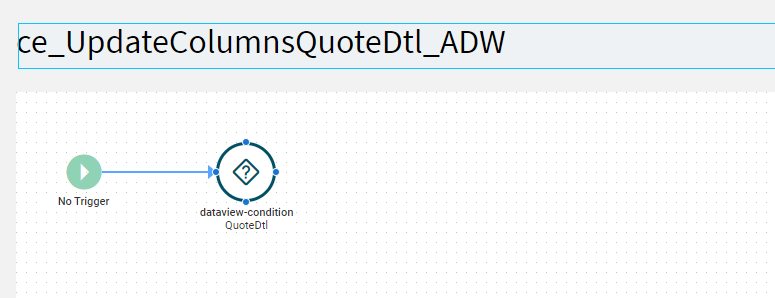
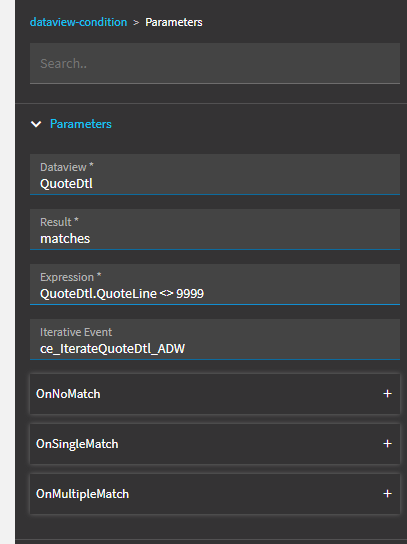
- Configure the DataView-Condition as follows:

- Dataview: This is the view that you’re looking to update.
- Result: this should be “matches” which is a system DataView to hold the rows of any match based on the expression.
- Expression: Add some logic here. I used
QuoteDtl.Quoteline <> 999in order to grab every row in QuoteDtl. I’m sure there’s another way to do this, but this worked well enough. - Iterative Event: This is the name of the event that holds the actions we want to do each time we iterate through. Enter the name of the event you create in step 5.
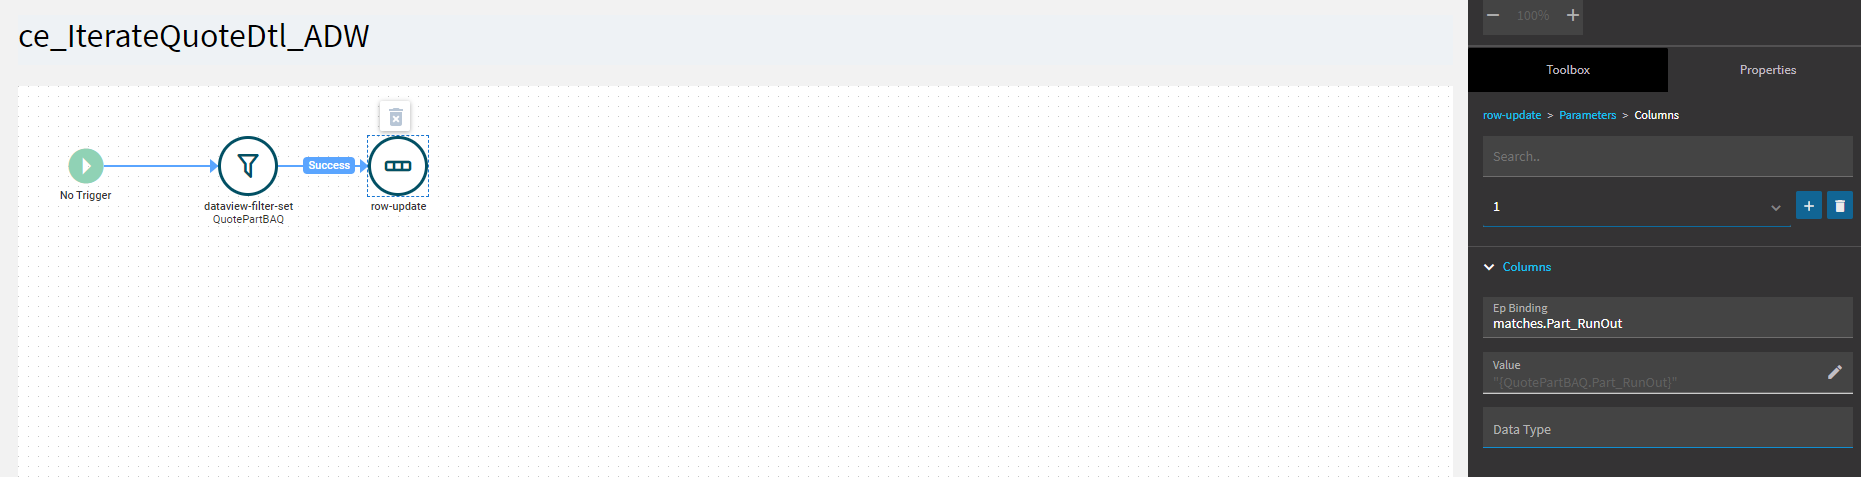
- Create a new, no trigger event for your iterations.

- Configure it as follows (adjust to your needs):
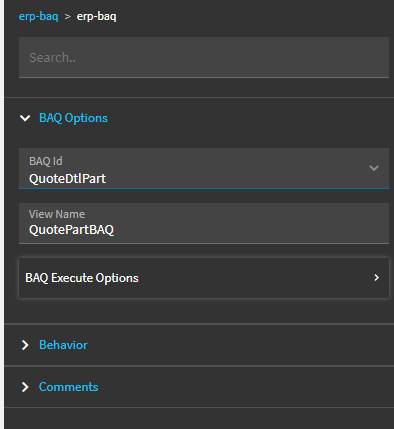
- Add a “rest-erp” widget and configure it to the BO that fits your needs. My example is getting part data.
GetByID also works for this.
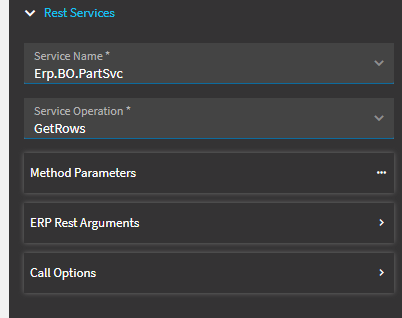
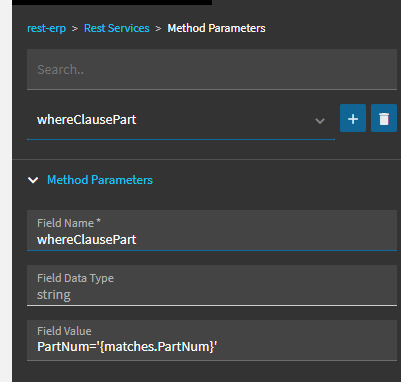
For the field value in the method params, you’re using the result from the rows contained within matches. In other words, only the rows that matched the condition we specified earlier.
Parameter Name: This is the table element returned JSON.
View Name: This is the view you’re binding the results to.
Parse from Response Path: as far as I know, this will always be “returnObj” unless it’s a custom REST call.

- On the rest widget, choose the On Success behavior and select a condition widget (*Note, I have a console-write in between mine for debugging purposes. You can ignore that)
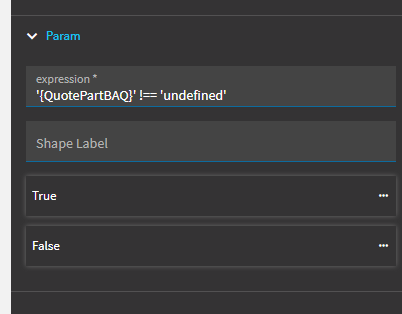
- For the condition widget, set the expression to check if your data view is undefined.
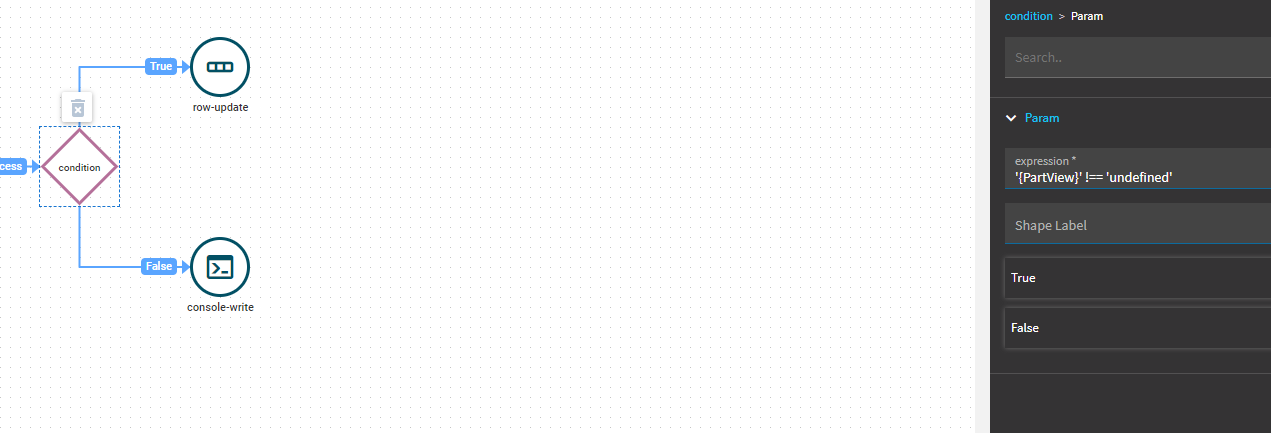
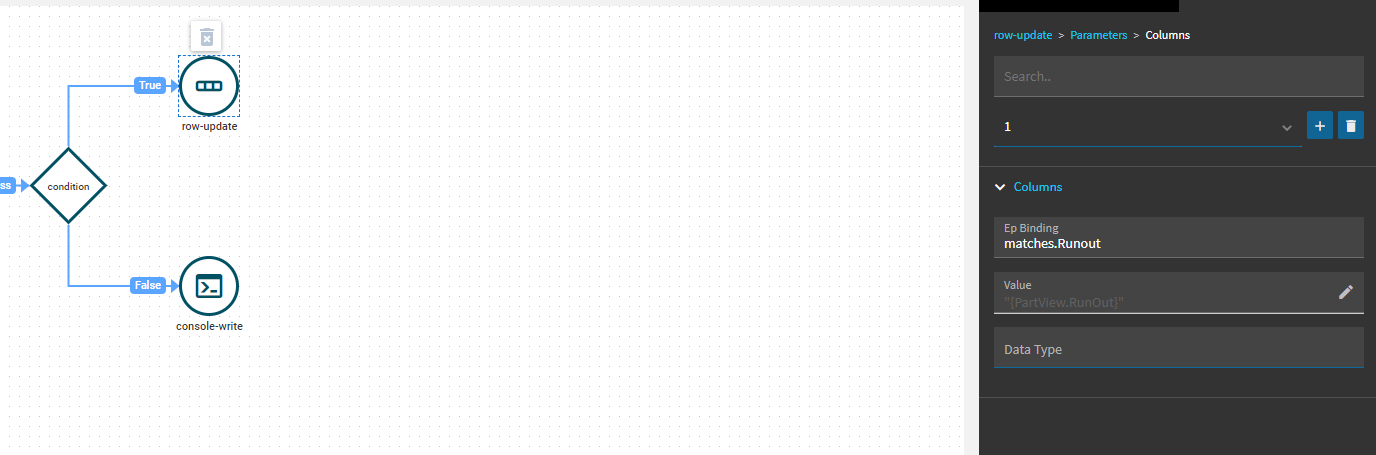
- Off of the TRUE branch of the condition, select “Row-Update”. This is where you’re going to set the values in the grid.
Ep Binding: set this to matches.YourColumnName. Whatever is populated in the “matches” table will be merged with the View you defined in your dataview-condition (QuoteDtl).
Value: set this to grab the value from the view your REST widget populated.
- Off of the FALSE branch, do something so that the processing can keeping going for other events. Originally, I did not set this to anything and it didn’t behave properly. I have it set to write “FALSE” to the console.
-
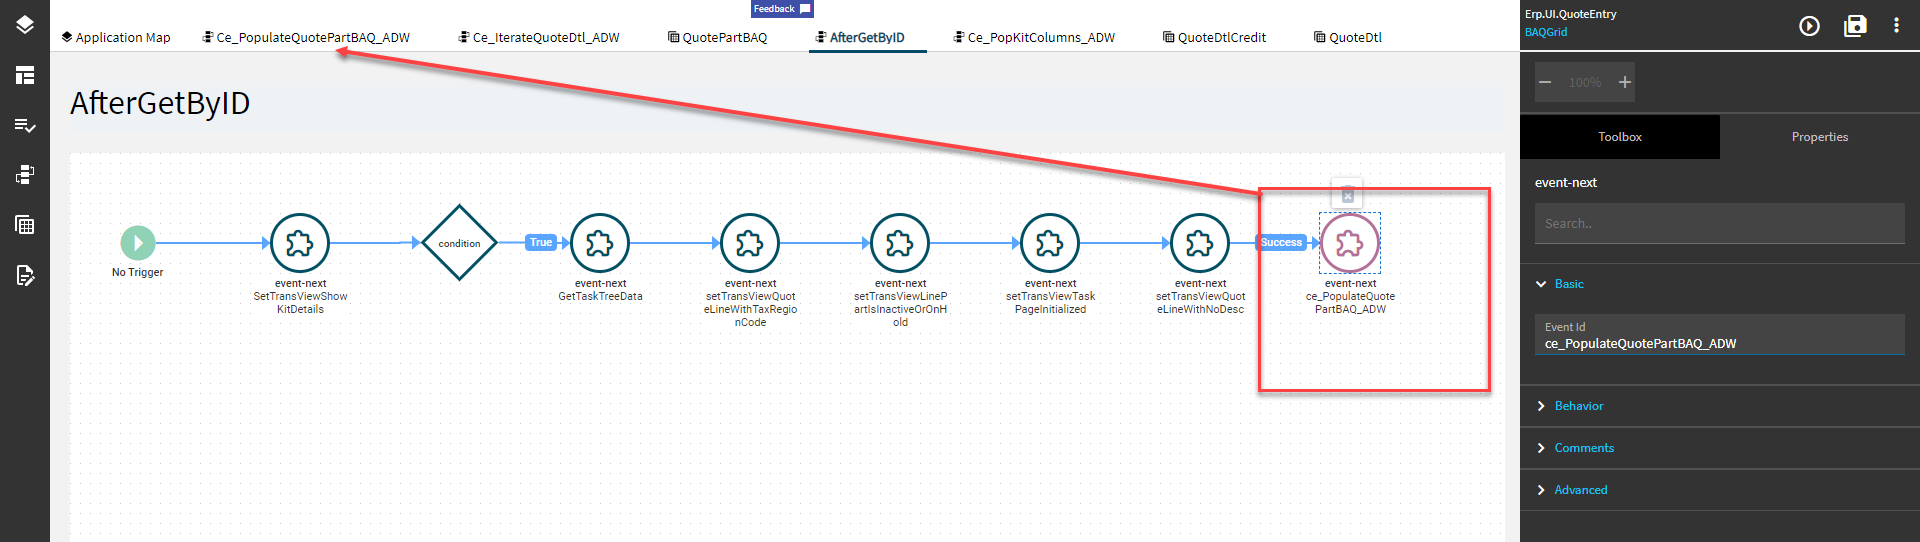
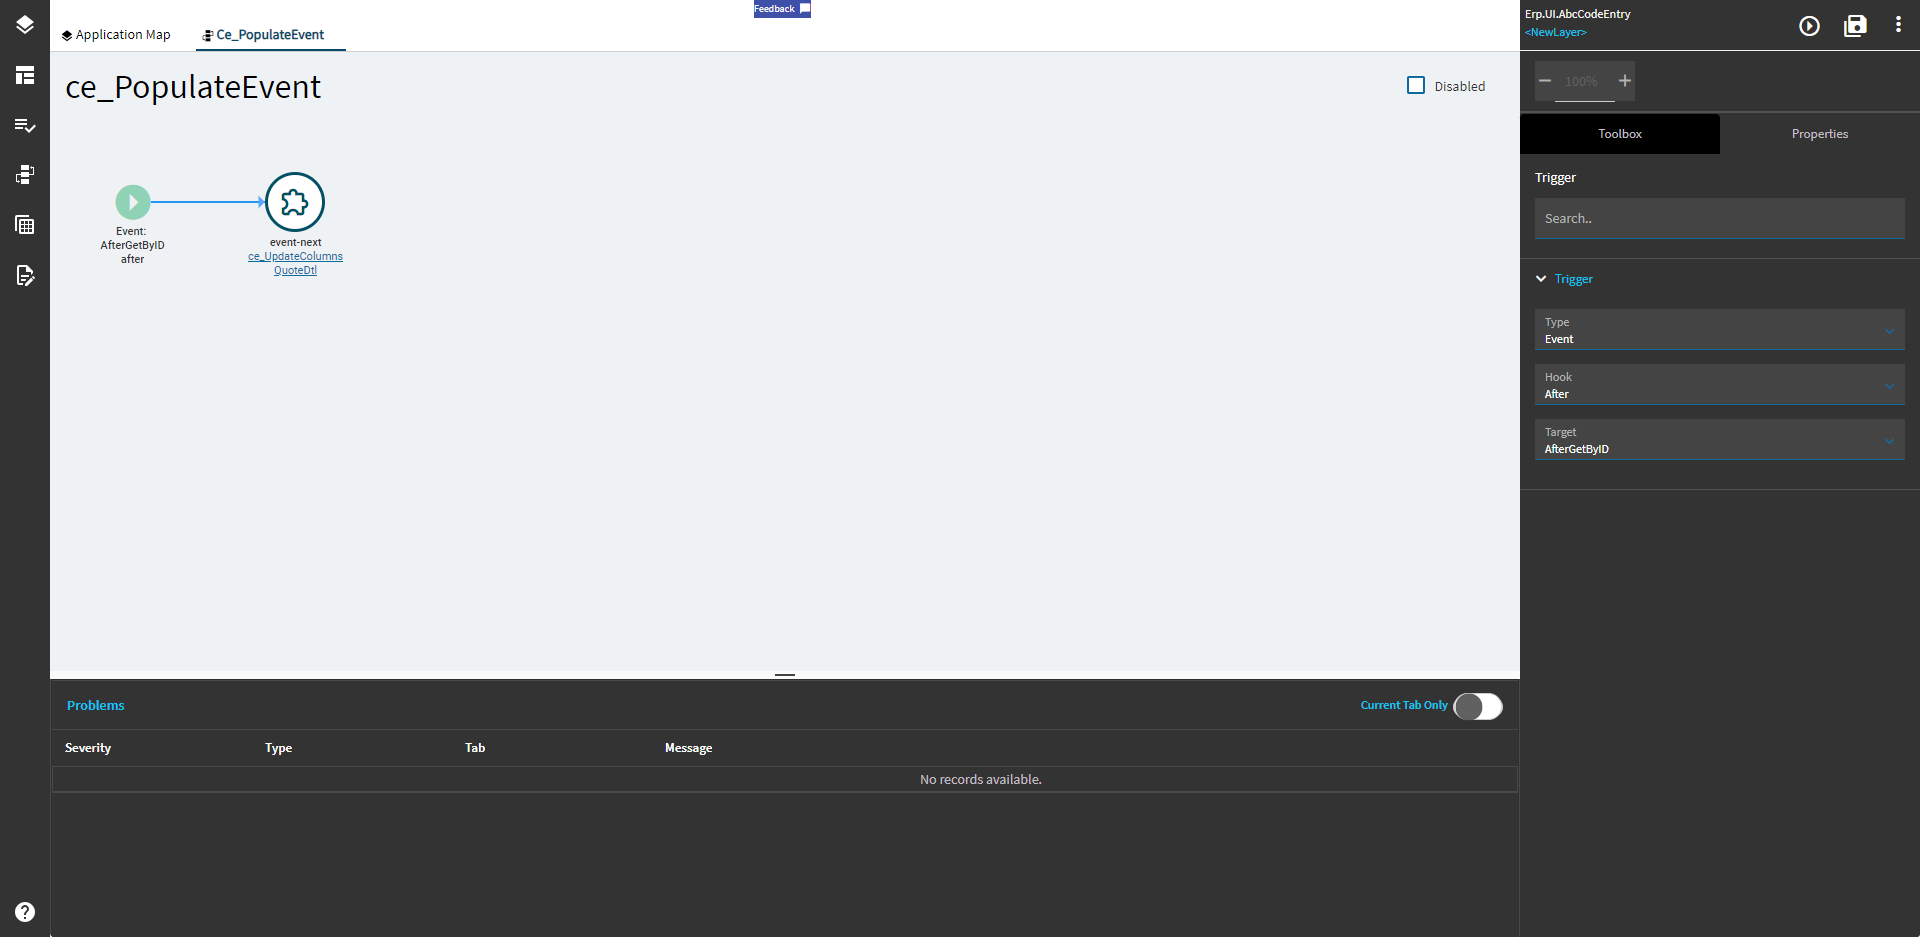
Finally, find the AfterGetByID event. At the end of the predefined actions, add an “Event-Next” widget and set the Event ID to the event you created containing the DataView-Condition.
This has changed in later versions and native events are locked. The change to this is to create your own event, set the Type to “Event”, the Hook to “After”, and the Target to be “AfterGetByID” (or whatever suits your needs in that particular form. You may have to do a trace with Dev Tools. Then add an “Event-Next” widget and set the Event ID to the event you created containing the DataView-Condition.
Save and test 'er out!

You can see that it 's populating line-by-line which is not the greatest solution if you have hundreds of lines. It’s feasible to create a BAQ View (like days of old), but you would have to modify a lot of events to make sure it’s pointing to the new view.
** Note, if you’re following my example, you will have to wire an event to the TransView.ShowKitDetails ColumnChanged event.