It is doable via App Studio… but it takes some doing…
You’ll need to customize both Quote Entry AND the QuotForm (process) in App Studio as we need to set up events to both SEND and RECEIVING the desired report style.
Quote Entry > SENDING VALUES
QuotForm > RECEIVING VALUES
~*~
Let’s set up the “Receiving” side first:
Open App Studio and filter for QuotForm. This is the form that opens when you click the print button.
Open the base layer, and then create a new layer for us to play with. Remember the name of this new custom layer. You’ll need it later!
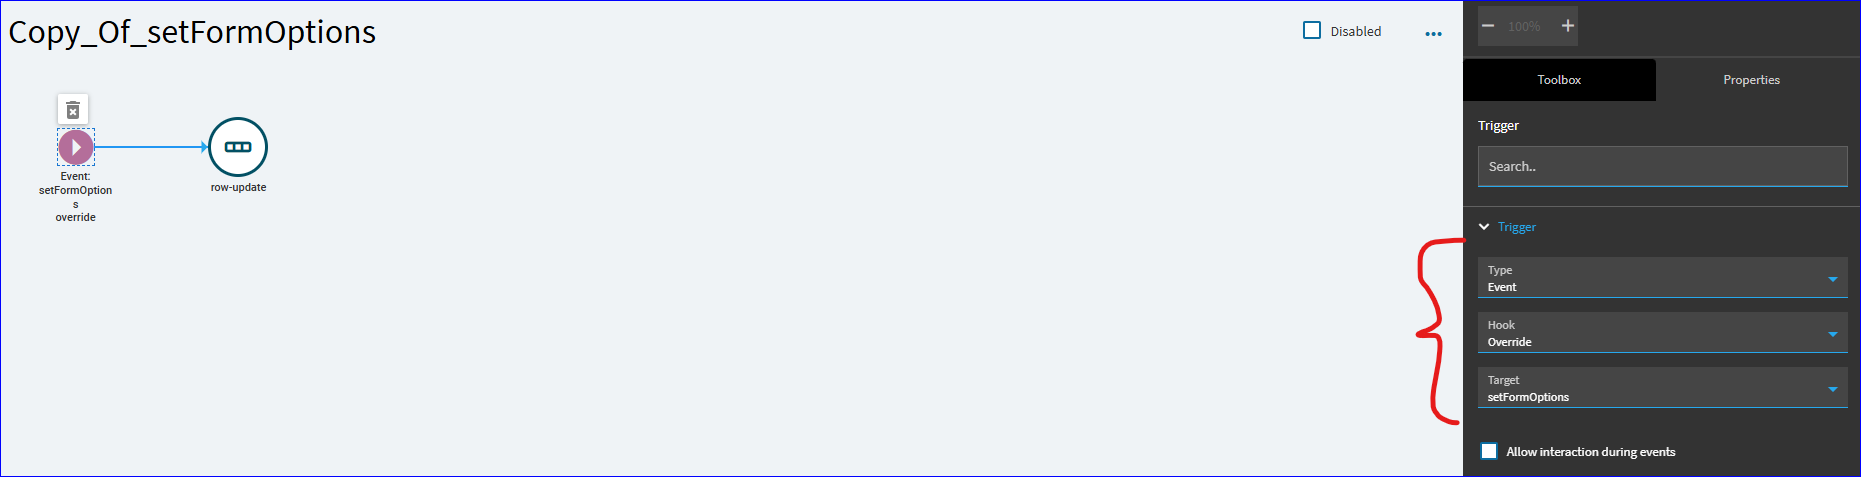
We need to override an existing base event. “setFormOptions”. This is the event that is setting the initial values on the Print Quote Form when it opens.
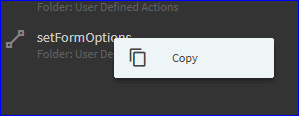
Search for it, right-click and “Copy”
Rename your copy if you want… and repoint the trigger to override the original base event.
In the row-update, you’ll see this column being updated:

This is the QuoteNum coming in from Quote Entry when you click the print button. We still want this. What we want to do is set up a second receiving column so we can receive the incoming desired StyleNum.
So, we need to add a second column here… but first, I’ll show where we get the binding…
If you look at the Print Quote Form page, you’ll find the Report Style is bound as follows:
This is the binding we want to update on form load.
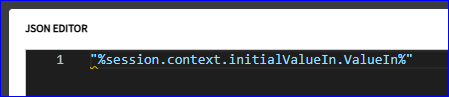
So, back in the event > row-update… we want to add a column:
Below is what you’ll want to add to the row-update (column 2):


"%session.context.initialValueIn.styleNum%"
With that set. Save this layer and publish it. Again, remember the name of this layer!
~*~
Go back to your Quote Entry custom layer and we’ll now work on the SENDING side of the process:
Here, we also need to create an event… but you need to decide what you want to do. You can either hijack the existing print icon… OR, set up your own button. In this example, I set up my own so I could easily test one vs the other.
So, figure out what you want to do here… use the existing icon, or create your own button.
Next we need to, again, copy the base event that is being used when you click the print icon.

Once copied, again, rename the event if you want.
Then re-point the trigger. If you want to hijack to existing icon, you can set this event to Override the base OnClick_toolQuoteHedPrintForm event.
If you set up your own button, your trigger will be Control > On Click > Name of button… like my example below:

Now we need to modify the app-open event widget… Click on that and open the Parameters:
We still want the button to open Erp.UIRpt.QuotForm… but we want the custom layer we built earlier to also be applied (so that our “Receiving” event will be applied)… so enter the name of your custom layer here:
Next, scroll down to the “Launch Options” and open the json editor. Add a comma, and then the last line I underlined below:
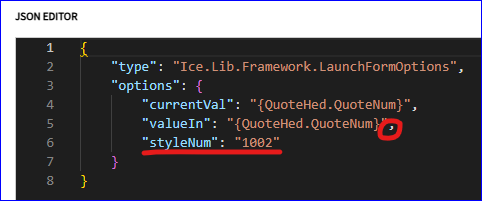
So, now this event, when it launches will pass the QuotNum, but will now also pass a hardcoded “styleNum” as well.
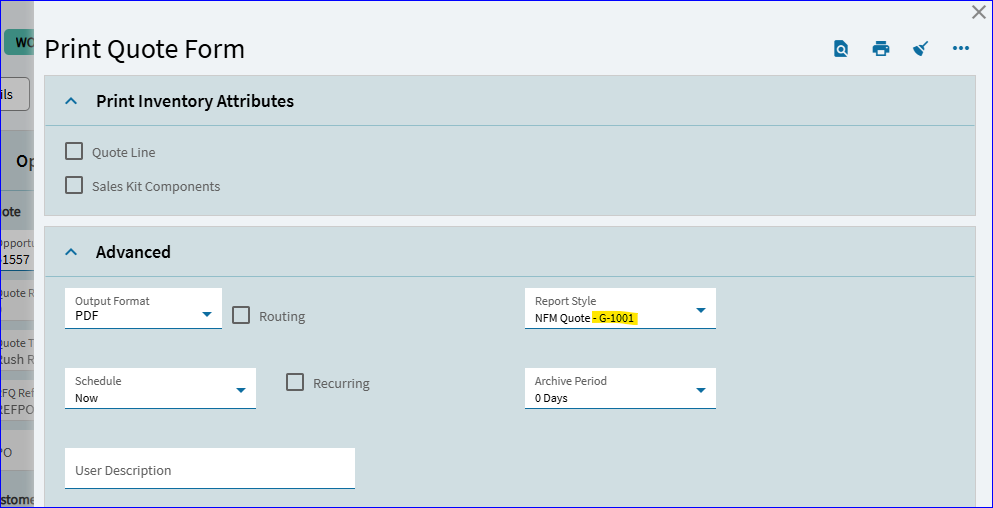
If you don’t know your StyleNum, you can find it in Report Style Maintenance:
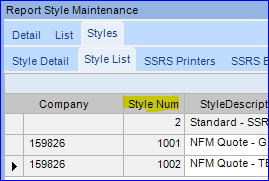
My company’s DEFAULT is style 1001. So, for this exercise, I’m hardcoding stye 1002.
Unless I’m forgetting something, that’s should be it.
Save & Test/Preview:
I now have two buttons:
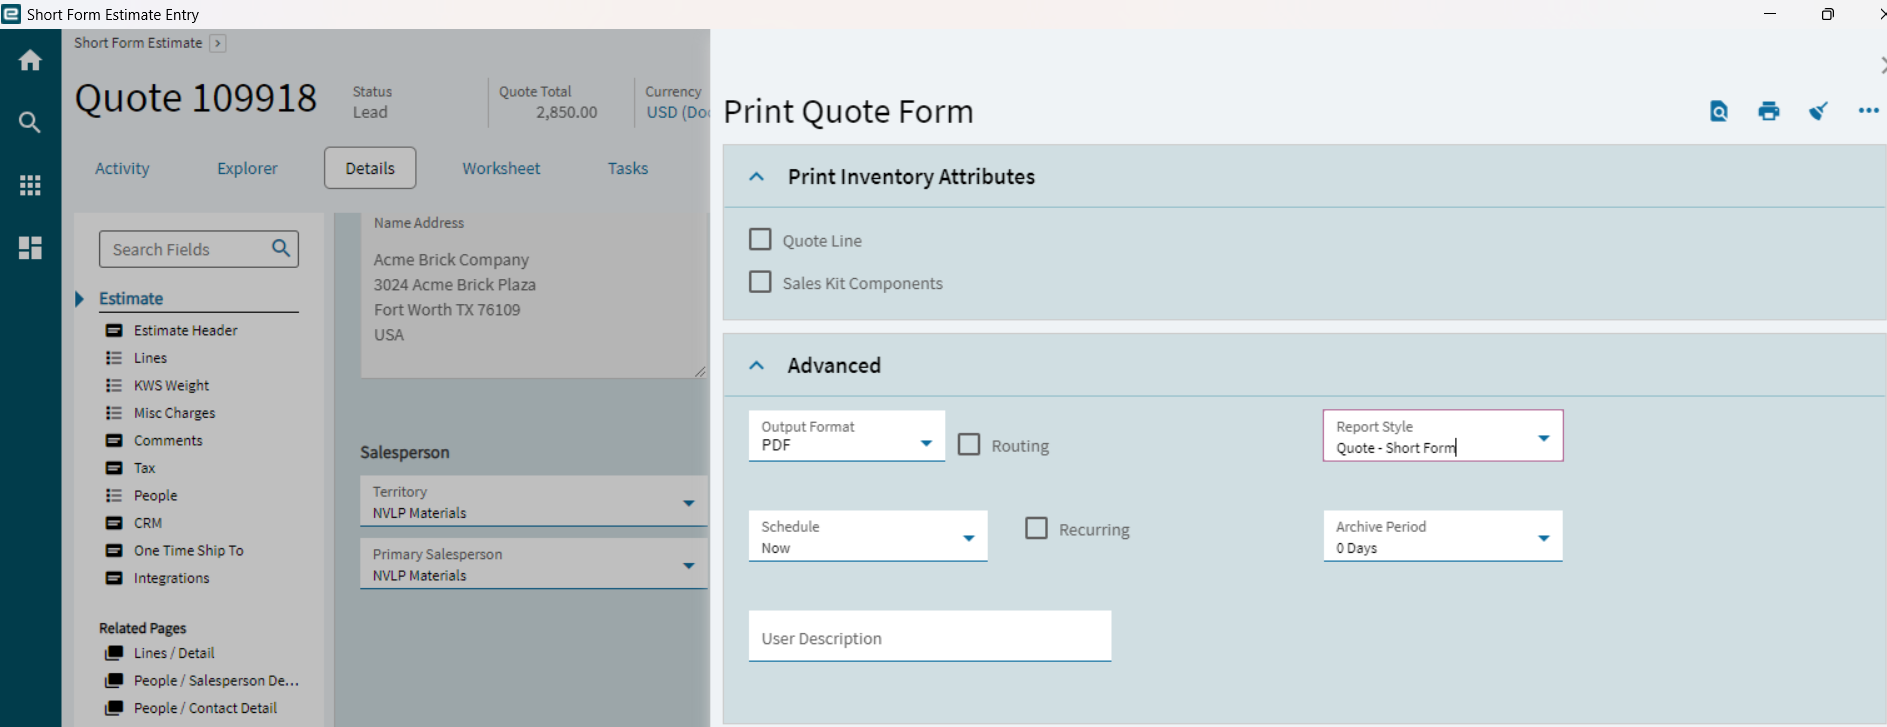
If I click the print icon… I still get my default report style (1001):
If I click my new button… I now get the 1002 style: