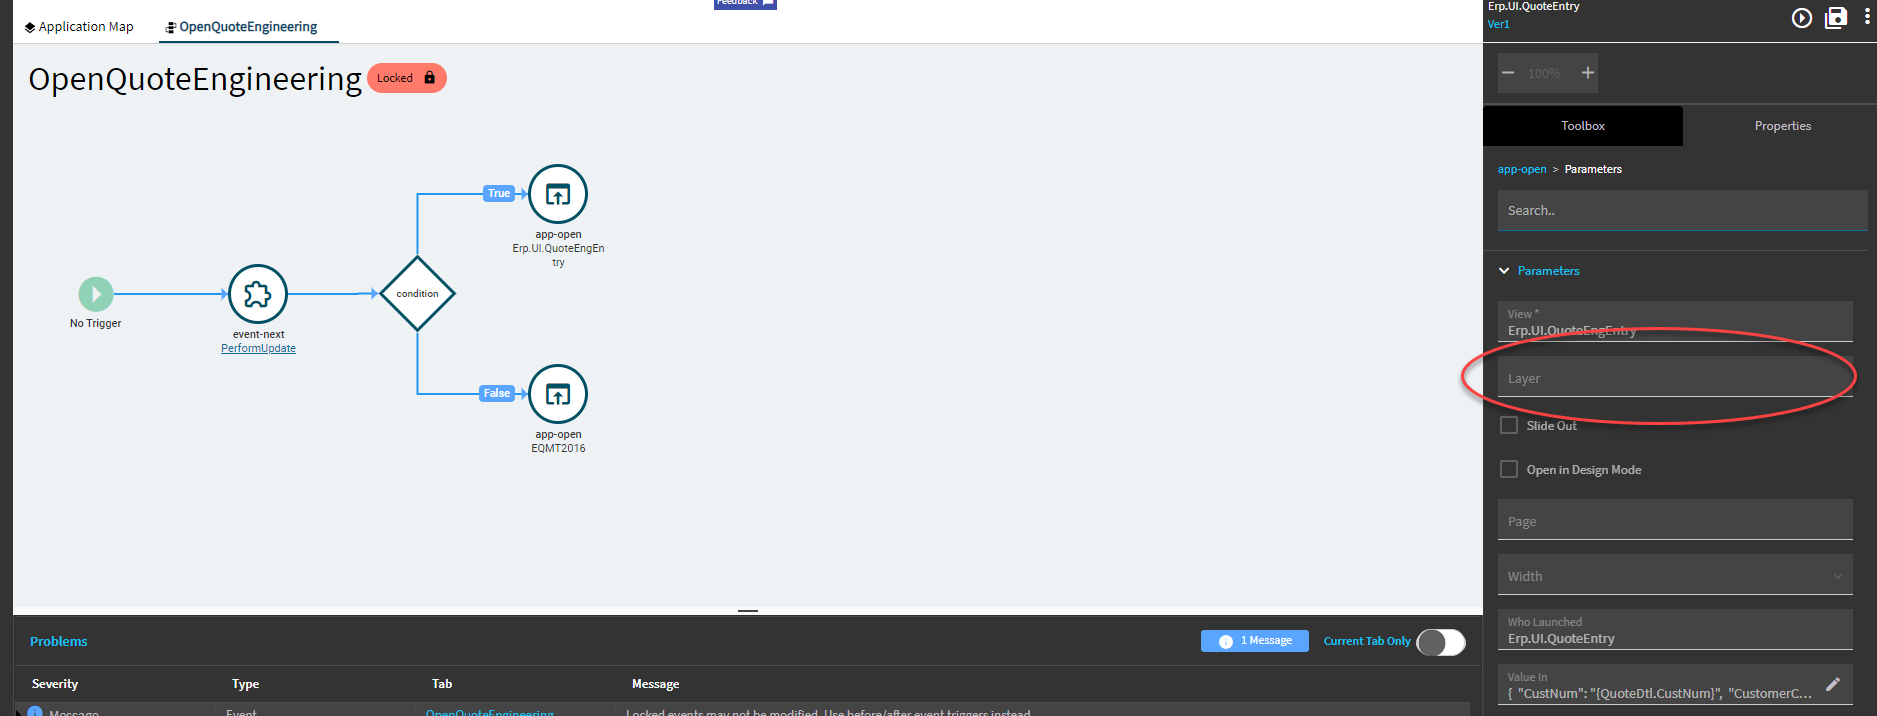
I made a new layer to the quote engineering screen and applied it to the menu. It works when launched from the menu, but launches the base form when opening from quote entry.
I’ve added a pre event to the tool click to open the engineering screen with the layer applied. This opens the engineering screen with the new customization, but also opens the standard screen.
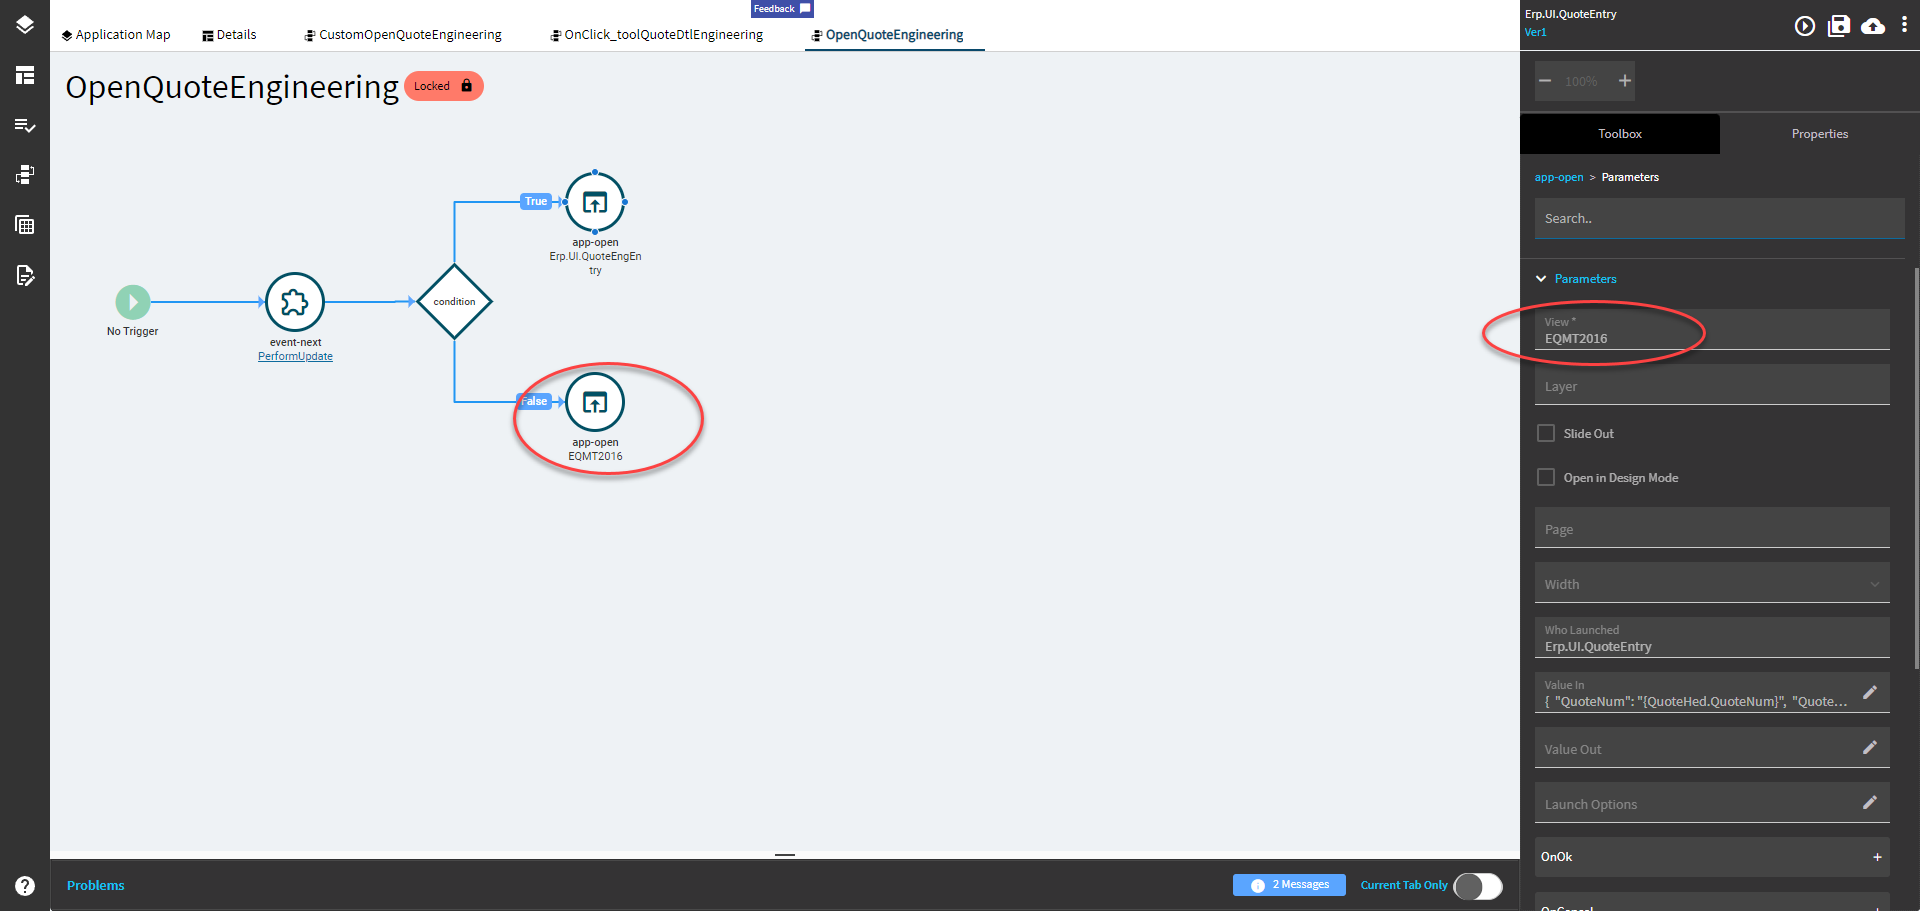
I replaced the button with a custom button and duplicated all the events you mentioned. Map all the custom events the same way but include your layer on this version. Then disable the standard button. This is under the page called Main.
… But I’ve found a strange bug (seems like a bug…) that while this works correctly from Quote Entry, if I have the same layer (any layer) on the Quote Engineering menu item itself, Quote Entry will open Quote Engineering in Tracker mode. If I remove the layer from Quote Engineering, I get the Entry screen via button in Quote Entry… but then I lose the layer if anyone accesses Quote Engineering through the menu.
Below is how to override the base method then you don’t need to update all the buttons. It’s from a KB article on doing the same thing in MES. The issue is the base screen sometimes calls a menu item and sometimes it calls the app directly.
Even the base OpenQuoteEngineering calls the app in one path and a menu item in another.
STEP B: Link the Data Collection Button’s Kinetic Customization in Data Collection.
Copy the Kinetic 2023.2 Client Icon, and rename the Icon Copy to “Data Collection”. Then add the following Switch to the Kinetic 2023.2 Data Collection Icon Properties: /Mode=DC
Launch Data Collection.
Select the Overflow Icon, and then select Application Studio.
If the “Modify Designer” Pop-up displays, select “Use Layer”
Select .
Key in a New Layer Name, and Description. Make sure to Record the Kinetic Customization Layer Name.
Select Save Layer.
Select the Events Icon.
In the Tree View, expand Events > Data > EpBinding.
Search for the Data Collection’s Button Event, like MESControl.EndActivity.
Right-click, and then select Copy.
Select the Trigger Widget
Select the Properties Tab
Change Type to: Event
Change Hook to: Override
Set Target to the Event that was Selected, for example: MESControl.EndActivity
Select app-open, and then select the Properties tab
Select Parameters
Set Layer to the Kinetic Customization Name created in STEP A.
Select Save
Select Preview
Log into Data Collection
Note: Make sure to create any needed data the Data Collection requires. For example, for End Activity, make sure there is a Job in the Queue.
Select the Data Collection Button
Note: In this Example, make sure the End Activity Kinetic Customization does Launch
I replaced the native OpenQuoteEngineering event with a custom one and I see exactly what @johnnyhays does. When opening Quote Engineering Entry from menu, cust loads just fine. When OpenQuoteEngineering from Quote Entry using native button, it opens Quote Eng Tracker instead. Sometimes it opens the entry screen though. Definitely a bug. So, is it impossible to load a layer for Quote Engineering Entry when opened from Quote Entry? Do I have to force users to use the menu item?
To help others: I was able to fix this glitch by making it a slide out panel. Works as it should when you do this. No idea why it forces you to go to the tracker if you open a new window.
Thank you for sharing this Jeremy, super helpful! Facing this exact issue in 2024.2.8. Is there an easy way to duplicate the base ‘OpenQuoteEngineering’ or did you have to manually re-create each trigger when creating your ‘Custom_OpenQuoteEng’?
I’m happy it helped someone! You should be able to load the base “OpenQuoteEngineering” event and then drag-drop a component in. The screen should ask you if you want to create a before or after event for it. Create a before event and you’ll see it duplicates the event for you. Delete the component you added, and then you’ll be able to manipulate the copied OpenQuoteEngineering event making it your own. Make the slide-out change and be sure to disable the original OpenQuoteEngineering event (disabled checkbox). Cheers!
The only bit I couldn’t find is how to disable the base OpenQuoteEngineering event as the disabled checkbox that appears in the newly created event doesn’t appear at the base event. But not sure if it’s needed as its working? Thanks again, really appreciate it
Happy to help out! I am not 100%, but perhaps the new event replaces the base event? That may be happening if the base event isn’t opening the tracker in a separate window.