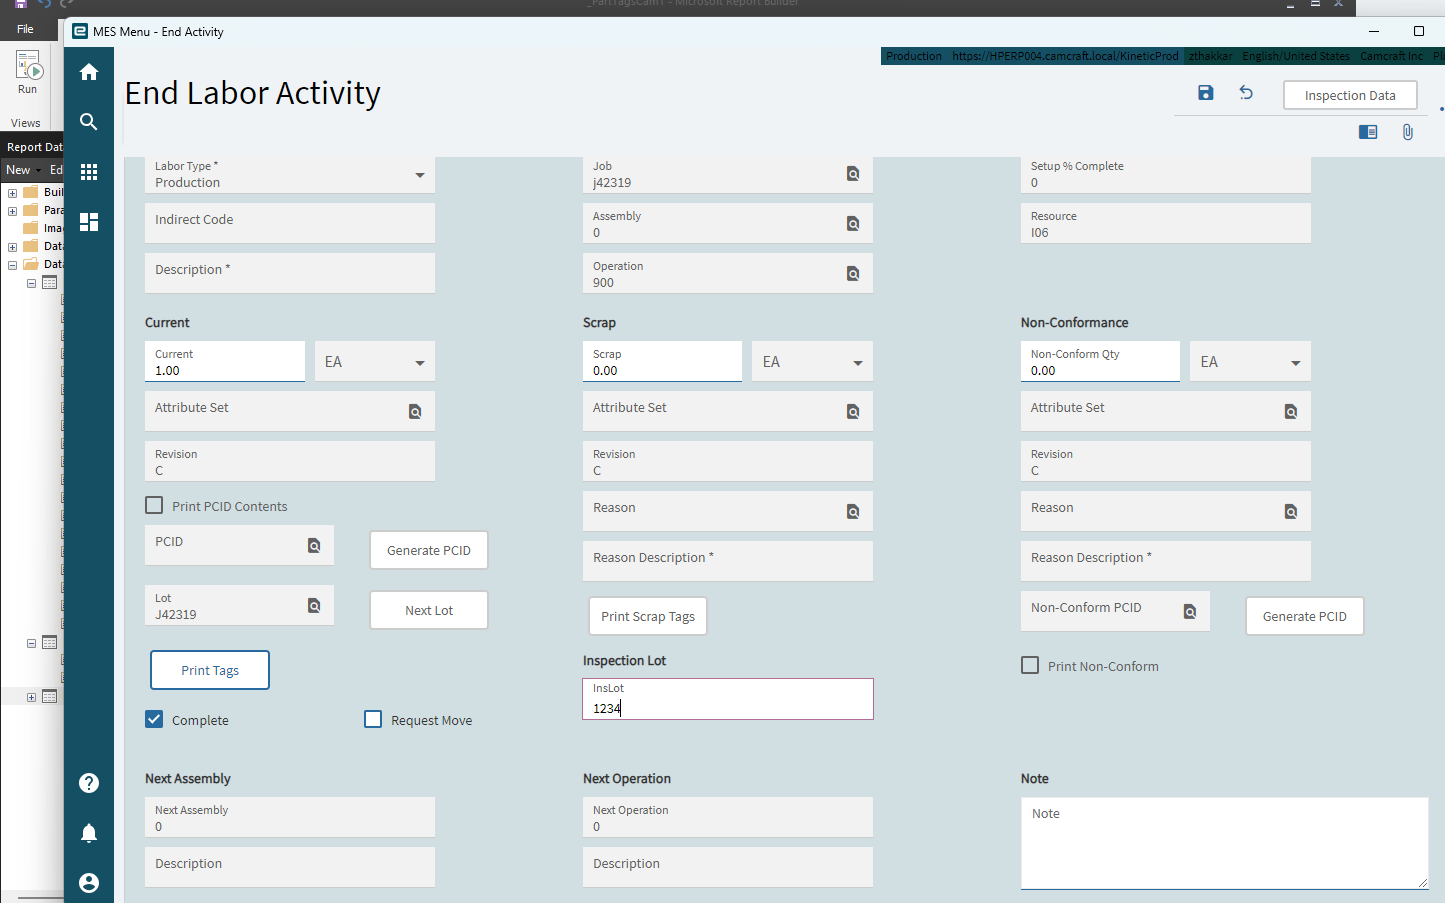
I have created new field to EndActivityEntry screen and trying to publish it and make it system default how to do it?
Here i attach the step which i am following.
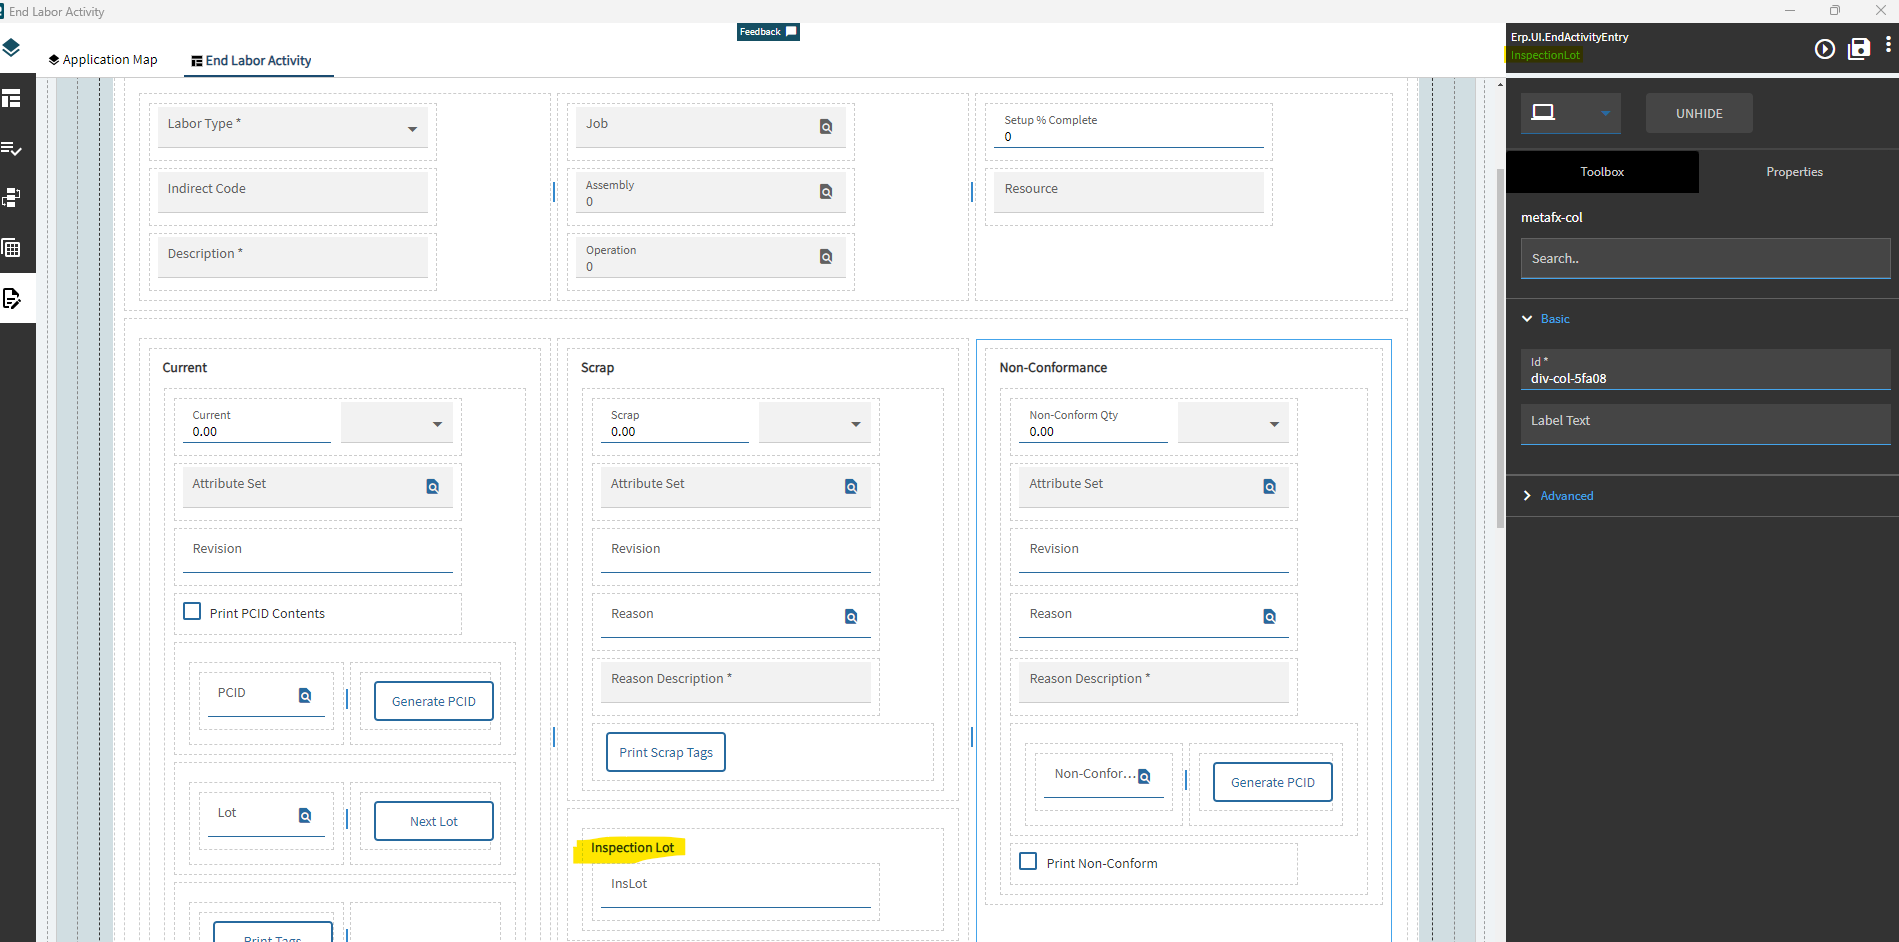
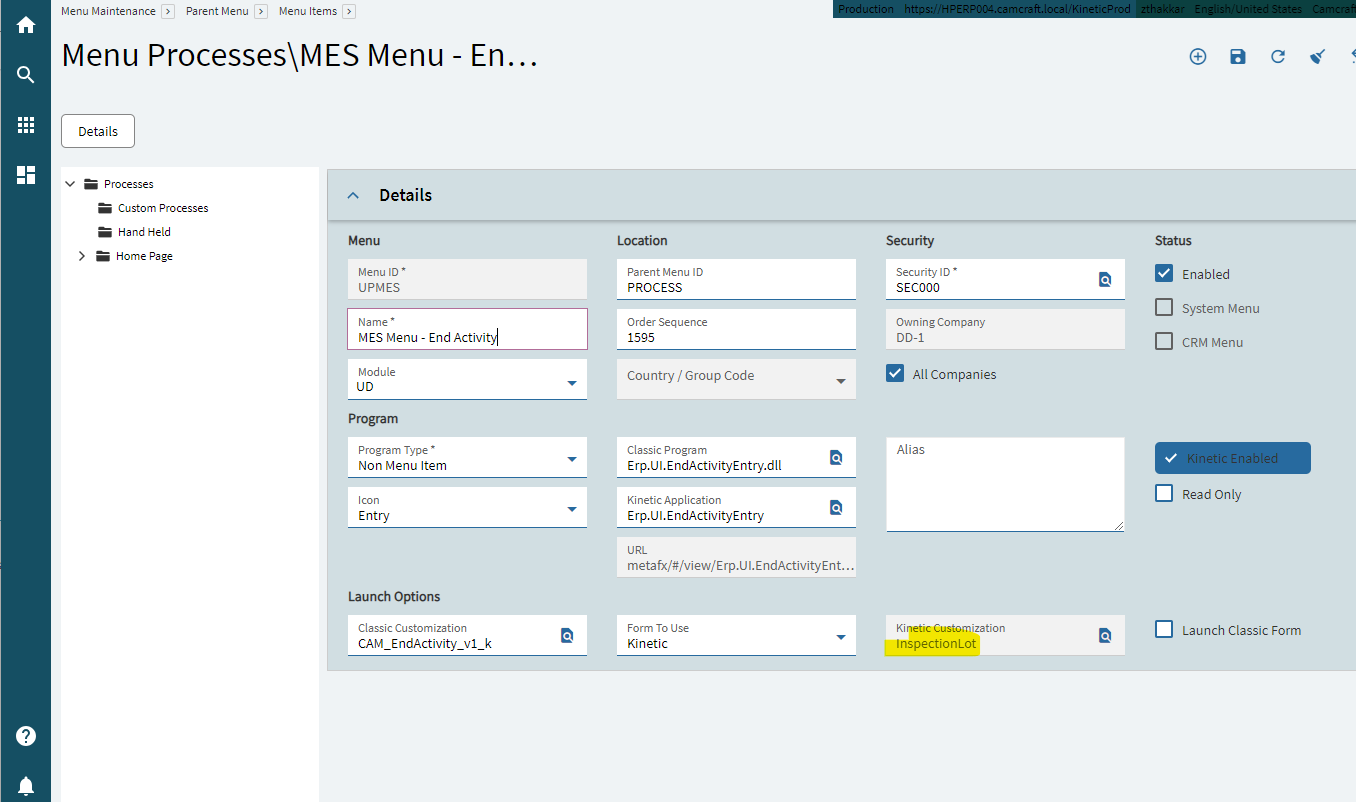
still not shows up custom field in end activity layer why?
Any advice.
The main MES form also needs customized.
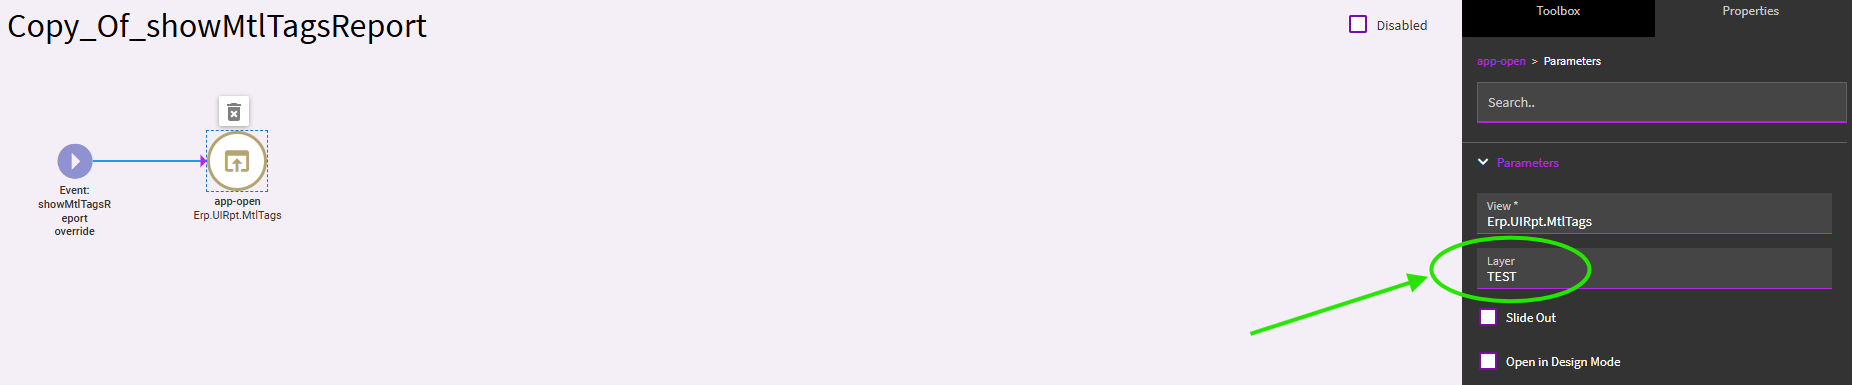
On the main MES form, when you click the End Activity button… this calls an app-open event to open the End Activity form. That EVENT is not calling your custom layer.
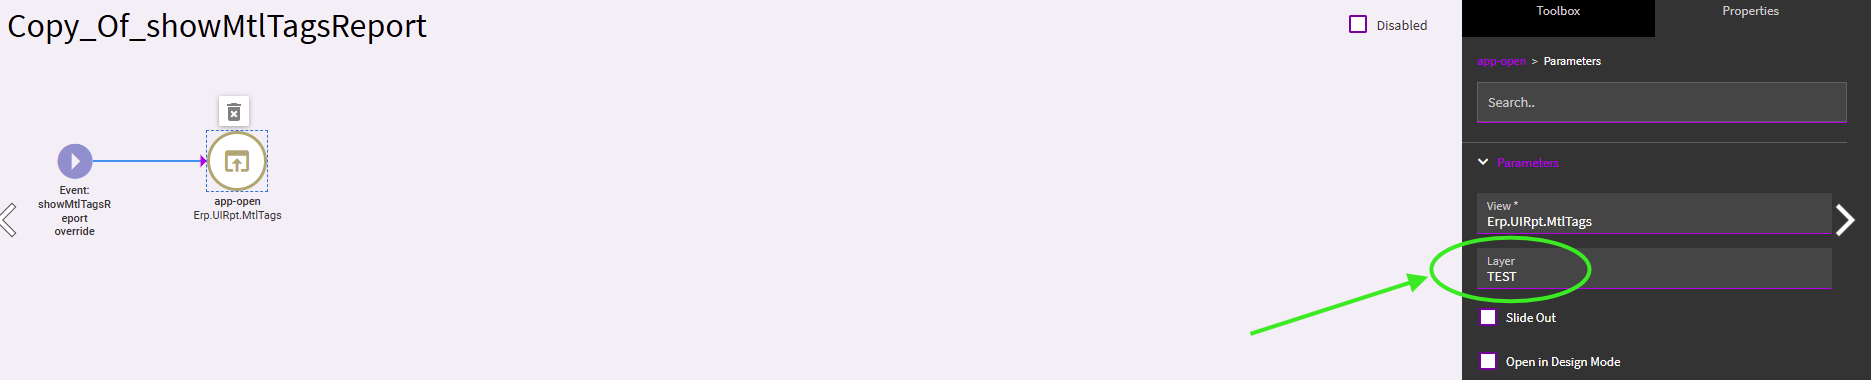
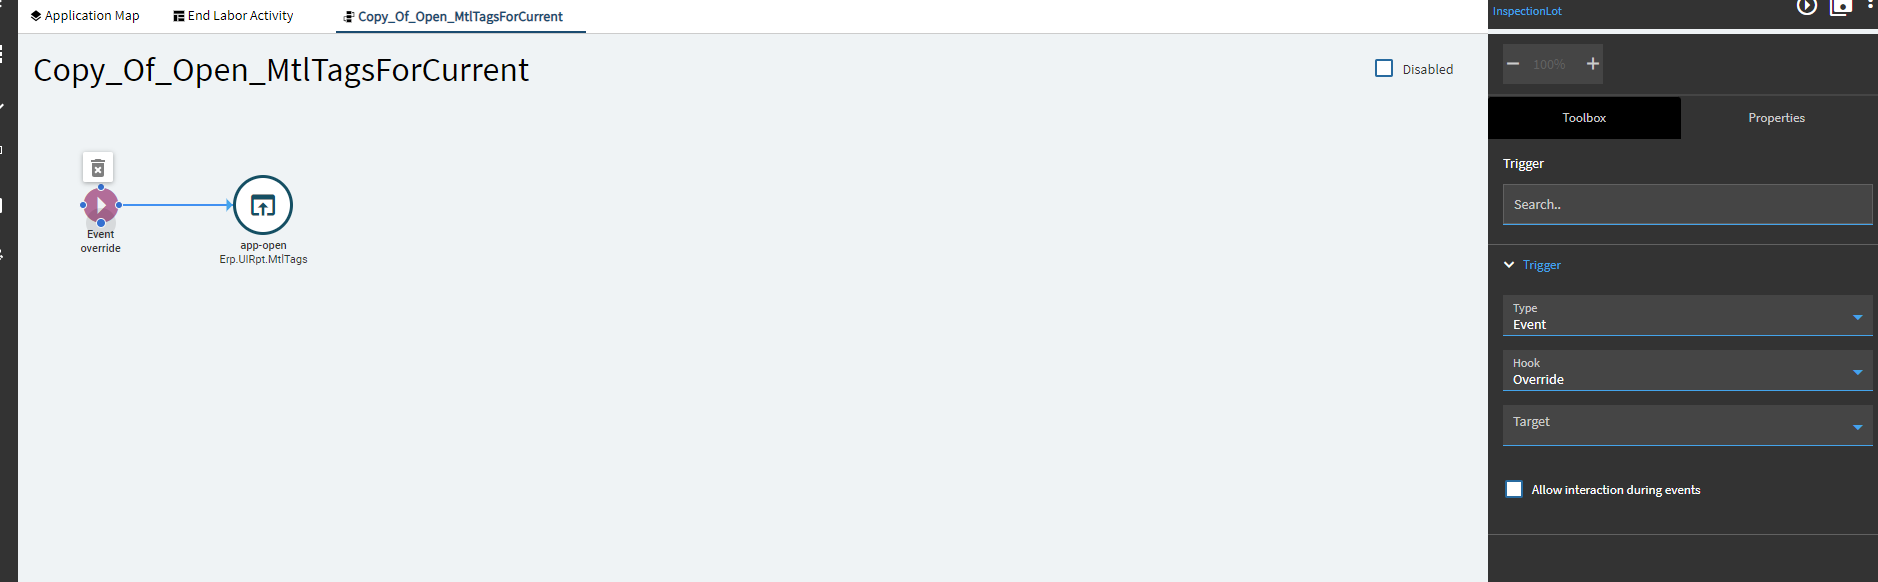
There are a number of posts on this in the forum if you need more details. But basically, you need to copy the MES End Activity button onclick event. Set the trigger to override the stock event… and then add your End Activity Layer name in the app-open event action.
which event should i need to use?
can you provide me any example please
this is something new for me
Here is a thread for reference. This one is talking about Start Production Activity… but the steps would be the same.
Open the main MES form in App Studio.
Save a new custom MES layer.
Find your button and look in Behavior… click the On-Click option. This will open the event that runs when that button is clicked.
In the events panel on the left, search for that event… right-click on it and select “Copy”. This will create a new copy of that event which you can edit.
Change the trigger of that event to Event > Override > the name of the stock event.
In the app-open action, it will already have the target app/menu… you just need to add your custom EndActivity Layer name.
Save.
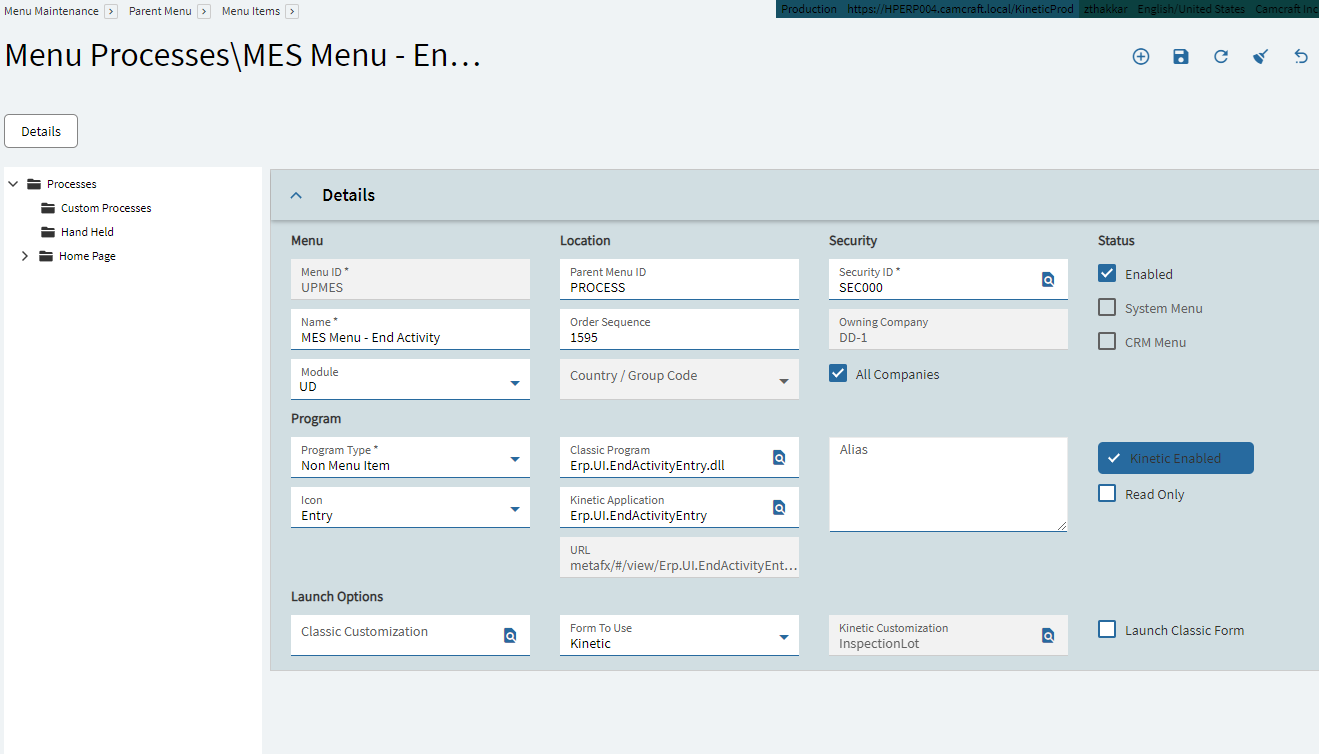
In Menu Maintenance, you need to search for MES and apply the above new custom menu.
This will now give you a Customized MES… with an event that will load your Customized EndActivity.
Can you show where InspectionLot is being saved to? (Which table)?
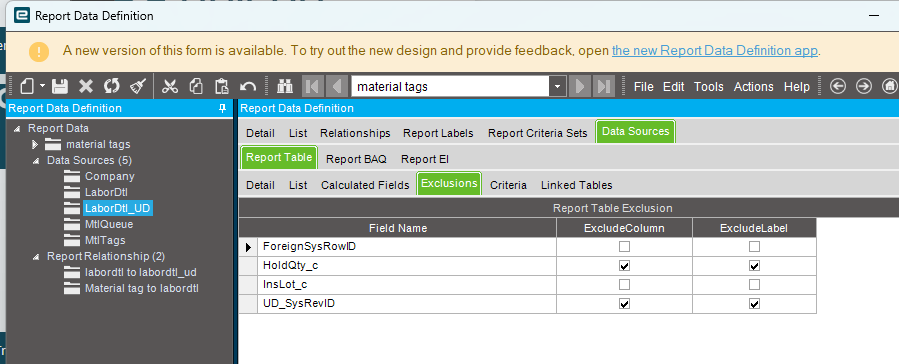
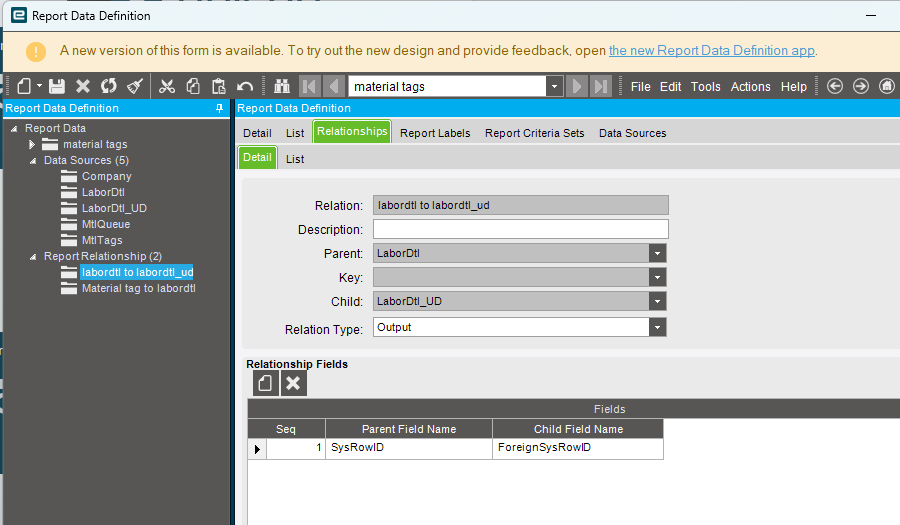
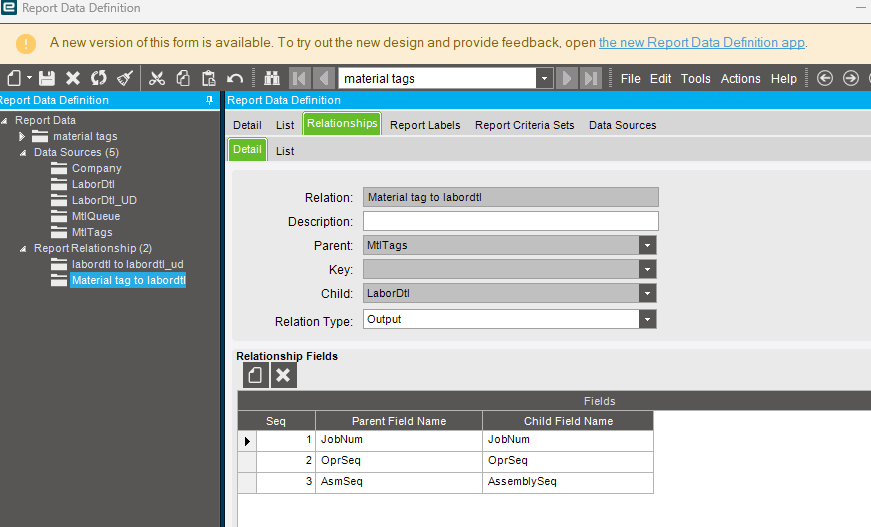
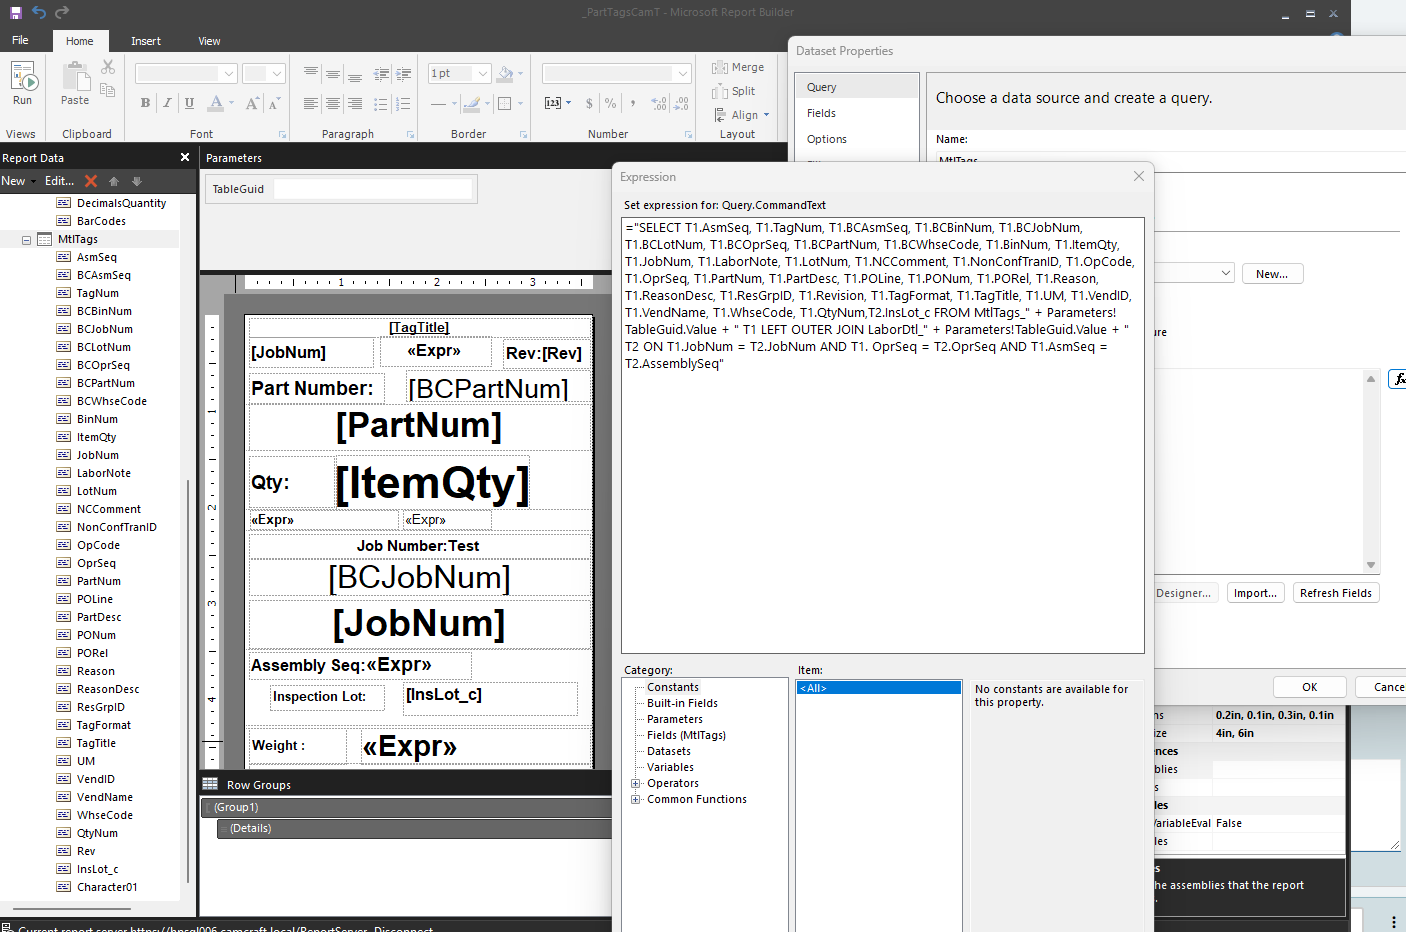
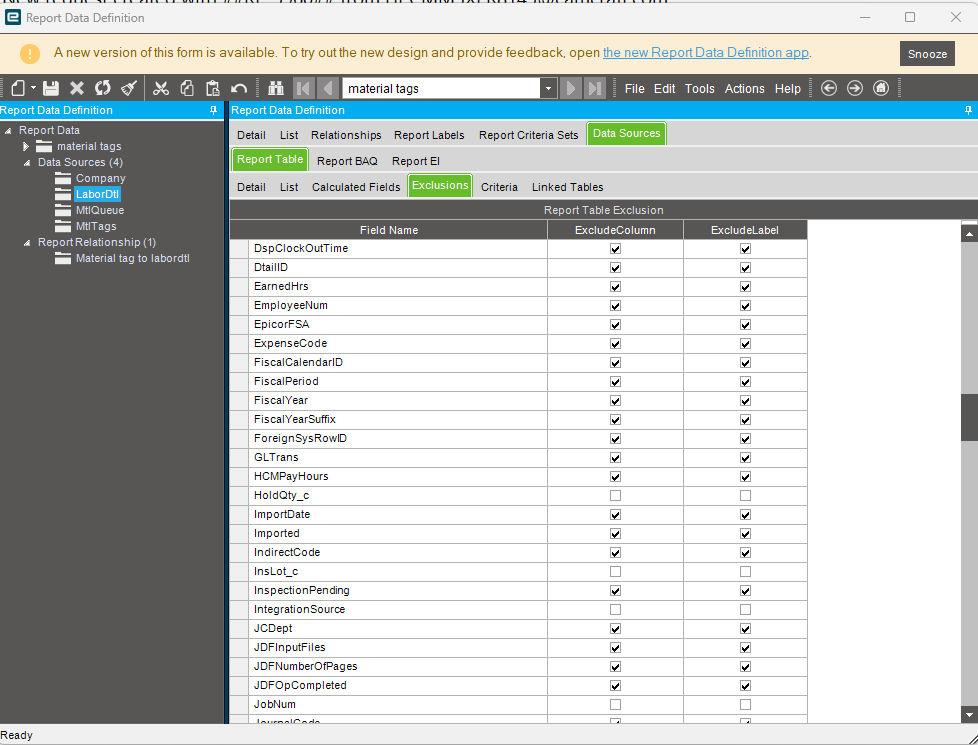
Can you show your changes to the RDD and RDL?
I don’t think you should have to join the LaborDtl_UD table to your RDD.
Look under the original LaborDtl table in the RDD… I think UD columns should appear there in the available columns, you just have to unexclude them.
But, even if you DO go your route, you added the table and relationship to the RDD… but you didn’t add the join relationship between LaborDtl and LaborDtl_UD in the RDL query. You added the field… but not the join.
You unexcluded your field in the LaborDtl_UD table… but not the LaborDtl table. So when you you added T2.InsLot_c to your query… its looking at the LaborDtl table for that column, not LaborDtl_UD.
But… again, I’d first just the LaborDtl table that was already in the RDD and see if your UD columns are listed in the excluded columns for that table. it may be as simple as turning them on.
The problem here is that MtlTags is a pain to work with. Its not a database table… its just a system query that Epicor designed, so it is difficult to work with. A lot of other have struggled with this… especially with one-to-many relationships. You’re wanting to pass LaborDtl information. Well, you could have many LaborDtls tied to a specific LaborHed, tied to a job, tied to a part… its not a very clear path.
If you want to give it a shot, you could try using CallContextBpmData. I got this to work… but there are a LOT of hoops to jump through!

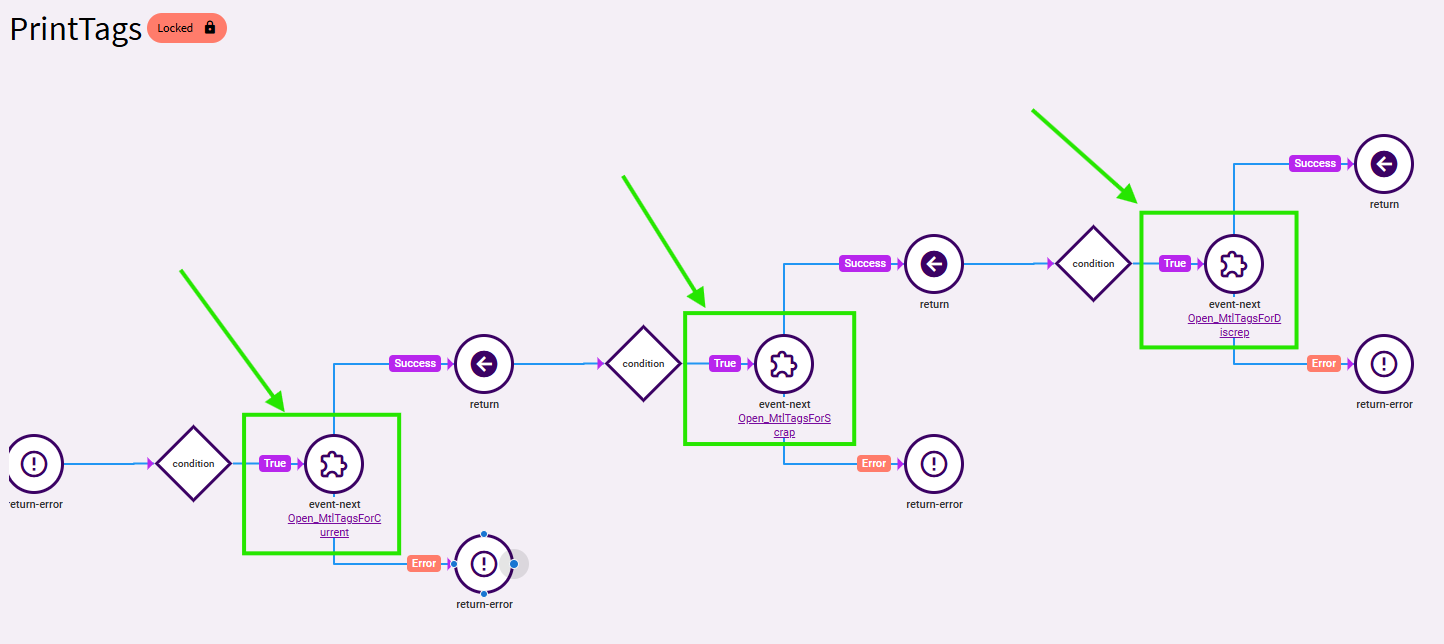
In your End Labor Activity app… you need to look at the PrintTags event. There are (3) separate calls to print tags, depending on whether you’re printing tags for Current, Scrap, and/or Discrepency (non-conformance).
Depending on what “Print Tags” button you select on the form, it is going to choose one of the (3) different paths. But, I’ll go down the normal “Print Tags” button… “Current”.
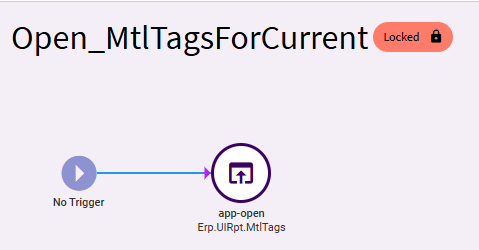
That opens this event:
In the events panel, you’ll need to search for this event, right-click and make a copy.
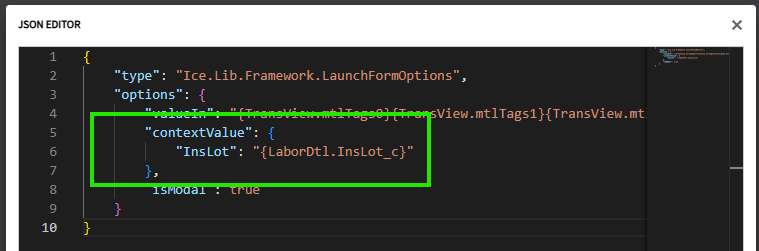
With your new copy of that event… we need to edit the Launch Options of the app-open action.
It is already pass a LOT of various values to pre-populate the Material Tags. We need to inject your LaborDtl.InsLot_c into the values being passed in the app open:
Here is the full JSON expression that should work for you (assuming I got your binding correct):
{
    "type": "Ice.Lib.Framework.LaunchFormOptions",
    "options": {
        "valueIn": "{TransView.mtlTags0}{TransView.mtlTags1}{TransView.mtlTags2}{TransView.mtlTags3}{TransView.mtlTags4}{TransView.mtlTags5}{TransView.mtlTags6}{TransView.mtlTags7}{TransView.mtlTags8}{TransView.mtlTags9}{TransView.mtlTags10}{TransView.mtlTags11}{TransView.mtlTags12}{TransView.mtlTags13}{TransView.mtlTags14}{TransView.mtlTags15}{TransView.mtlTags16}{TransView.mtlTags17}{TransView.mtlTags18}{TransView.mtlTags19}{TransView.mtlTags20}{TransView.mtlTags21}{TransView.mtlTags22}{TransView.mtlTags23}{TransView.mtlTags24}{TransView.mtlTags25}",
        "contextValue": {
            "InsLot": "{LaborDtl.InsLot_c}"
        },
        "isModal": true
    }
}
This is now going to send your InsLot_c value along when it opens the Print Tags app.
Save and publish.
We now need to customize the Print Tags app in app studio to receive the newly passed value.
~ Receiving Form: Print Tags ~
Preamble: I attempted to receive the passed value directly to CallContextBpmData.Character01… and my events DID show the value was set. But somewhere after my event, CallContext was getting wiped! So… I pivoted and stored the value in TransView instead… and then I pass it to CallContext right before I print.
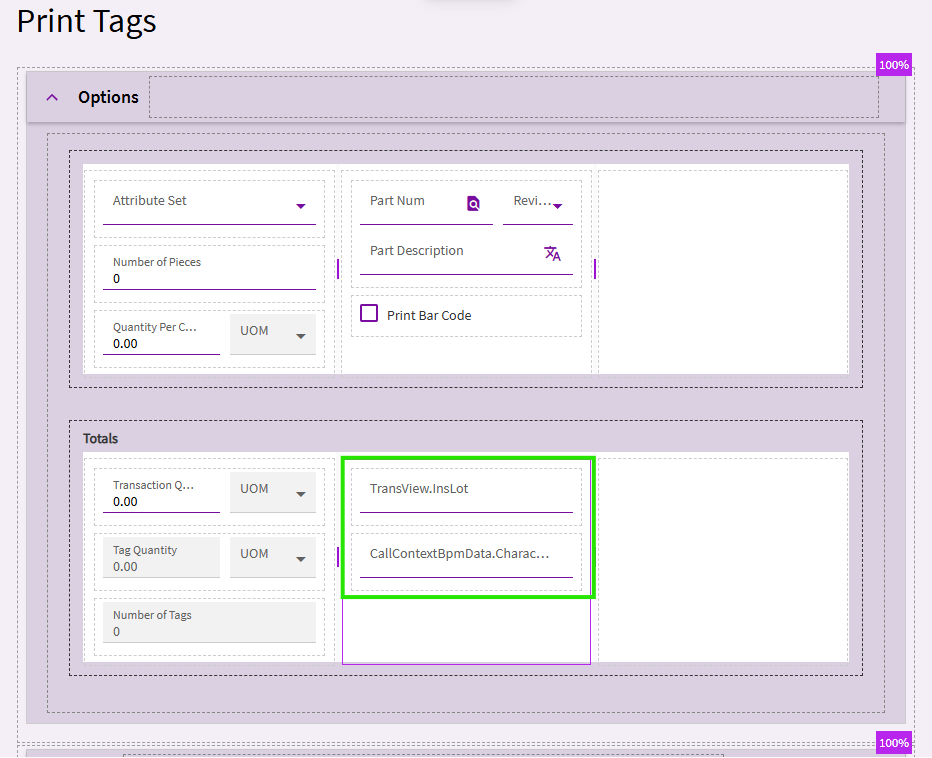
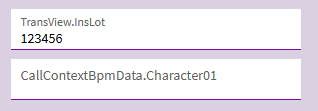
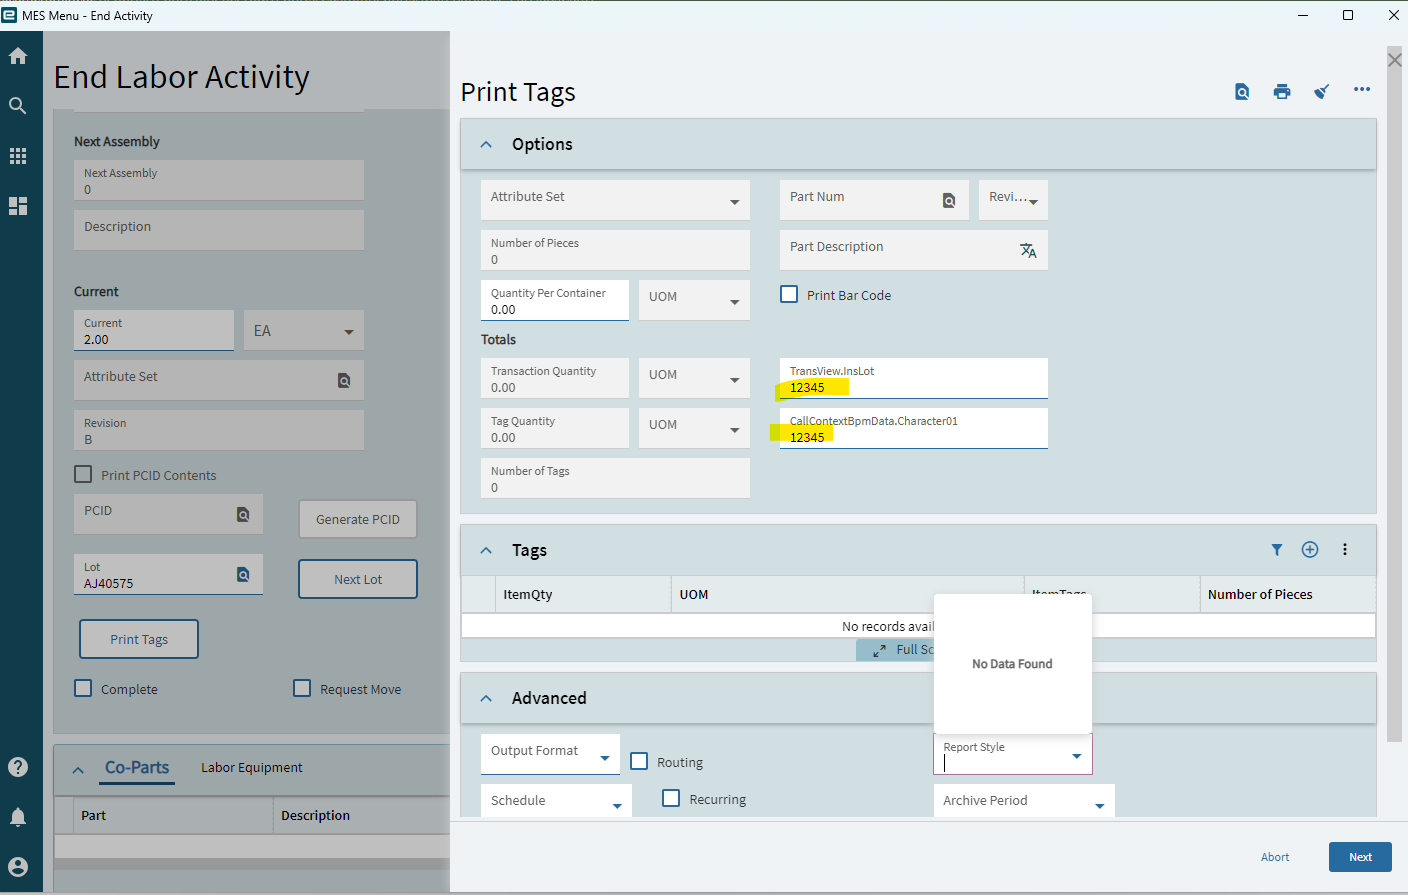
I added (2) textboxes to the form so I could see when things worked correctly.
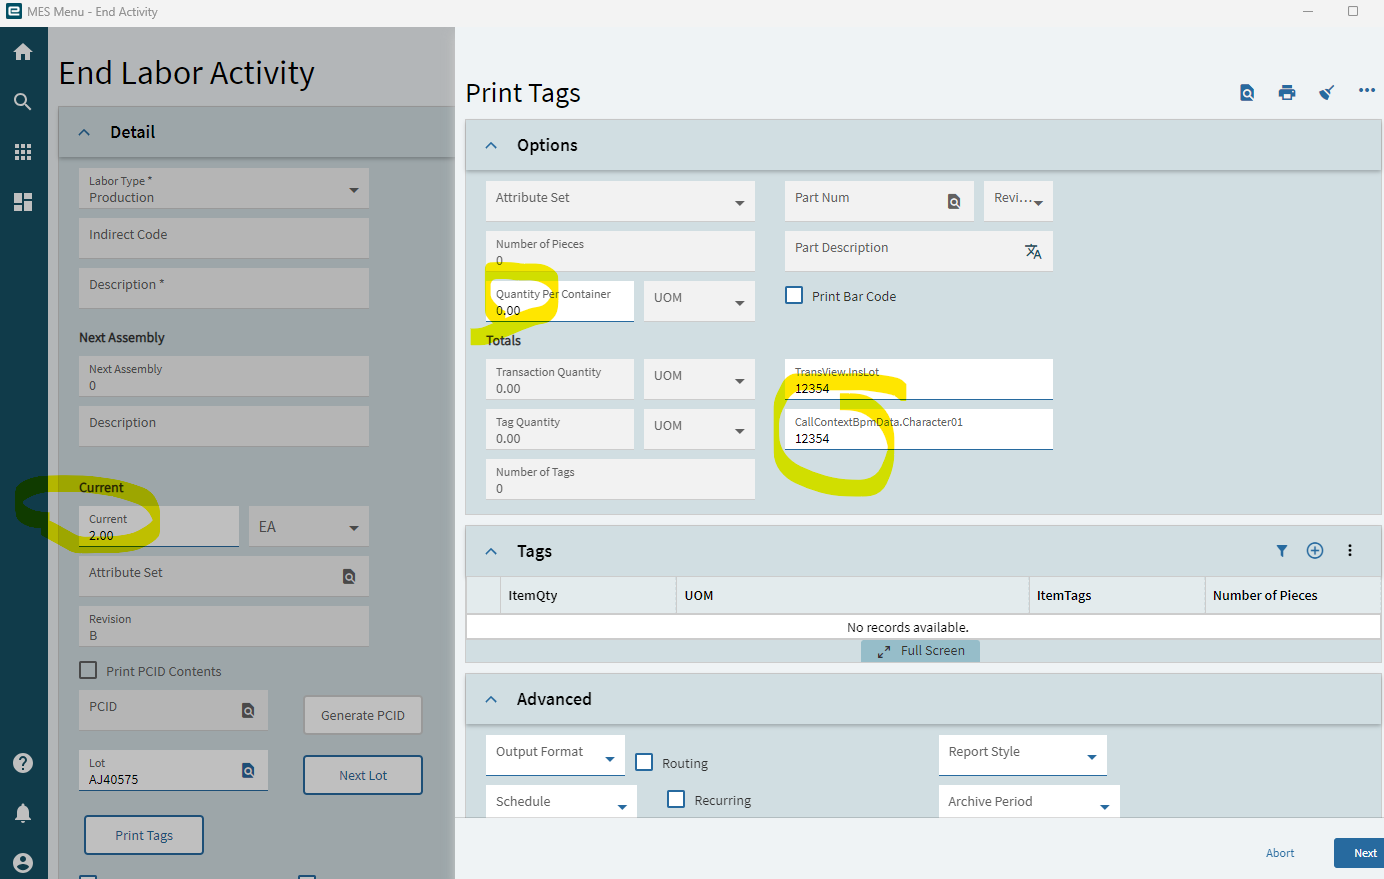
The top is bound to TransView.InsLot
The second is bound to CallContextBpmData.Character01
You now need a new event to receive the InsLot_c value that is being passed from the End Activity app.
I set mine with a trigger of Event > After > GetNewParameters
Row-update:
Binding: TransView.InsLot
Expression: context.initialValueIn.contextValue.InsLot
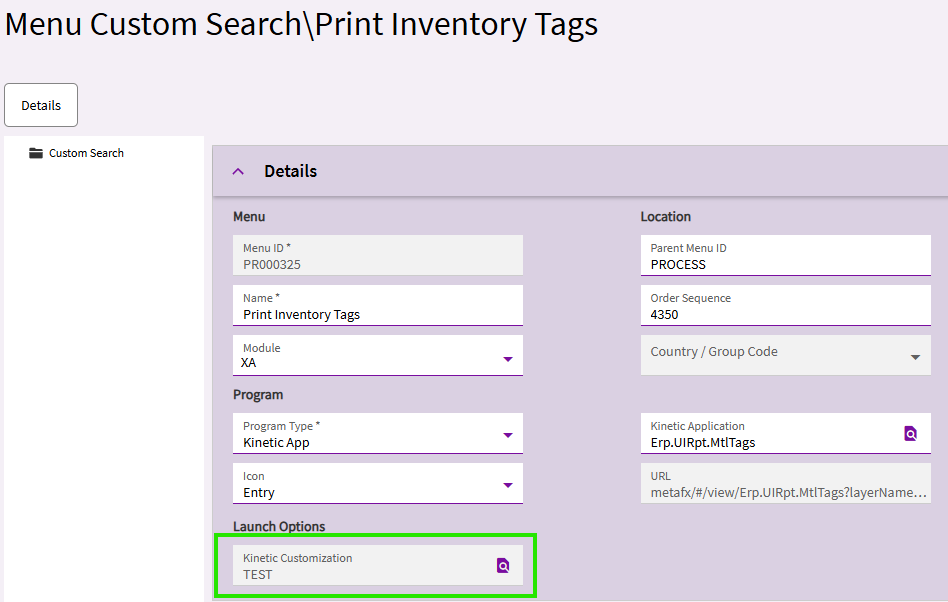
Save… publish… ADD this custom PrintTag layer to your Print Inventory Tags menu…
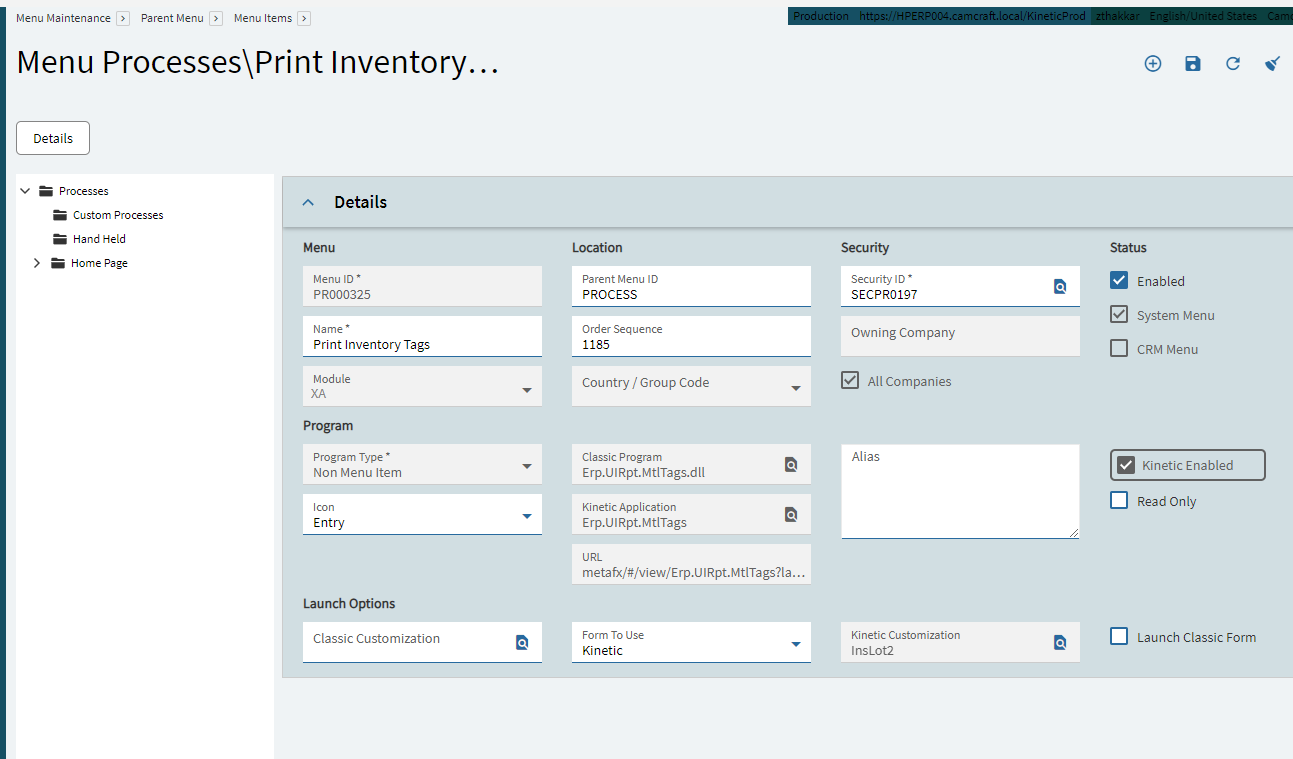
Menu Maintenance… search for Erp.UI.Rpt.MtlTags.. add your custom layer to the menu.
Save the new menu change.
Pause…
At this point we set up End Activity to pass a new value when it open the Print Tags app. We created a new custom layer on Print Tags to receive that value. BUT… we need to go BACK to the End Activity app. We need to tell the app-open event there to open Print Tags WITH our newly created PrintTags layer applied!
So, back in End Activity… add the PrintTags layer you just created.
Save & publish.
~~
At this point, (unless I’ve gotten turned around somewhere), you should be able to test the value being passed from one app to the other.
In End Activity… enter a InsLot value.
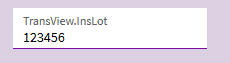
Then click the Print Tags button.
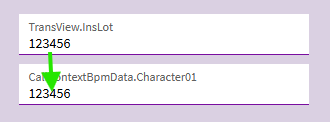
Print Tags should open and you SHOULD see your InsLot value in the TransView.InsLot textbox:
Now… like I mentioned before, if I passed the value directly to CallContextBpmData… it was getting wiped. Never found what was causing that. Instead, I created a new event to pass that value JUST BEFORE I clicked the PrintPreview button.
So, in the Print Tags app… create another new event.
Trigger: Event > Before > printpreview (or something else if you’re network printing, etc.)
Row-update:
Binding: CallContextBpmData.Character01
Value (JSON): "{TransView.InsLot}"
Save. Publish.
You should now be able to test again. Go to End Activity… enter a InsLot value… Print Tags… you should see your InsLot_c value in your TransView field.
Click Print Preview
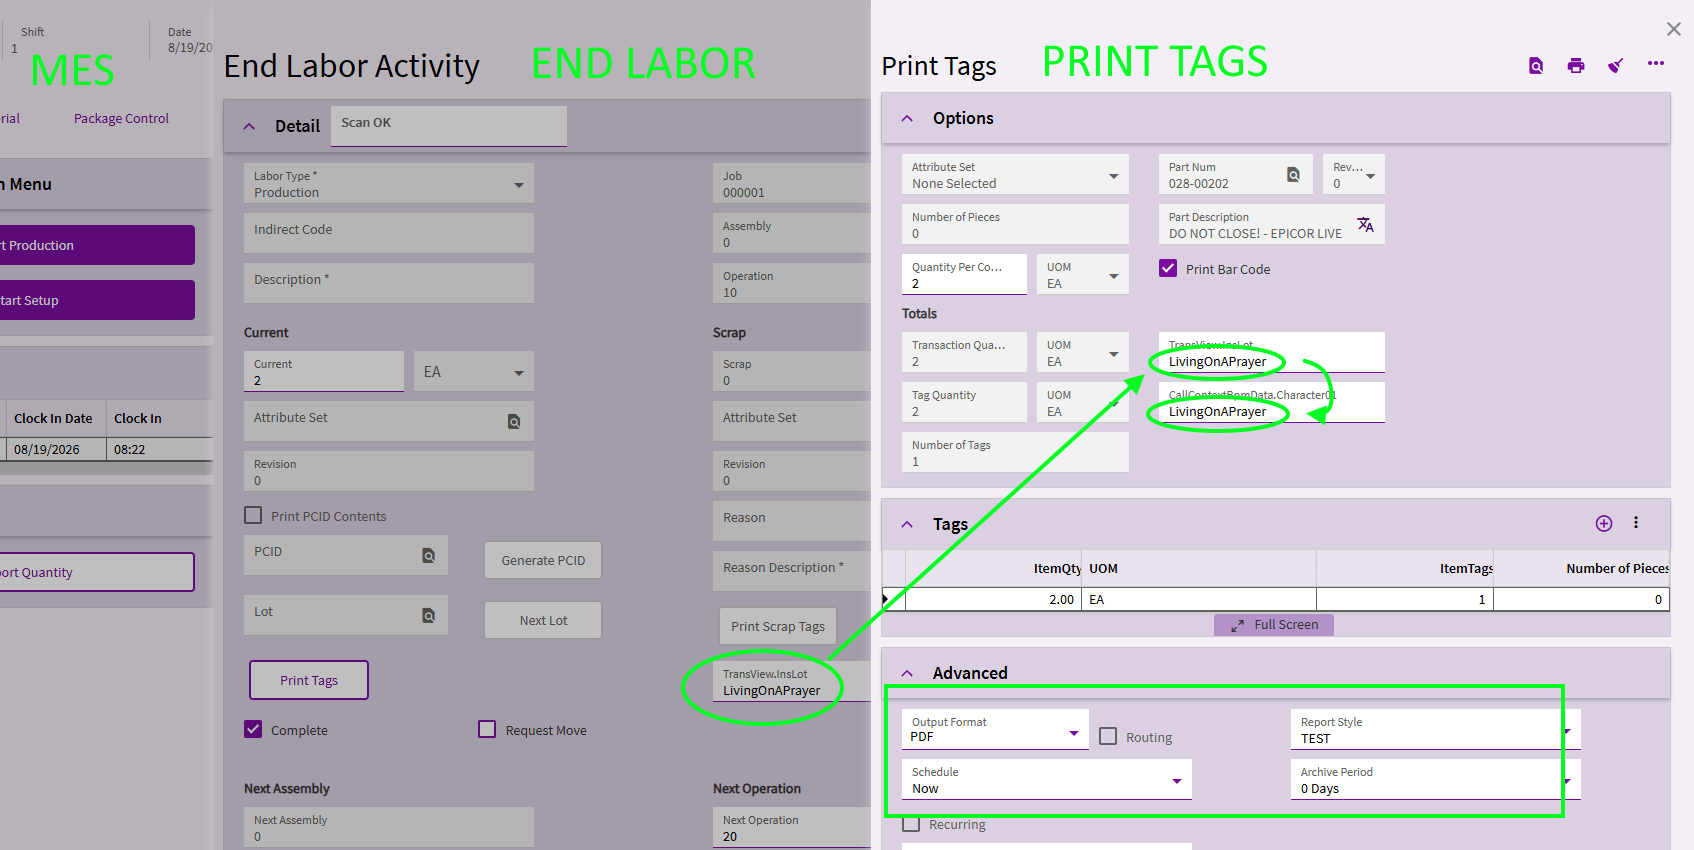
When you click Print Preview… you should then see your value pass to the textbox we bound to CallContext:
If that’s all working… we can get back to modifying the actual report.
REPORT CHANGES:
The good thing is… we don’t need to modify the RDD at all.
Open the RDL.
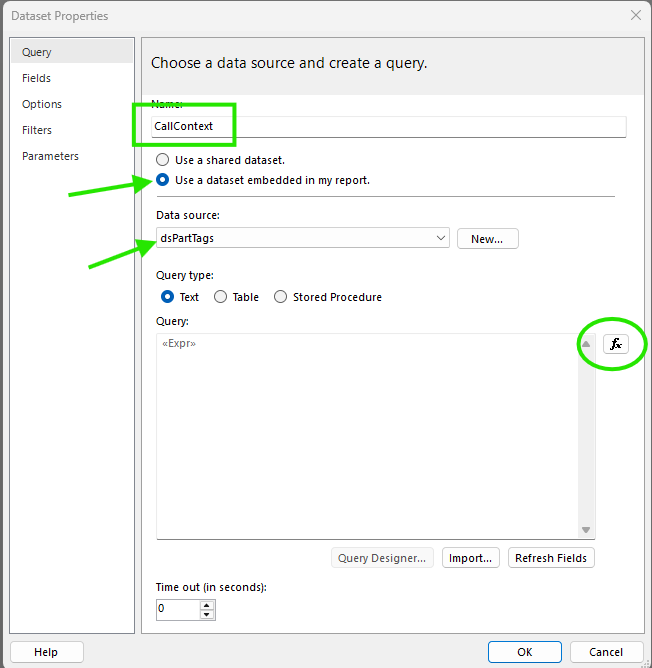
We’re going to add a new Dataset entirely.
Right-click the Datasets folder and select Add Dataset…
Give it a name… I used CallContext
Select the option to use a dataset embedded in my report… select dsPartTags
Then Click into the expression…
Expression:
="SELECT
    Character01,
    SysRowID
FROM CallContextBpmData_" + Parameters!TableGuid.Value
You don’t really need SysRowID… I just had that in there for testing/troubleshooting.
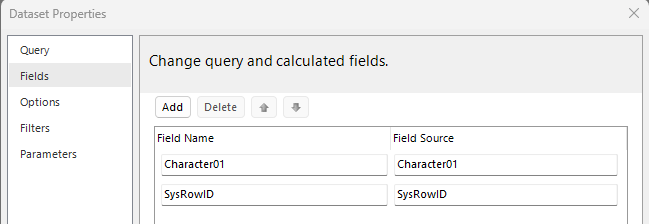
Save that and then add your fields to the dataset:
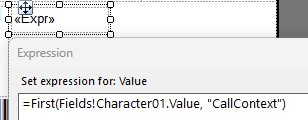
On your form, add a field with the below expression:
=First(Fields!Character01.Value, "CallContext")
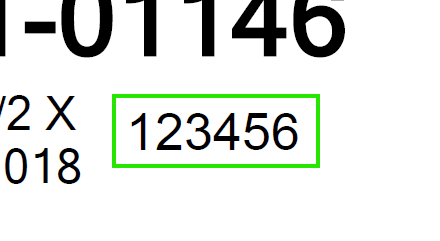
Save the RDL. Upload and test. HOPEFULLY… you’ll see your LaborDtl.InsLot_c value… which was passed from the End Activity app to the Print Tags app… received into Transview… passed to CallContextBpmData… land on your printed report.
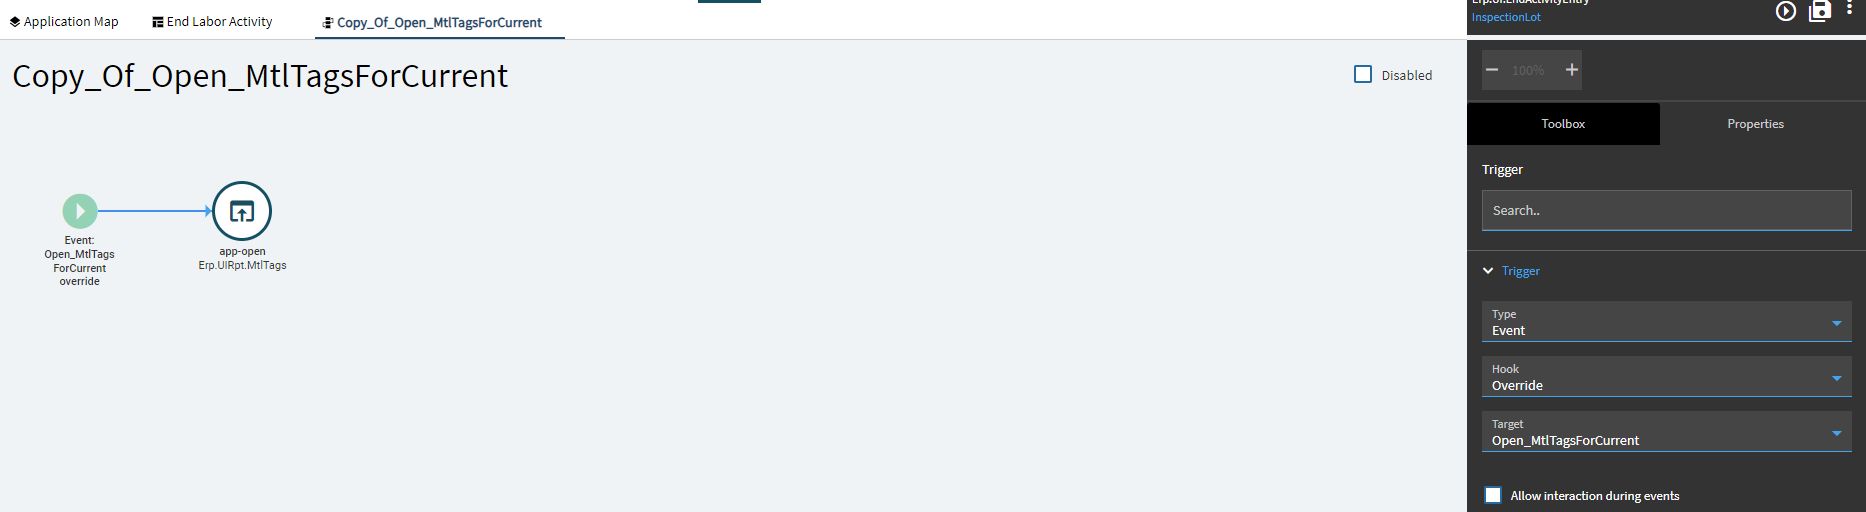
So, that would be your target then. MtlTagsForCurrent.
You’re trying to tell it what event to “override”.
MtlTagsForCurrent is a base system event… so we can’t make changes to it. But if you copy it, you can then make changes. But the Trigger needs to override the original event.
Hope that makes sense.
Should be, yes.
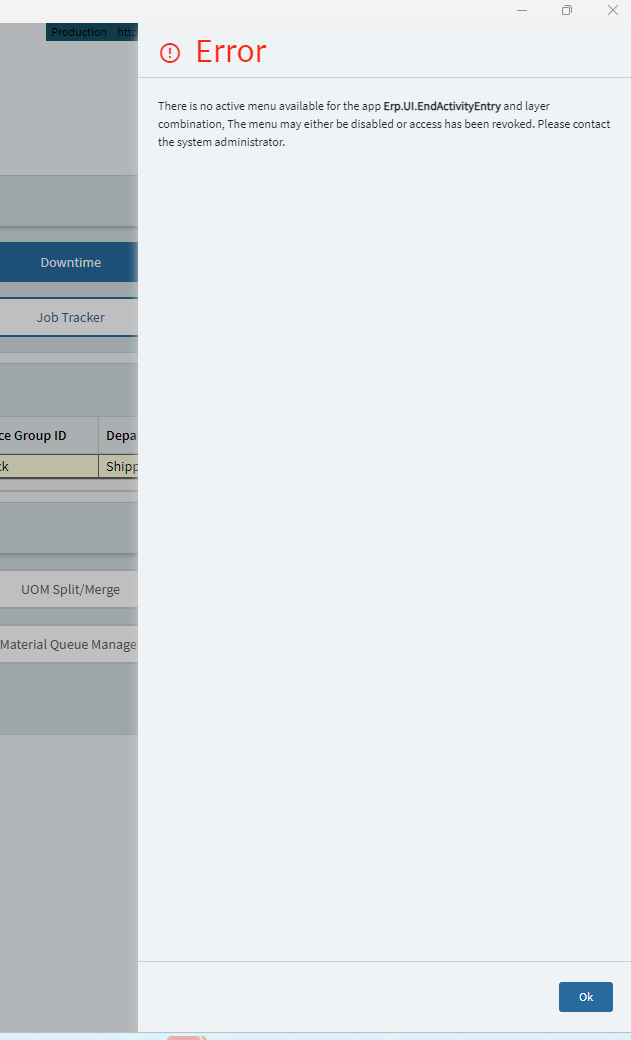
Starting in 2025.2 you need to add the new layer to the menu in menu maintenance in addtion to the app-open event in my experience.
@dcamlin please help me for this
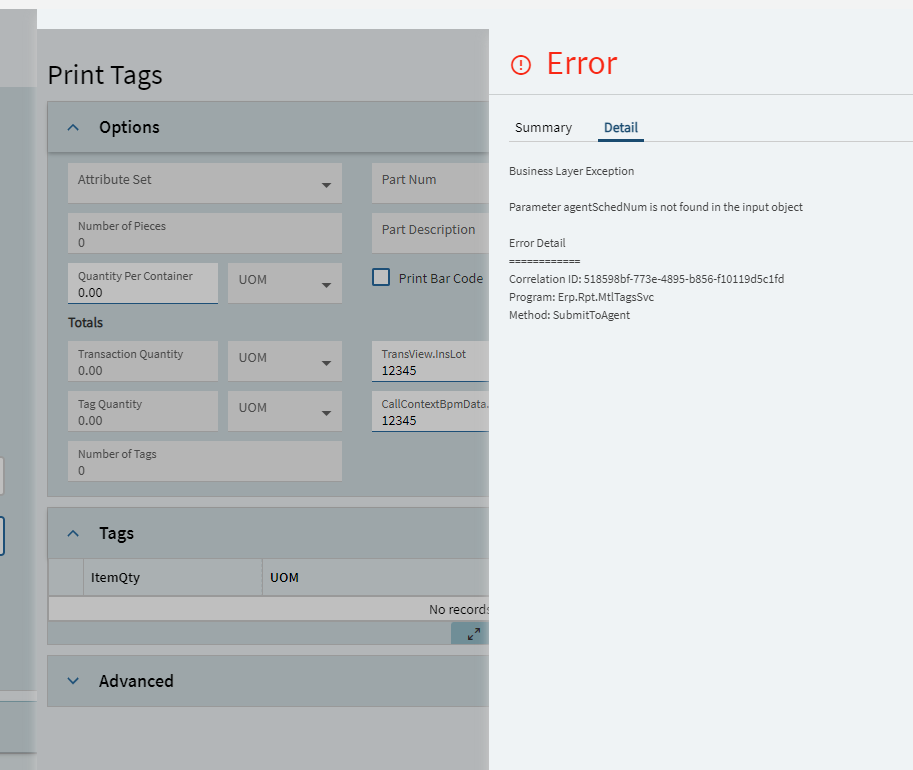
okay, I think I found the issue.
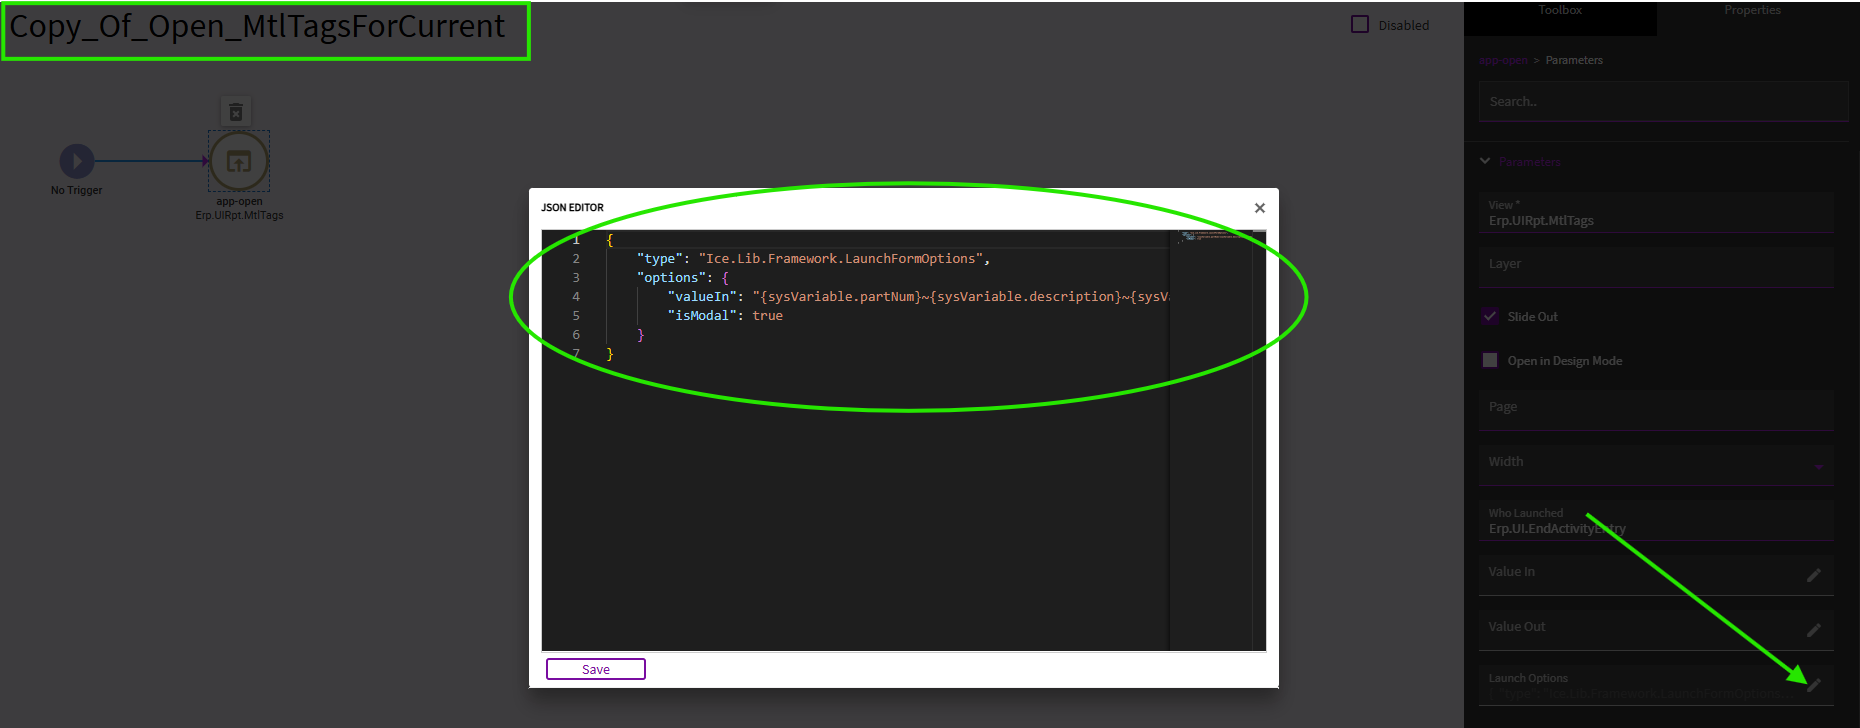
I gave you the wrong JSON for the app-open event.
(Full disclosure, when I initially tested this, I did this from Receipt Entry (which also called MtlTags) instead of dealing with the headaches of customizing MES, I was focusing more on getting the CallContextBpmData to work. Well, turns out Receipt Entry’s Launch Option JSON is vastly different than End Activity’s. It sends different values.)
So… let’s fix it…
Go back into End Activity in App Studio. Open your Copy_Of_Open_MtlTagsForCurrent event.
In the app-open, click Launch Options, and delete what’s in there and replace with the below:
{
    "type": "Ice.Lib.Framework.LaunchFormOptions",
    "options": {
        "valueIn": "{sysVariable.partNum}\~{sysVariable.description}\~{sysVariable.qty}\~MFG-OPR\~{sysVariable.revisionNum}\~{sysVariable.iUM}\~{LaborDtl.JobNum}\~{sysVariable.assemblySeq}\~{sysVariable.oprSeq}\~\~\~\~\~\~\~\~\~{LaborDtl.LaborNote}\~\~\~WIP\~{LaborDtl.AttrClassID}\~{LaborDtl.LaborAttributeSetID}\~{LaborDtl.LaborAttributeSetShortDescription}\~0",
        "contextValue": {
            "InsLot": "{LaborDtl.InsLot_c}"
        },
        "isModal": true
    }
}
Save & Publish your End Activity.
Now… with this “fixed” JSON sending the RIGHT values from End Activity… it should push through and load your report styles correctly, etc.
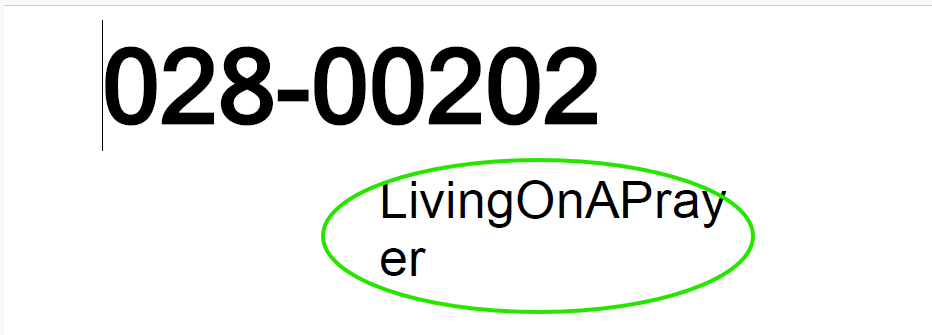
Final MtlTag Report…