Issue Material Custom Layer Not Displaying from Material Request Queue

Hi,

Does anyone know a quick way to display a custom layer on the Issue Material screen within the Material Request Queue?

I’ve created a custom layer on Issue Material and updated it through Menu Maintenance. However, when I click on an “STL-MTL” transaction in the Material Request Queue, the Issue Material slide-out window opens without my custom layer.

Is there a menu item that controls this? I’m trying to avoid overriding the base Epicor logic in Application Studio if possible.

AFAIK you tell it to apply a specific layer int he Slide Out properties, you specify the Menu ID and then there should be a box for the Layer Name.

It sounds like the slide out is opened using an app-open event - once you find where that happens, you can copy and override the base event then edit the app-open event to use your customized layer.

It might sound complicated, but it’s not terribly difficult - holler if you would like help with any of that

Thanks, Leonard and Jonathan, for confirming that I’ll need to do a bit of customization to achieve this. I was hoping I might’ve missed something simpler and more straightforward, got lazy :stuck_out_tongue_closed_eyes:

For anyone looking to do the same in the future, here’s what you’ll need to do:

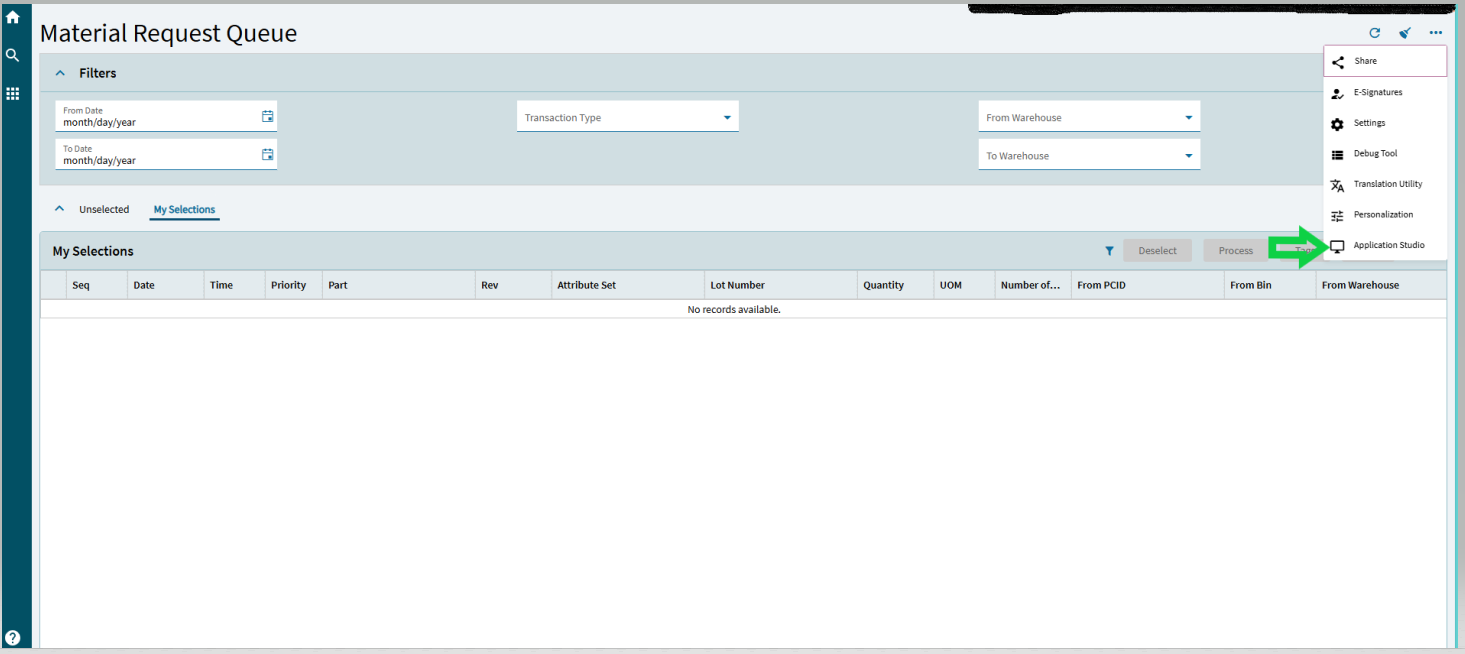
Step 1: Open Application Studio and create a custom layer on the Material Request Queue. You can do this directly from Application Studio, but I went straight to it from the overflow menu in the Material Request Queue.

Note: The purpose of this layer is to display the custom layer on other Kinetic screens, and you do need to create them separately.
For example, I had already created a custom layer on Issue Material.

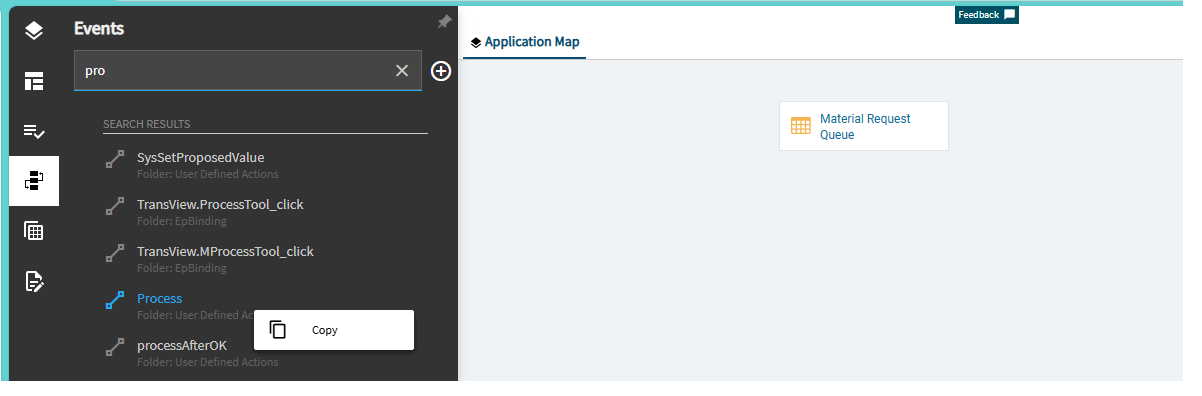
Step 2: Navigate to the Events and search for “Process.”
This is where the different menu displays and they are determined based on the transaction type. Then, right-click and select Copy.

Step 3: Rename the copied event and update the “No trigger”:

Type: Event
Hook: Override
Target: Process

Step 4: Find the Kinetic menu and enter the custom layer section under Parameters.

(Please Ignore this step!)

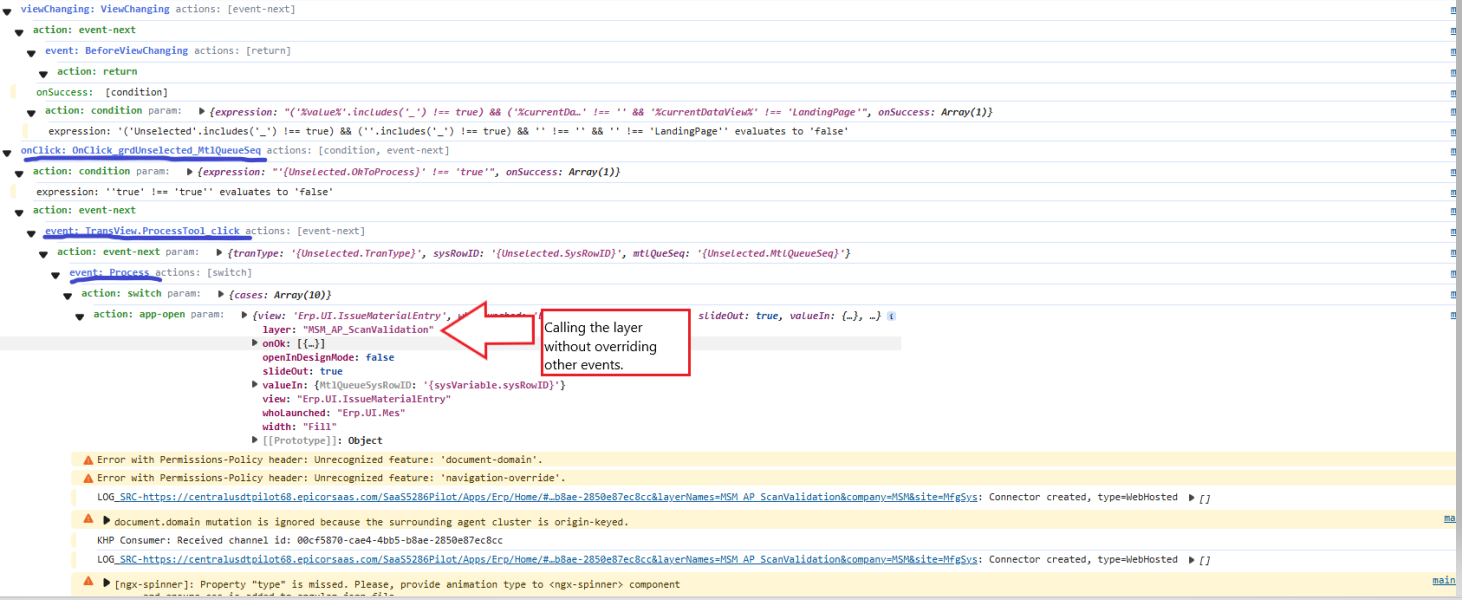
Step 5: You may need to update any events that use the original Process event to reference your copied Process event instead. Copy the event, rename it, and update it accordingly.

For example, I had to update the TransView.ProcessTool_click and TransView.MProcessTool_click events.

Step 6: Preview the layer, you should now see the custom layer.
You can also verify it in your debug tool, which should show that the custom layer is being called.

2 Likes

This is a great write-up! Thank you for taking the time to do it

This part was surprising to me! In some ways it makes sense, since it’s a direct call to the old event – but I had always assumed that the override completely overrode all calls to the old one.

You’re right, there’s no need to override the other events. I tested it again this morning, and the custom layer loaded correctly without any extra overrides.

I must have missed something yesterday when the custom layer didn’t show up. That made me think I needed to override the other events. I’ve done some customizations in App Studio, but I still consider myself a newbie.

Aren’t we all having fun learning new things every day? :face_with_peeking_eye: :smirk: I’ll go ahead and update my script, thanks a bunch!

1 Like