Kinetic Application Studio: Button Click to populate screen fields (Ship To address fields)

First, apologies (again) from an Application Studio newbie. I really think this is an easy question. FWIW, I tried asking Copilot, but couldn’t spiral in to get answers I need.

We are converting our screens from Classic to Kinetic.

I’m working on a simple customization in Purchase Order Entry.

In the Ship To Address area, we have three buttons. Whse2, Whse5, Whse6 (don’t ask). When you click one of the buttons, it retrieves the address for that warehouse and uses it to populate the Ship To address fields.

After they are populated, it’s still editable, in case the user wants to modify it.

Sounds easy enough, and for you experts, I’m sure it is. :slight_smile:

What I’ve tried so far:

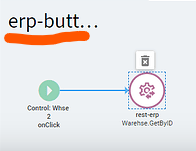
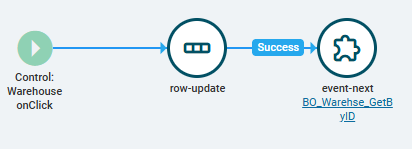
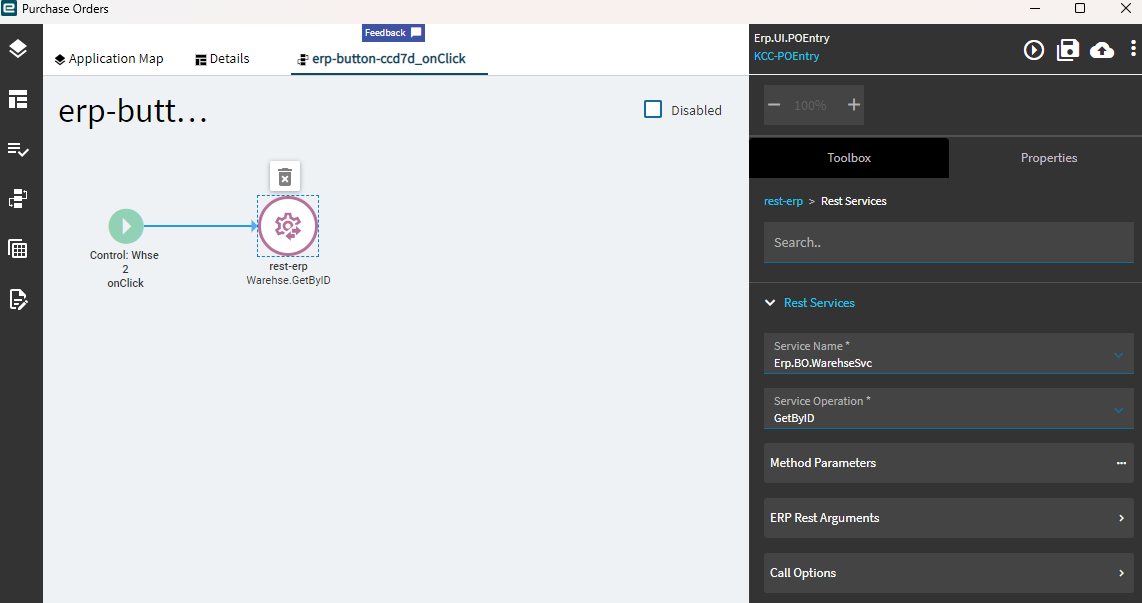
Add the button (labeled Whse2). In the control properties, select Hook On Click, and added a rest-erp widget.

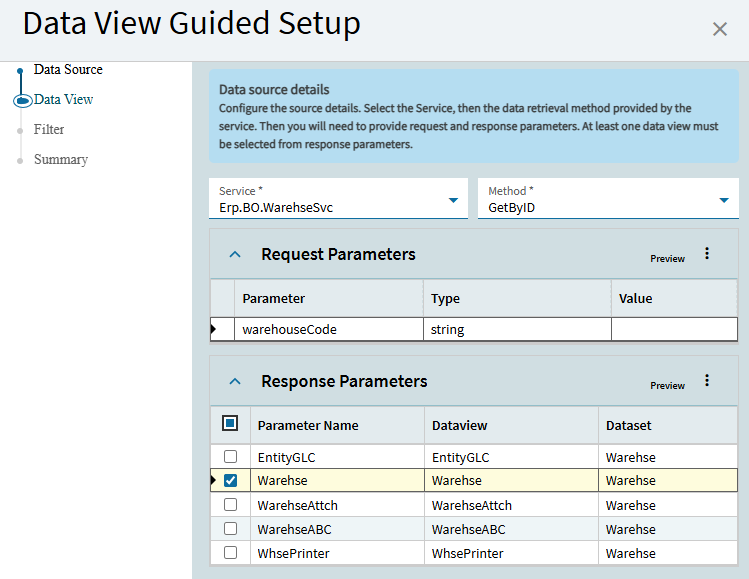
Service Name = Erp.BO.WarehseSvc Service Operation GetByID. So far, so good.

First question: Do I use “Method Parameters” or “ERP Rest Arguments”? Or both?

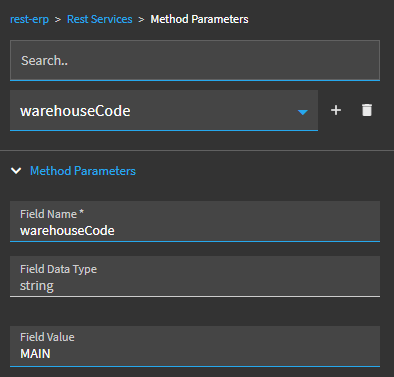
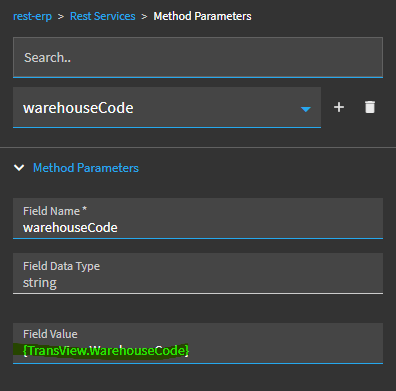
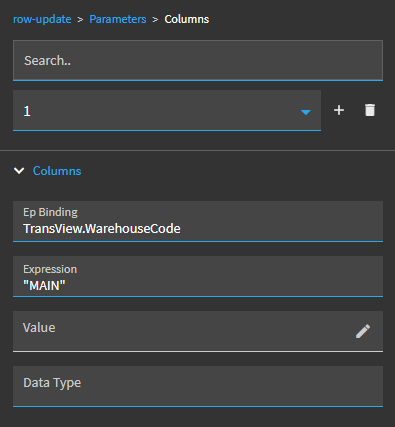
For Method Parameters, I have this:
Field Name: warehouseCode
Field Data Type: string
Field Value: LWH2 (the WarehouseCode for Whse 2).

That all makes sense to me.

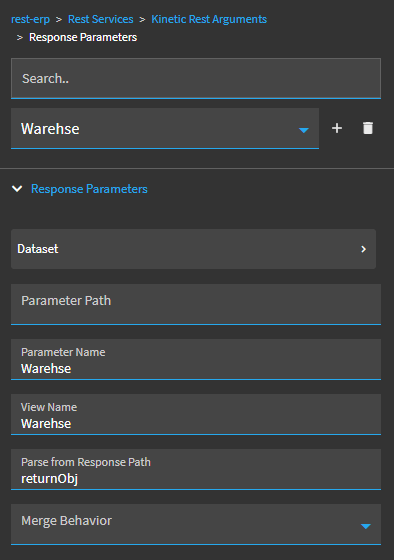
But I need to then set my text fields (txtAddress1, txtAddr2, txtAddr3, etc.) with the values returned from the object (returnObj.Warehouse.Address1, returnObj.Warehouse.Address2, etc.) GetByID.

This is what I have, trying to get the values from the response. Pretty sure it’s wrong…

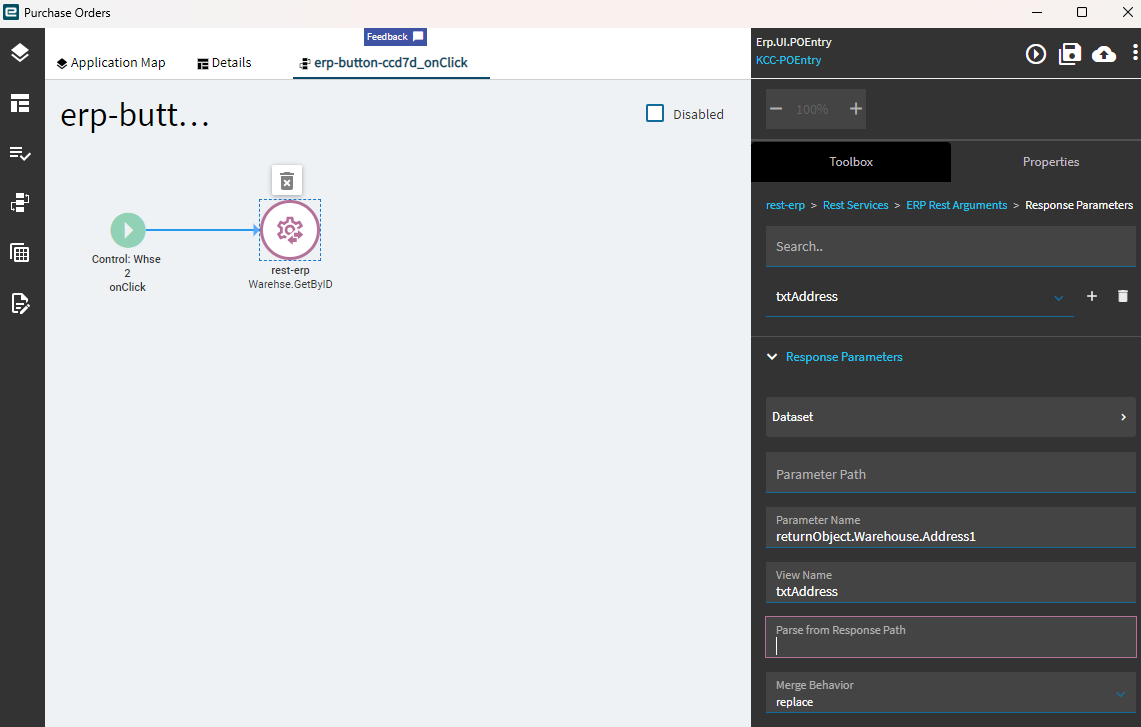
How do I bind the resulting values from the GetByID call to my Ship To Address fields on the screen?

[Currently, clicking on the Whse 2 button yields this error:
Parameter warehouseCode is not found in the input object
]

Typically when you’re doing a rest call, I have a dataview created to receive the returned data.

Here’s my long-winded answer and approach.

I first wanted to create a dataview to store the rest-call results.

Using the dataview wizard is very handy in cases like this.

Select the Source Type “BO Service Call”

Next… pick your service and method.

The only Response Parameter you really need is Warehse, so select that one.

The next step is to name the dataview… and it gives you the answer:

You aren’t creating new, or deleting Warehouses… so, don’t check those boxes.

The good thing about using this wizard is that it will create the dataview AND also create the “GetByID” event for you!

Go into that newly created GetById event and go into the rest call properties:

In Rest Services > Method Parameters, type in your Warehouse Code: LWH2

(my warehouse code is “MAIN”)

Rest Services > Rest Arguments > Response Parameters… should already be set-up!! Thanks Epicor!

Now… the rest call is set-up… so we need to trigger it.

Go to your button on-click event… (unintendedly hilarious, by the way)

Swap out the rest-erp control you have there and put in an event-next.

You can use your BO_Warehse_GetByID event instead. So, clicking your button will now call that event… the rest call happens and the returned data will be stored in columns like Warehse.Address1, Warehse.Address2, etc. for your use.

~*~

BUT… you have a more complex requirement.

You have (3) different buttons, one for each warehouse and each would send a different Warehouse Code to the rest call. So, here’s what we can do… let’s retreat a little bit and make some tweaks.

Go back into your BO_Warehse_GetBYID event:

Change your method parameter to send a column value from {TransView.WarehouseCode}

That’s all you need to change here.

Next, go into your button on-click event… add a row-update BEFORE the event-next.

(you can just delete the event-next if you want, its easy enough to add back in)

In that row update, set column TransView.WarehouseCode with the expression of your warehouse code:

NOW… when you click the button, it is going to set TransView.WarehouseCode to your desired warehouse code… then the GetByID will use THAT value in the call.

You can repeat this same thing with your 2nd and 3rd buttons, and all you have to do is change that preceding Row-Update with the desired Warehouse code.

That way, if you click button one, it will send Whse2’s code,
if you click the second button it will send Whse 5’s code,
if you click the third button it will send Whse6’s code.

… make sense?

1 Like

First of all, THANK YOU! I really appreciate the time and great detail. I am still working through these steps and will update this post when I have completed them. And will mark it as Solution once I have it working.

Thanks again!

Sorry for the slow response. Using your notes as a guide, I was able to get exactly what I needed.

Thanks again!

1 Like