If you stumble across this, I updated it with a better version that is in a post below. There is still useful information in this original one, I would just recommend using the newer version.
Do you have users that cannot seem to create parts consistently with the defined rules? If you do, you could do the following.
Part Creation Tool
The starting point for the customization is an event:
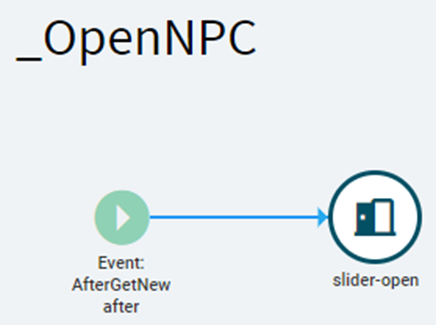
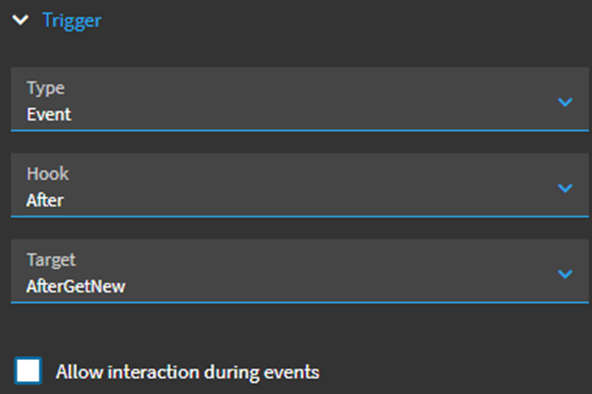
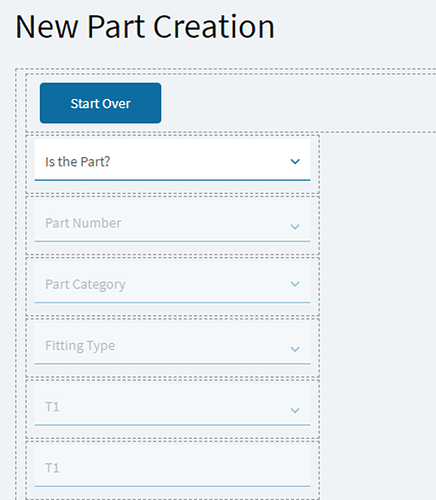
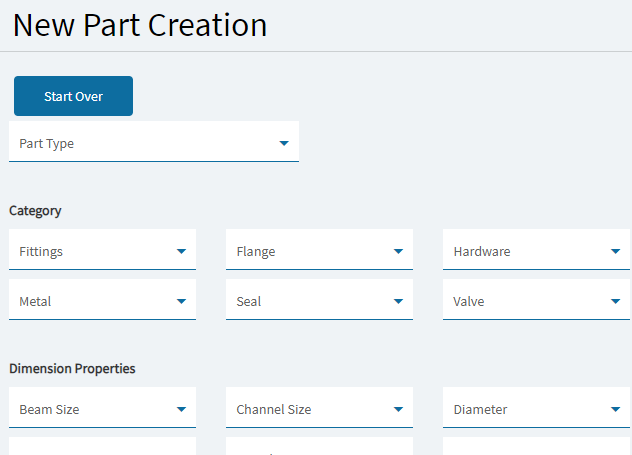
This opens the slider that the user will interact with to create the part using drop downs. The slider has multiple combo boxes and text boxes. To start many of them are hidden.
The first question is needed to determine which UD table holds the data. In this instance, it was necessary to split it between ASME and Non-ASME parts as the tables ended up being very different. If more than one UD table is not being used, this first combo box is not required.
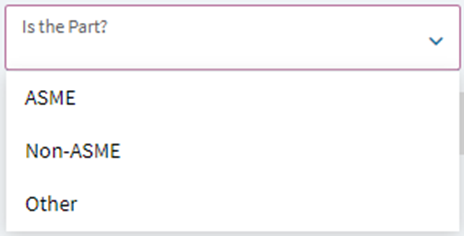
The values in the Combo Box are a manually entered list, it is not being driven from a DataView.
- Data > EpBinding: TransView.IsPart
- Advanced > Drop Down Style: DropDown
- Advanced > Data Mode: list
- Advanced > TextField: display
- Advanced > Value Field: value
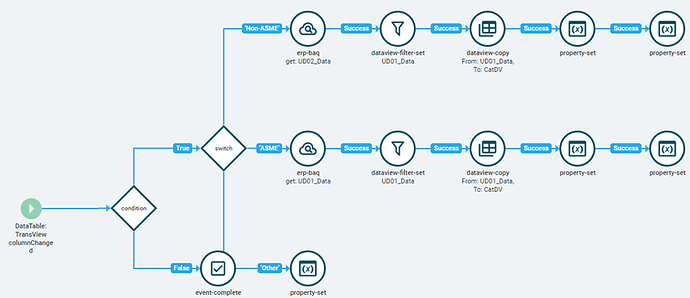
Once a value is selected, there are events that run to drive the next combo box. The TransView table is used extensively to hold the responses, as you will see throughout this document.
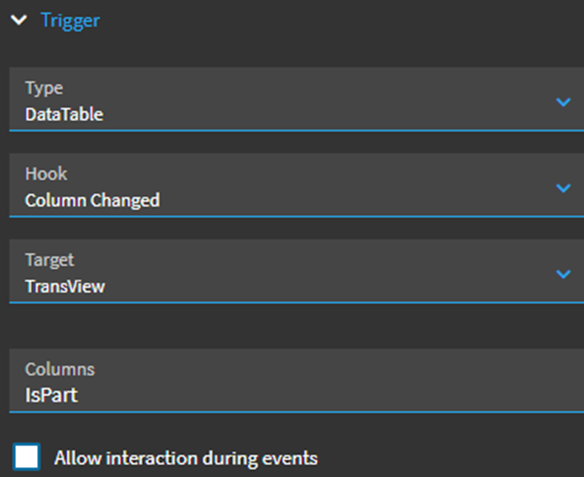
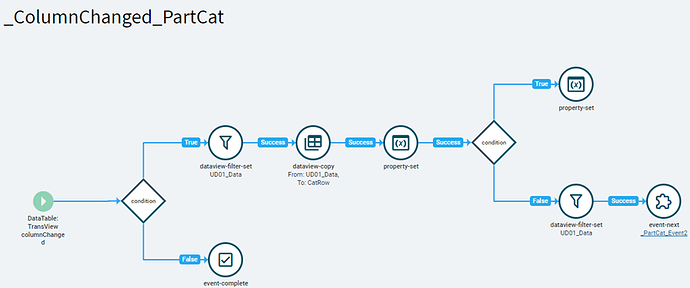
- The event is triggered on Column Changed.
- The first condition is there for the Start Over button on this event and all other similar events. I could not figure out how to stop all the events from firing when setting the TransView columns back to “”. So, this condition checks if the Column Changed was to enter a value or clear it. The Expression is:
"{TransView.IsPart}" !== ""
- The True path leads to a Switch condition. If you are not using more than one table, this Switch can be omitted.
- The Non-ASME and ASME paths are identical except for the Rest erp-baq. Since I am using two UD tables (UD01 & UD02) I created two BAQs to get the correct data in the session.
Now would be a good time to explain how the UD tables are used. Each UD table uses all 5 keys.
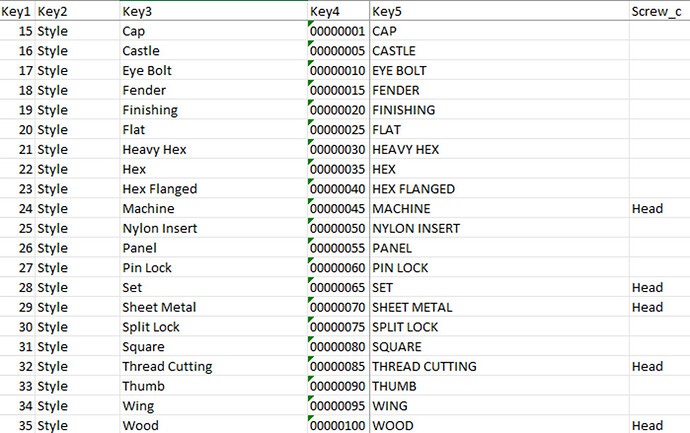
- Key 1 is an incrementing number used as a unique identifier.
- Key 2 is the name of the group that drives the drop downs.
- Key 3 are the values that show up in the drop down.
- Key 4 has two uses:
- For the Part Category, it drives which column to filter in later combo boxes.
- For all following combo boxes, it holds a value to sort by.
- Key 5 holds the text that will go in the Part Description for that combo box.
In addition to the keys, UD columns were added to the UD tables, one column for each Part Category answer (Key3).

In the example above, if the user selects Hardware as the Part Category, the next combo box would hold the Key3 values. Once a value is selected, the Key4 is used to focus future events to the correct column and also drive the next grouping. It should hopefully make sense as we go deeper into this document.
As you can see in the example above, Key4 is the name of the appropriate column minus the “_c”. Also, the Screw_c column has Style in it which will filter the next combo box.
The above shows the next group of data if Screw was selected. You can see the sort values in Key4. I left space in between so if there are additions in the future, the sorting should stay alphabetical. In the Screw_c column, you can see that only 5 rows are valid for this drop down and it also holds the next group.
The BAQs were built to have the same Table Alias as the field names. When creating them, UD01 table was added twice so that the table alias could be set. When the table was added the second time, the alias was set to “XX”. This ensures that the results from both BAQs have the same field names (e.g. XX_Key1). Also, both BAQs are loaded into the same DataView in the layer (e.g. UD01_Data). This means that which ever path is chosen, the field names are the same (e.g. UD01_Data.XX_Key1).
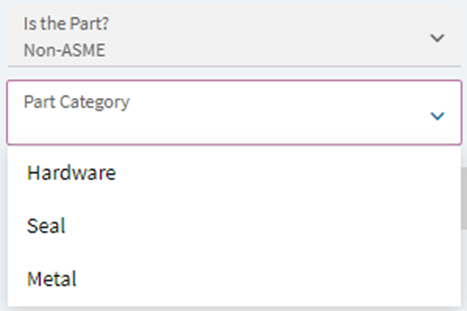
The Part Category is first grouping that is in the UD table. Only Key1, Key2, and Key3 columns contain values.

As you can see in the below screen shots:
- Only the current combo box is available to use. Each field is disabled after a value is selected. This is to ensure that values are not changed after entered. It was too difficult for me to figure out how to handle values changing, so I disable the fields and provide the Start Over button.
- You will never see the next field in the chain because it has not been determined yet. Once a value is selected, the next field appears.
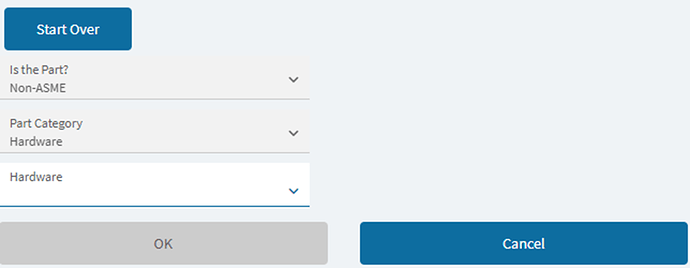
- There are 2 buttons on the bottom. OK which is disabled and Cancel which is enabled. The OK is disabled to stop users from hitting it until they have traversed all the fields.
And here is what the screen looks like after selecting a Part Category.
This ends the explanation of how the UD tables are used.
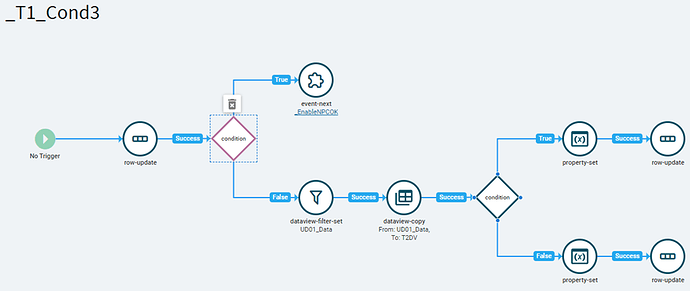
Once the BAQ successfully loads, the DataView is filtered by UD01_Data.XX_Key2 for the column that was selected. This first filter is hard coded to:
UD01_Data.XX_Key2 = 'Category'
This is because the ASME/Non-ASME/Other selections are not in the UD table.
If the filter is successful, the next step is to copy the filtered DataSet to a new DataSet. I created multiple DataSets to facilitate the customization. If a custom view contains “DV” in it, they hold the filtered data that drives a combo box. If a view contains “Row”, they hold the row of the selected value. The ones I have are:
- CatDV, CatRow, T1DV – T10DV, and T1Row – T10Row.
- CPK – this is used to store the response from a BAQ that gets called later.
After the dataview-copy is successful, the current field is disabled and the next field is un-hidden. This ends the event for the first combo.
The next combo has a different event structure. Once the Part Category is selected, the following event runs.
- The event is triggered on Column Changed.
- I will mention this one more time and will not address it further. A condition is next that is used to not trigger the events again on Start Over. Instead of this being hard coded like the previous one, we start to use the TransView fields:
"{TransView.PartCat}" !== ""
- The next steps are again the same, filtering the DataView, copying it to it’s own DataView, and disabling the current field.
- The condition can be ignored, that was done for a special instance where I needed to diverge from what I originally had.
- A new filter event is added in to filter UD01_Data based on what was just selected. This is getting the next group based on the response of the current field. The filter is:
UD01_Data.XX_Key2 = CatRow.XX_Key3
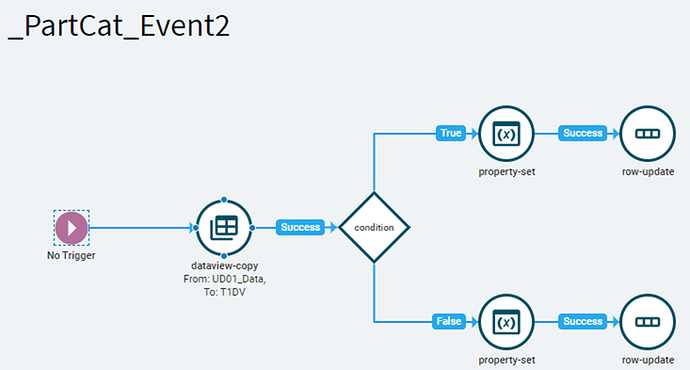
- After the filter is successful, we call another event using event-next. This is done to keep the events small and easier to read/follow.
- This event has no trigger.
- It is picking up from the filtering of the DataSet and copies the filtered version to a new DataView.
- Next is a condition that is checking if the first row of the new DataSet has Entry in it. The expression is:
'#_trans.dataView('T1DV').dataRow(0)['XX_Key3']_#' === 'Entry'
- If the DataView has Entry in it, it is the only row in the DataView. I’m not sure exactly what the code is doing, but I lifted it from @fvodden. When there is Entry in Key3, I drive the next entry to a text box instead of a combo.
- After the condition, I again unhide the next field. We also set the labelText of the next field that appears using the following:
"{CatRow.XX_Key3}"
- The last part is to set a TransView field to know in the next set of events if the prior field was a text box or combo box.
If you look back at the screenshot of the slideout, you will see that there are hidden fields with T1 in them. Since you do not know what the next group is, it needs to be dynamically chosen based on the response. So, I named each of the combo boxes Tx, where the x is just an incrementing number.
Starting with the T1 boxes, all the events are the same (except for one piece I will call out) until the end. The only differences are the fields and tables called out. Let’s dive into what the rest of the events are.
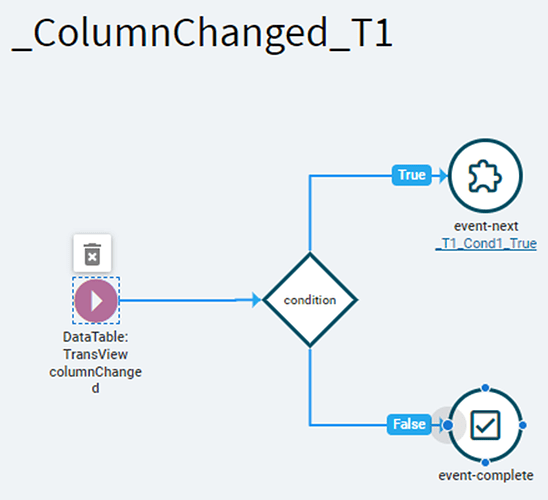
- The events start again with a Column Changed trigger.
- We then move to a new event with the event-next.
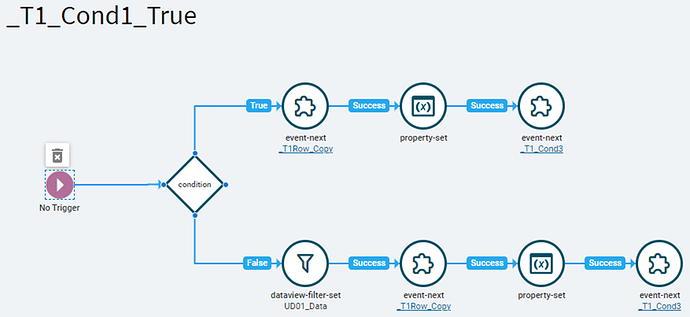
- This event has no trigger.
- The condition is checking if the prior box was text or combo that we set at the end of the last group of events. The expression is:
{TransView.Entry} === true
- If Entry is true, we know that there is only one row and can just call the row copy event.
- If Entry is false, we know that the DataView has more than one row and need to filter it by the selected row to copy. This is the filter:
UD01_Data.XX_Key1 = TransView.T1
- Again, we disable the last entry and then call the next event with event-next.
- This event has no trigger.
- The first row-update is only contained in this event, it is not in any of the following events that are a copy. What it does is take the Key4 and add _c to the end of it to store the column that we will be using to filter the following boxes. It is updating TransView.Col with the following expression:
"XX_{T1Row.XX_Key4}_c"
- The condition is checking to see if we have reached the end of the required inputs. Instead of putting the next group in the column, I have entered End to know that the process is done. The expression is:
"#_trans.dataView('T1Row').dataRow(0)['{TransView.Col}']_#" === 'End'
- If the condition is true, we enable the OK button to trigger the entering of the part in Part Entry.
- If the condition is false, we do a filter on UD01_Data to get the next group of rows. The filter is:
UD01_Data.XX_Key2 = #_trans.dataView('T1Row').dataRow(0)['{TransView.Col}']_# AND UD01_Data.{TransView.Col} <> ''
- We then copy that filtered dataview to a new dataview.
- We again check to see if that dataview has Entry and set the correct properties for the next box.
- Again, we update the TransView.Entry with the new value.
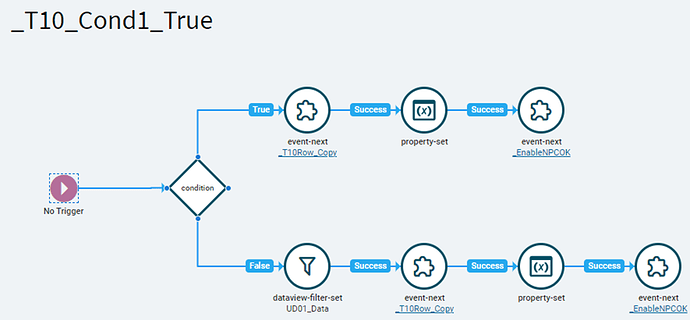
I have created 10 layers of this as my longest question tree was 9 long. I added an extra one so I would not have to when another layer was needed. This just keeps on looping through the same set of events (labeled with the Tx it is for) until the last box.
This is the last of the Tx events. If you were to reach this, the last part is to just enable the OK button.
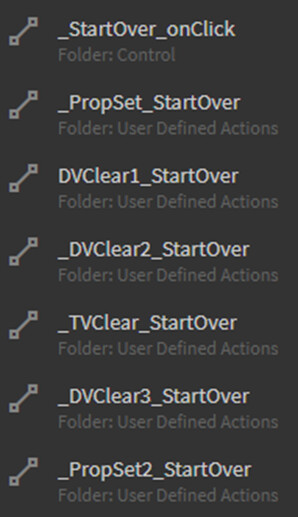
The Start Over button allows the user to do exactly what it says. It clears all of the custom dataviews, fields, and sets all the properties back to start. I use 7 events to accomplish this. The first 4 clear the dataviews, then there is 1 to clear the TransView field, and the last 2 are to set the properties of everything back to start.
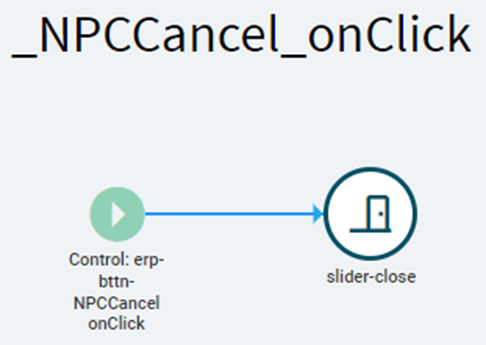
Next, lets look at the Cancel button. It is pretty simple, it just closes the slider.
Now the OK button. This click sets off a bunch of events.
- It builds a part key.
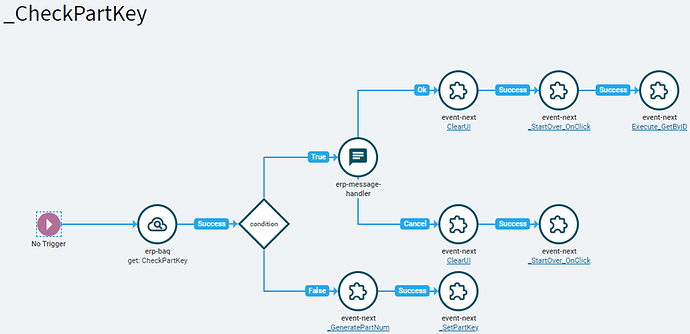
- It checks to see if that part key already exists.
- If not, it generates a part number.
- It sets the part description.
- And it sets a handful of other fields on the part.
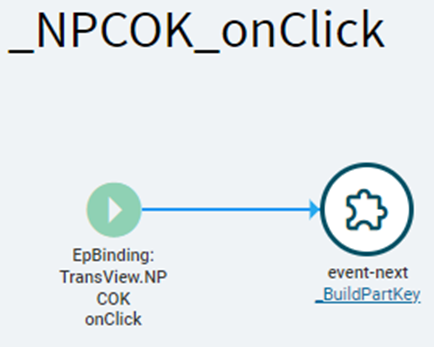
This event is triggered by clicking the OK button.
- This event has no trigger.
- It does a row-update to incrementally build the part key. The field is TransView.PartKey and the value is:
"{TransView.T1}"
- The next row-update is to the same field with the following value:
"{TransView.PartKey}~{TransView.T2}"
- This continues until TransView.T10 is added.
- After the final field there is an event-next that checks the part key.
- This event has no trigger.
- The first step is to send the part key we just created as a parameter to a BAQ to see if that key exists in the database. If it does, the BAQ returns the part number. If it does not, an empty response is received.
- The condition checks the response to see what is there. The expression is:
'{TransView.PartKey}' === '{CPK.Part_CreateKey_c}'
- If it already exists, I pop up a message letting the user know and provide them the option to open that part. If they chose not to, I clear everything using the start over. If they chose to open it, I again clear everything out and then call Execute_GetByID.
- If it does not exist, I start calling the creation events.
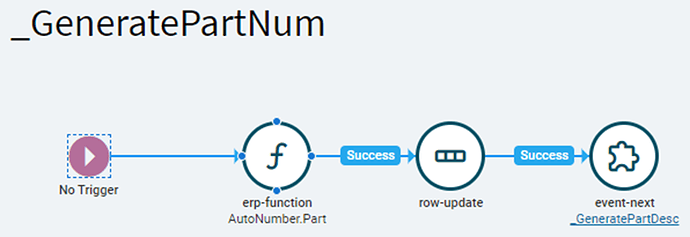
- This event has no trigger.
- The first step is to use a function that generates the next part number. This function is thanks to @klincecum
- It then updates Part.PartNum with the returned number.
- Setting the part number this way allows all the system triggers to run. Once they are done, it moves back to the next event in the chain.
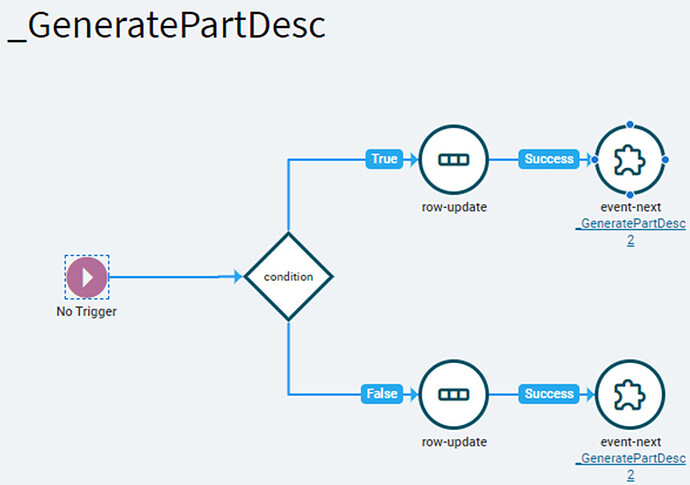
- This event has no trigger.
- This is another event that is iterative. There is one of these events for each Tx field.
- The condition is:
"{T1Row.XX_Key3}" === "Entry"
- If true, I build the description this way:
"{TransView.T1}{T1Row.XX_Key5}"
- If false, I build the description this way:
"{T1Row.XX_Key5}"
Then they both go to the next iteration in the part description event chain.
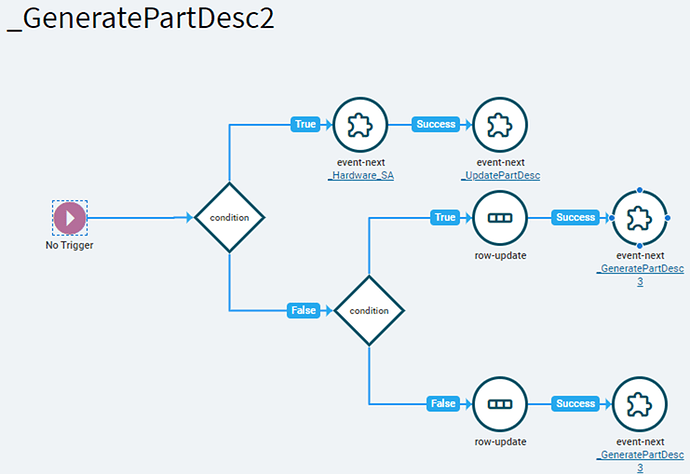
- This event has no trigger.
- All subsequent events are the same until the end is reached.
- The first condition checks to see if an answer was provided for the box. The expression is:
"{TransView.T2}" === ""
- If it is true, we can break out to the next events.
- You can ignore the _Hardware_SA, just another break out for an issue I had to solve.
- If it is false, it does the same as the event before.
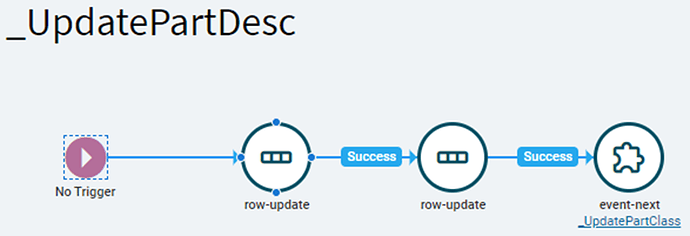
- This event has no trigger.
- The first row-update sets the part description with the following value:
"{TransView.PartDesc}"
-
The second row-update sets the Product Group. All parts created this way are non-saleable goods, or in other words, they are not finished goods.
-
Then the event-next will set the Part Class.
-
This event has no trigger.
-
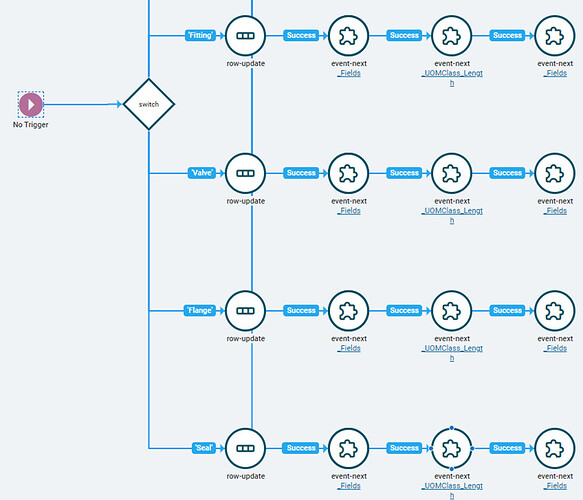
I use a couple of switch statements to determine what was configured and drive the Part Class off it.
-
I also set the UOM Class based on the values.
- This event has no trigger.
- The final event sets some extra fields that I want based off of the answers.
