Okay, so since App Studio has taken something as inocuous as a selected checkbox and made it require 40,000 steps to work, I figured I’d write up a quick How-To on how to get these working in Kinetic Grids.
Set up your grid to pull in data from whatever source you’re using (outside the scope of this tutorial)
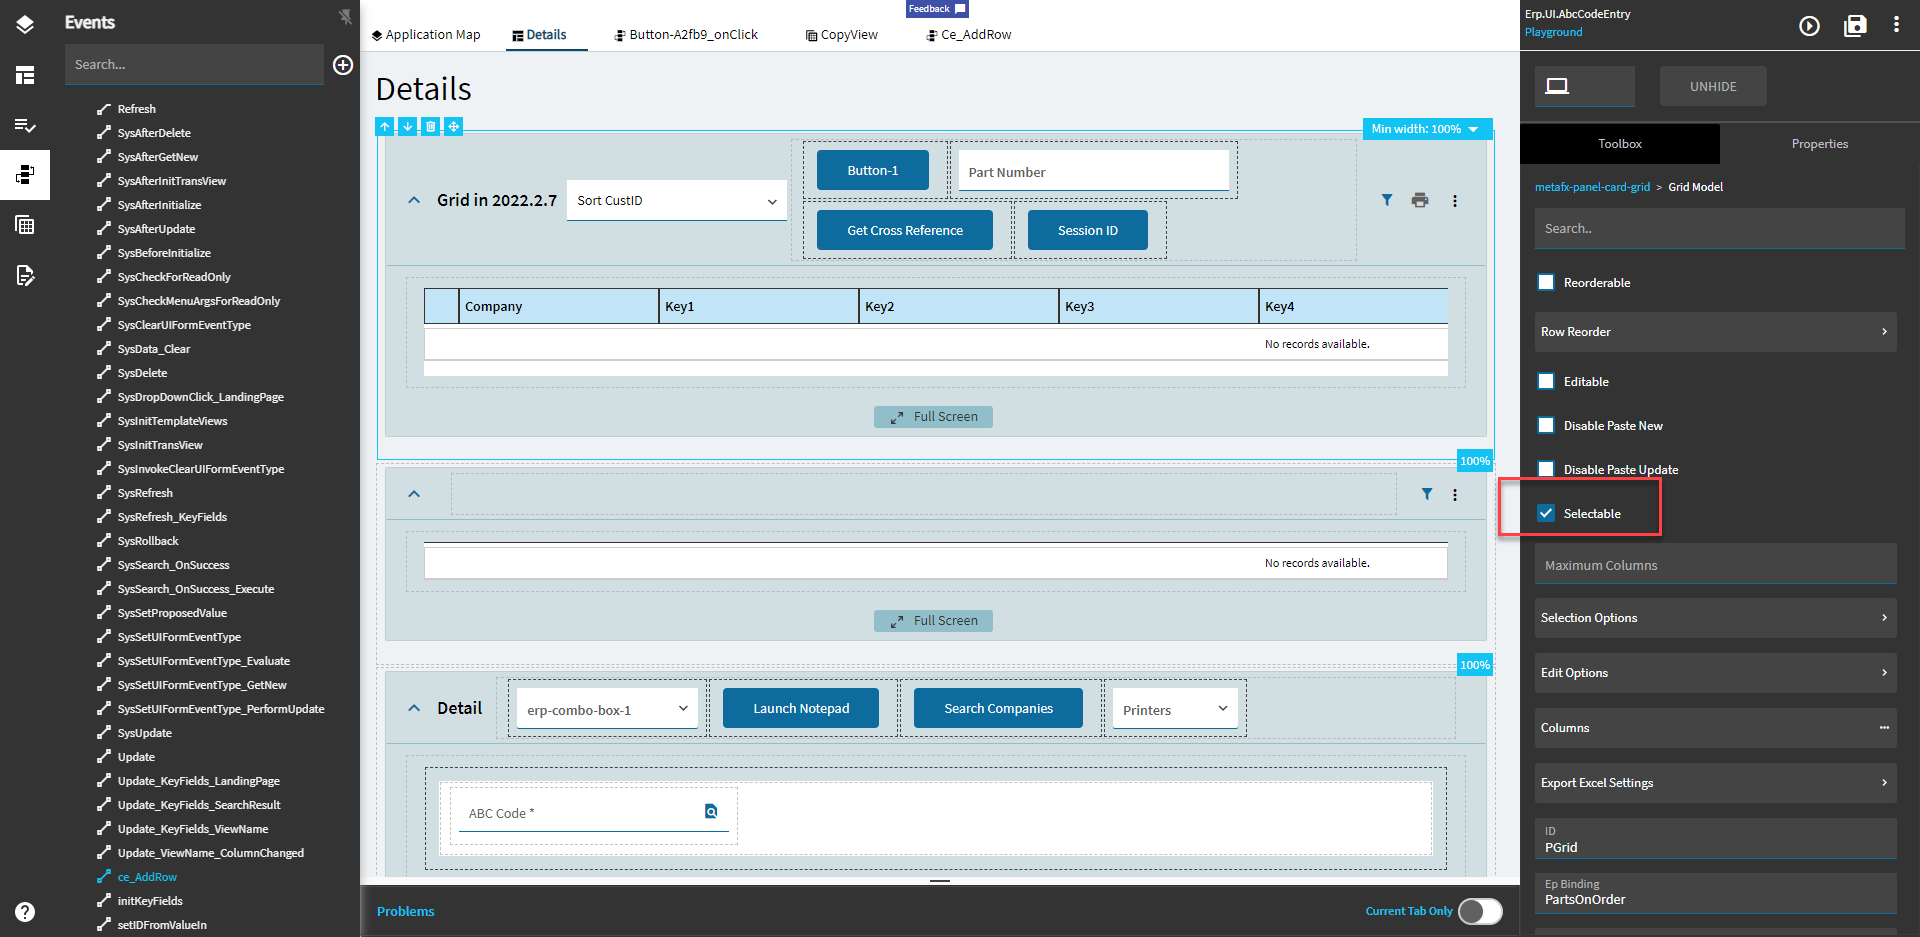
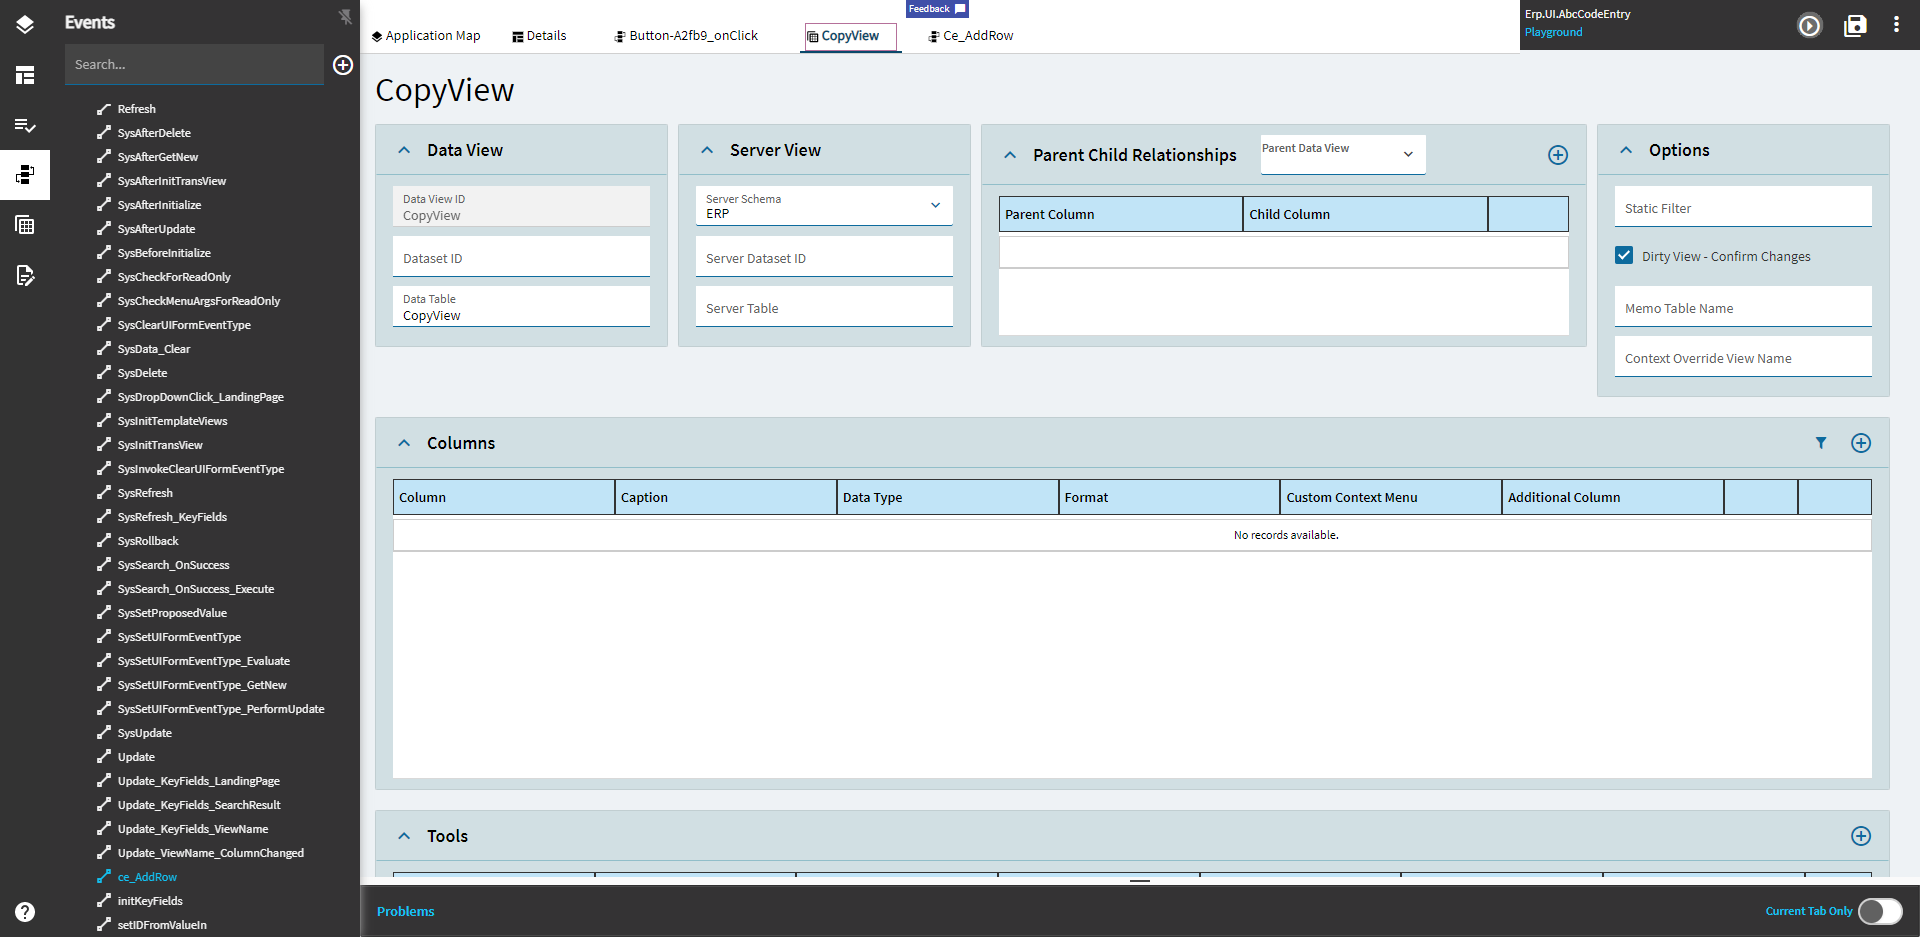
Go into your grid > Grid Model and check the “Selectable” checkbox.
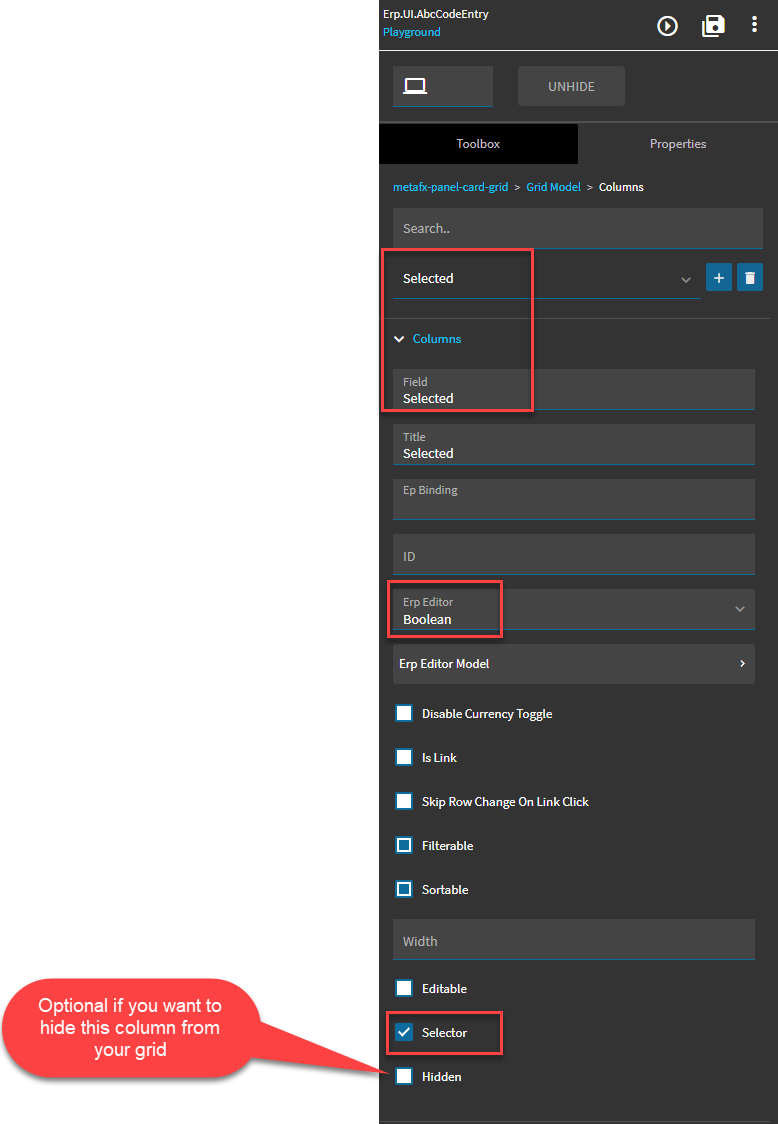
Go into your grid > Grid Model > Columns and add a new column. You can name it whatever, but I typically choose “Selected”. Set the “Erp Editor” to boolean. Check the “Selector” checkbox. When you check the selected row, this new column will now show “true/false”. Optionally, select the “Hidden” checkbox to hide it from your grid view.
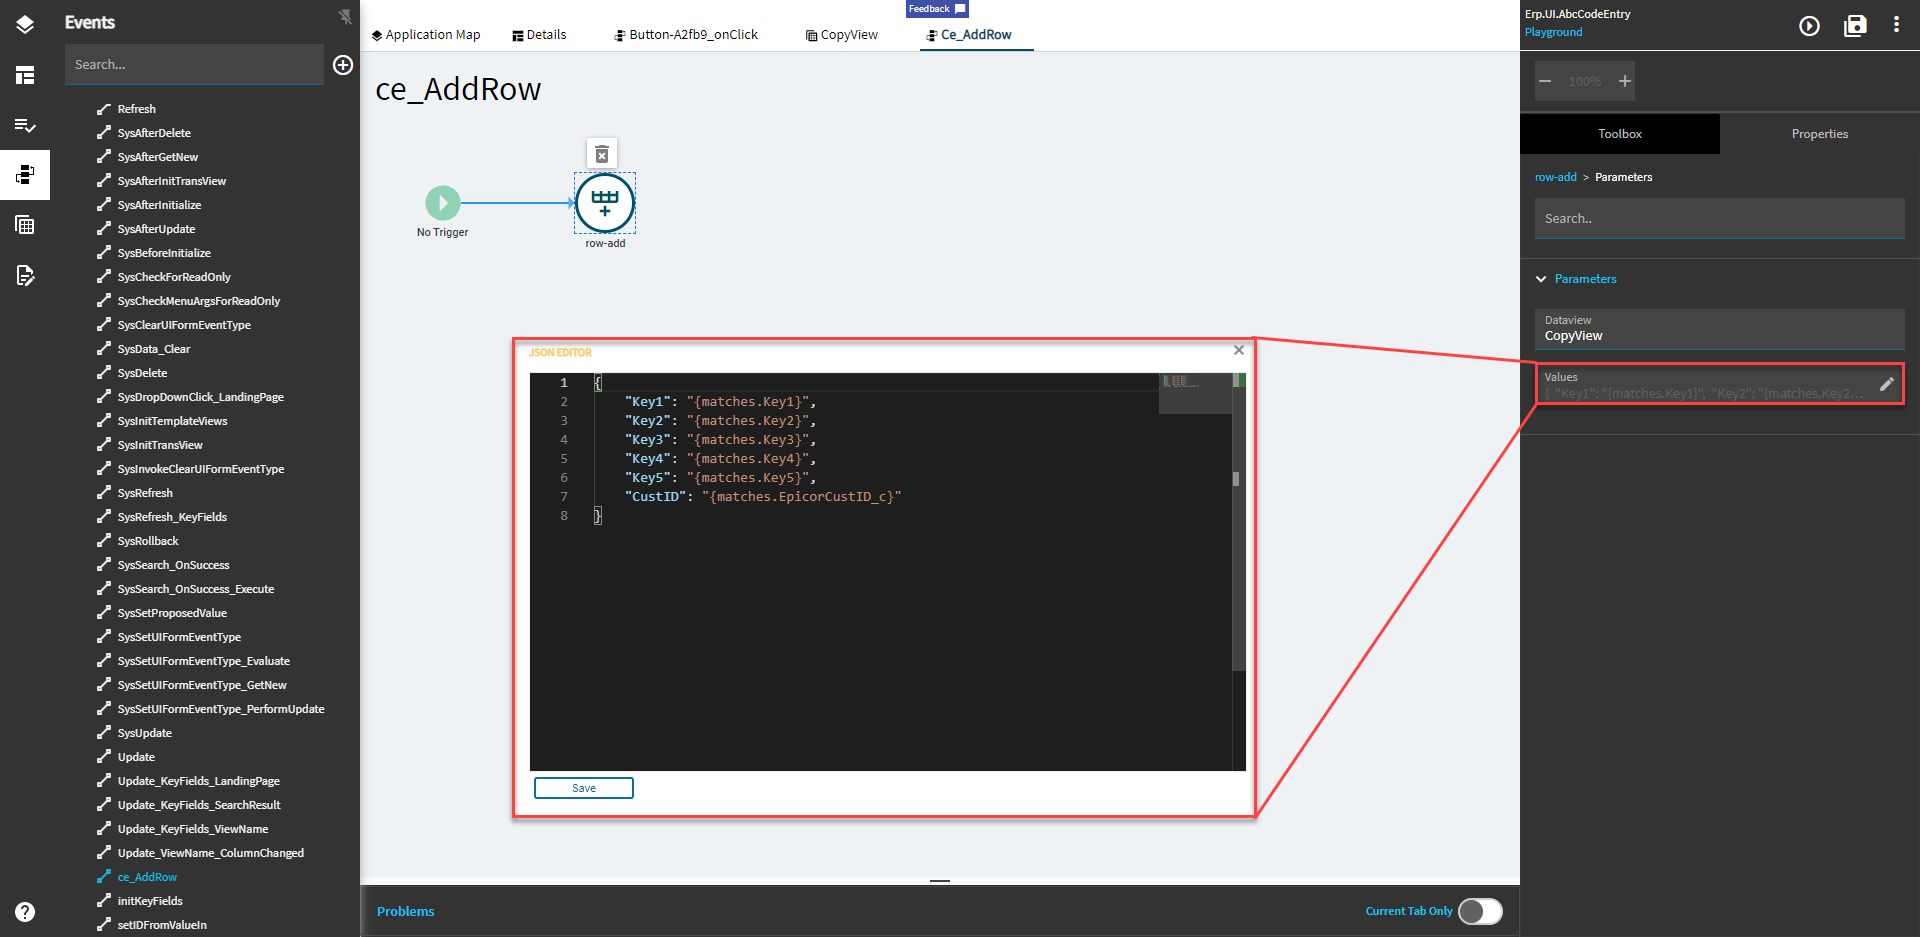
Create a no-trigger event with an add-row widget. Name the columns whatever you want (The blue strings in the following screenshot) and set the values to be {matches.SourceColumn}. You’ll see where “matches” comes from momentarily.
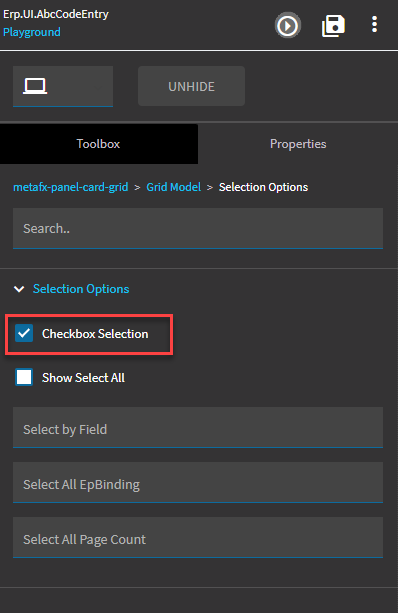
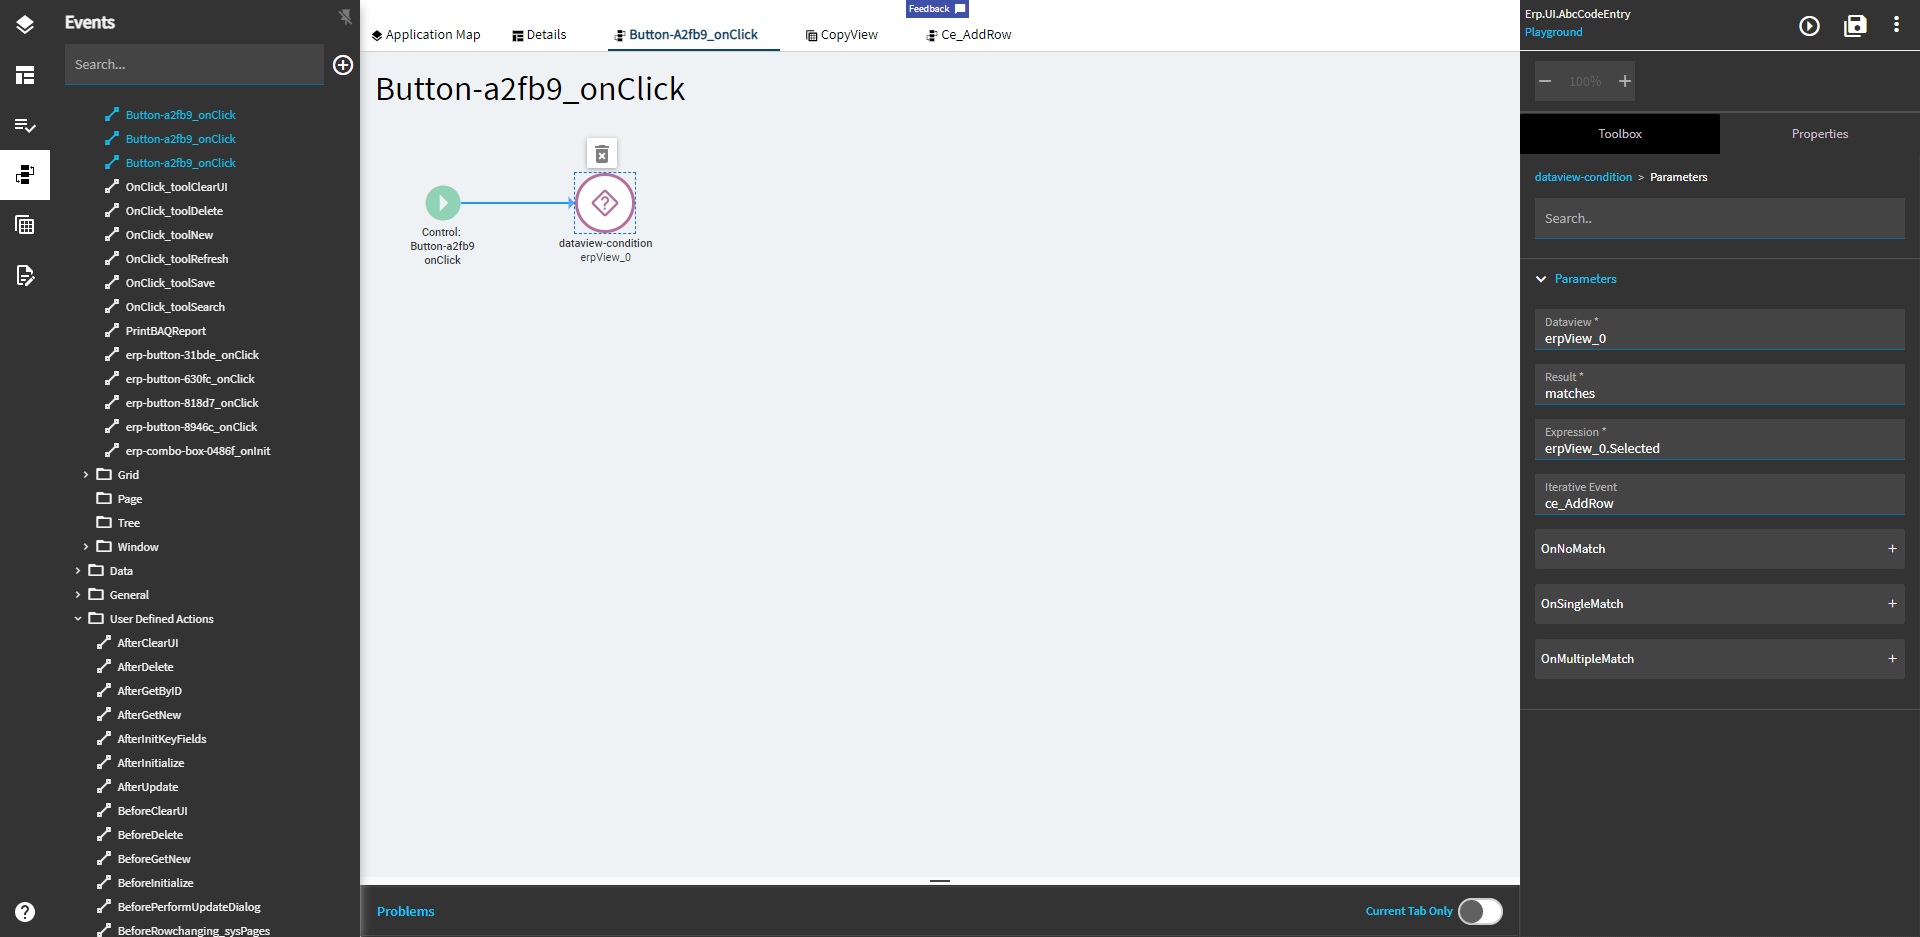
Create an event to trigger off of; I used a button click. Within that event, add a dataview-condition widget and set up as follows: Dataview: Source dataview for your data Result: set this to “matches”. If you name it something else, be sure to update your params in step 2. Expression: SourceDataView.Selected – This should yield a true or false. If you named your selector column something else, then rename appropriately. Important syntax note: The typical syntax to get data from a column is {DataView.ColName}. This is not the case in this particular expression field. It does not want the curly braces, so only set it to DataView.ColName. Iterative Event: set this to be the name of the event you created in step 2.
Currently working in version 11.2.300.2 and this selector functionality stopped working. @hmwillett: Did you also experience that grids are not loading any records since this release when a selector has been added to the grid columns?
I managed to fix it by adding a fake boolean selector field to the BAQ that’s behind the grid. With the earlier versions this was not a problem at all.
A well, it’s working again
Strangely when I add the “Selected” column to my grid/data model/columns suddenly my grid shows no rows. This is even before I mark it as the Selector.
I even added a column “Selected” in my dataview definition for the grid, same behavior.
(my grid Provider Model is a UBAQ)
Curious as to possible uses for the additional column, does it make it easier to determine which rows are selected ? (for example if I passed the view to a function as a dataset)
I liked the looks of this, in the past I have added a UD field to include in my BAQ for that purpose.
Determined that if I add a calculated field to my uBAQ that is the provider for the grid it then works…I guess that’s one step easier than creating a UD field.
Is there a way to select all records in a group within a grid. In Epicor 10, you could click on the group header record and it would “select” all the records in the group you selected.
Has anyone found solution for this (without updatable baq field? I have the same issue i use baq data view, when i add Selected column my data disapears from grid even if it is visible in developer tools.
Found something, so if I add at least one additional column in grid model, in the same way i need to add all my baq columns in grid model under columns
I am trying to add selector column to WBS phase, which has an in-built update function triggered by row-change event. But since the selector column is not binded to any data model field, the selection always gone after the update.
Is it possible to bypass the row-change event which the selector column is being changed?
Thanks a lot!