Updated for 2025.2
01/1/2026
Hey-diddly-ho-neighborino’s! I haven’t done one of these in a while, so I thought I share a How To on how to create a selection list in Kinetic.
You may be familiar with these from various attribute screens within Epicor and equally frustrated at the fact that you have to customize it yourself to get it into classic.
Well, the day has finally come where Epicor has a native control for it now!
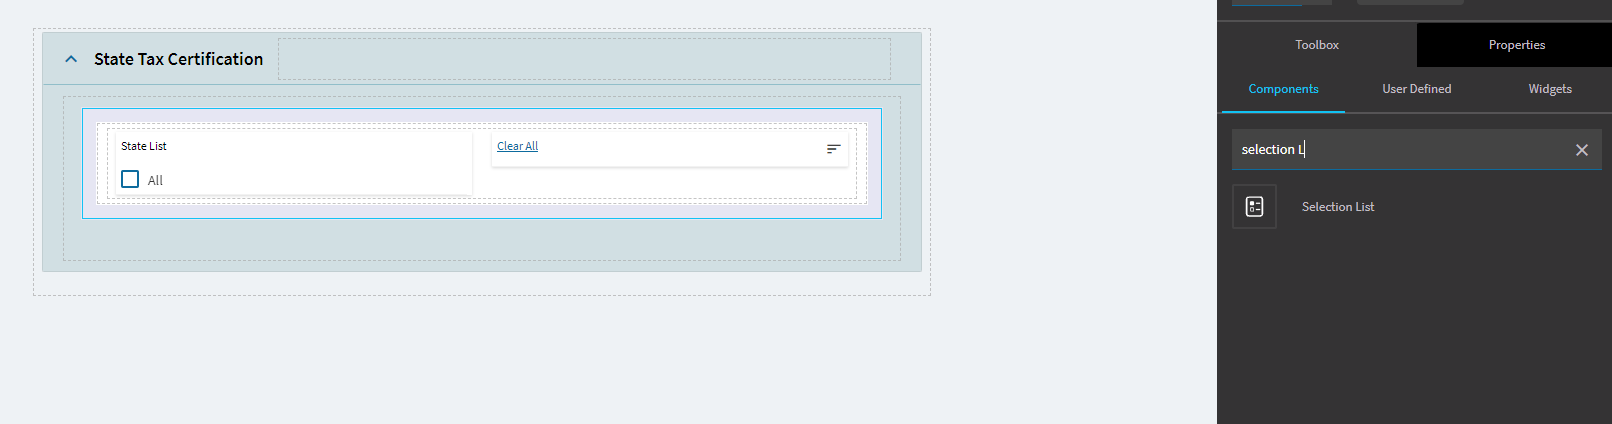
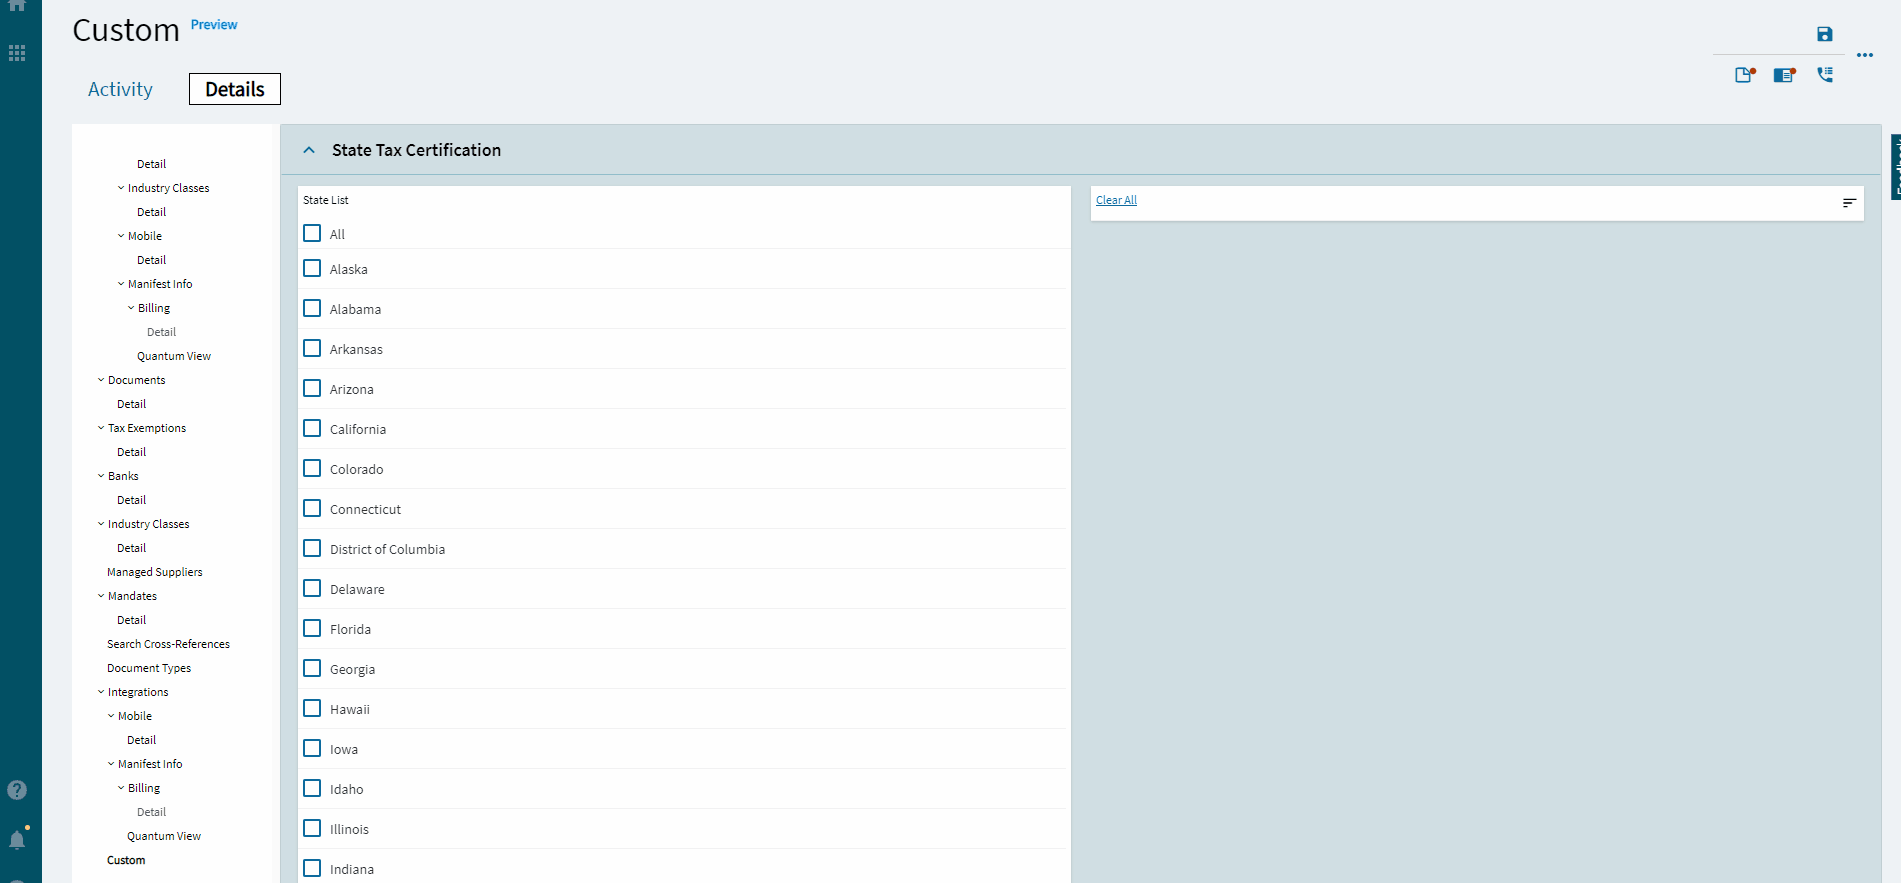
In this example, I’m going to show how to select States that are stored in the UD01 table.
Here’s how to wire it up:
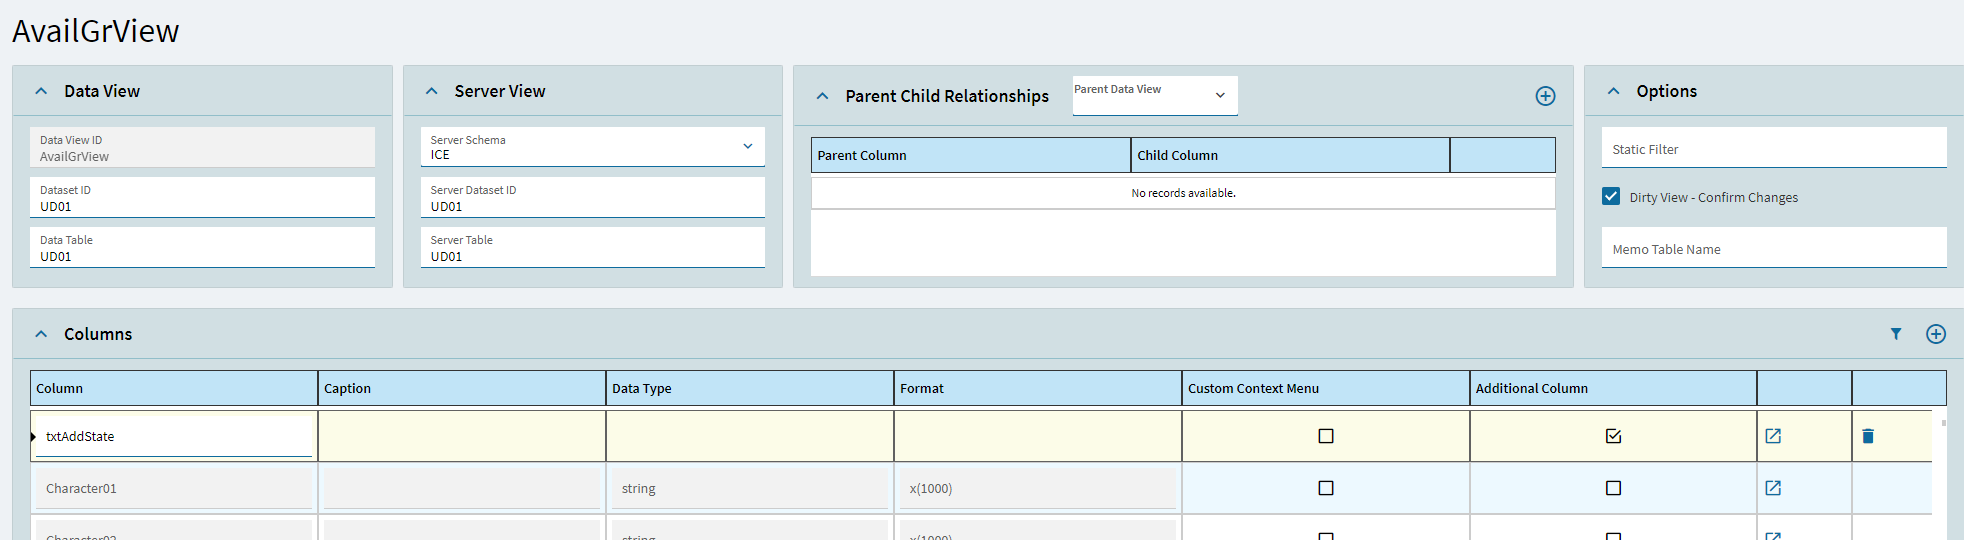
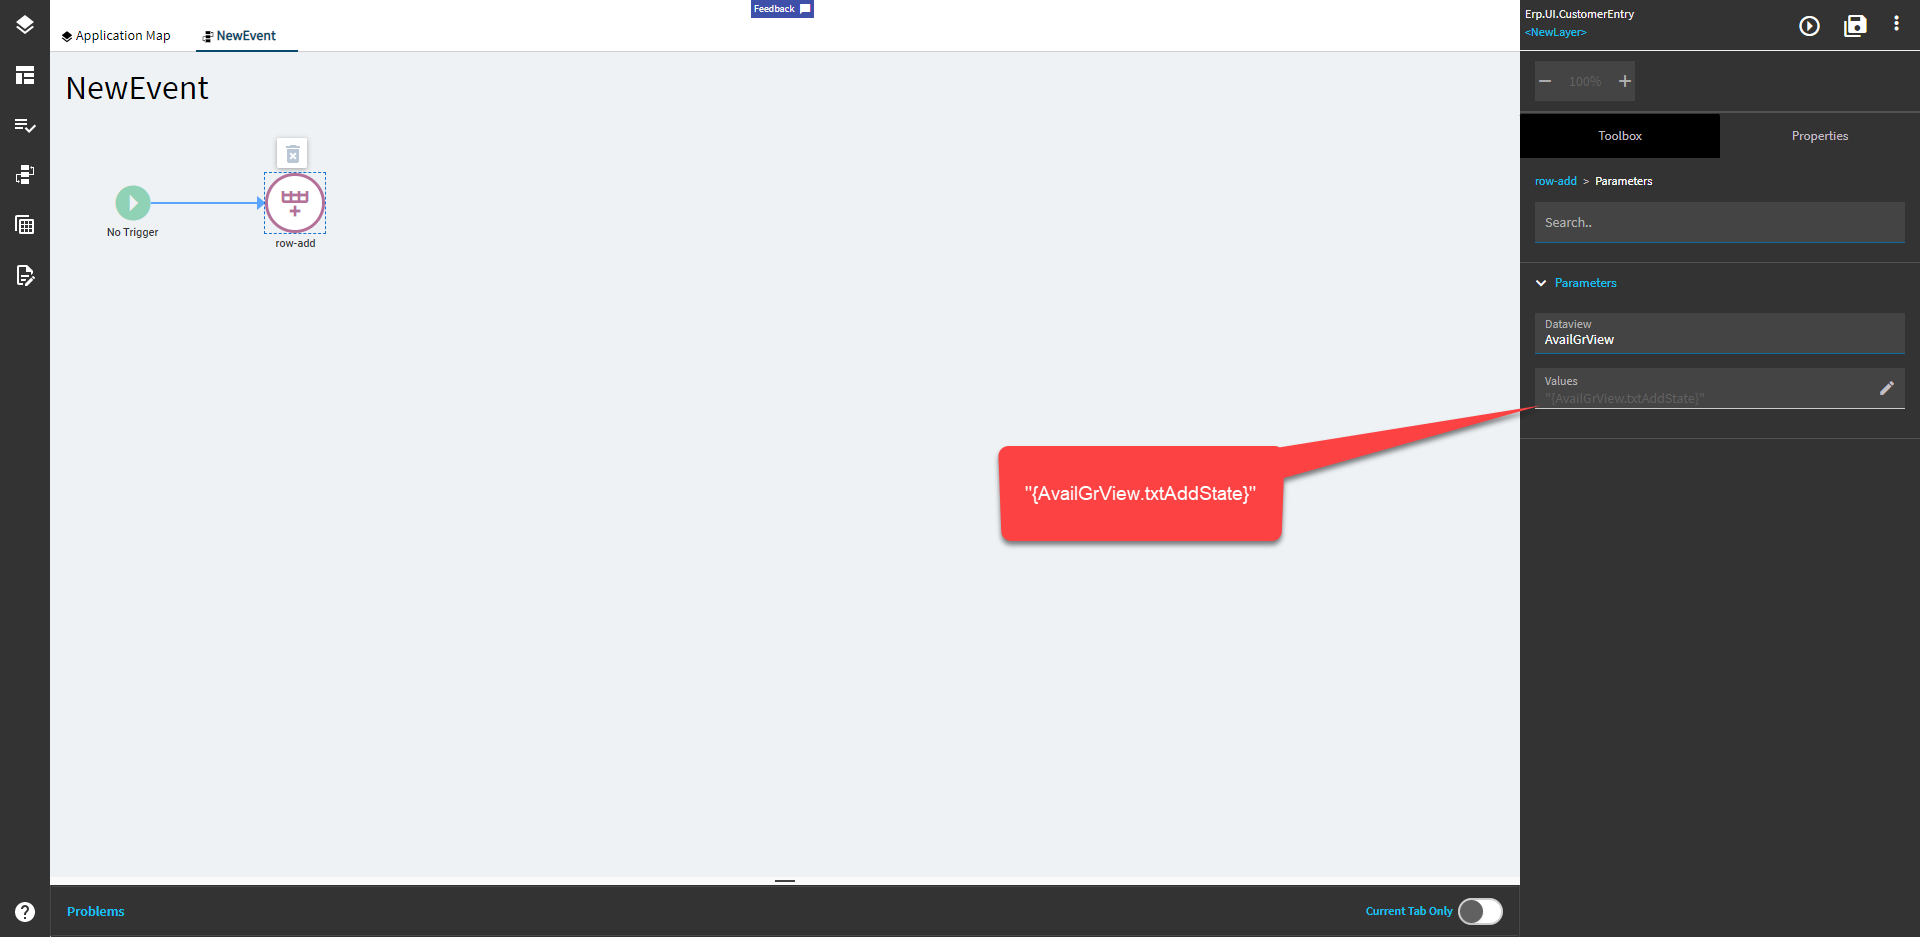
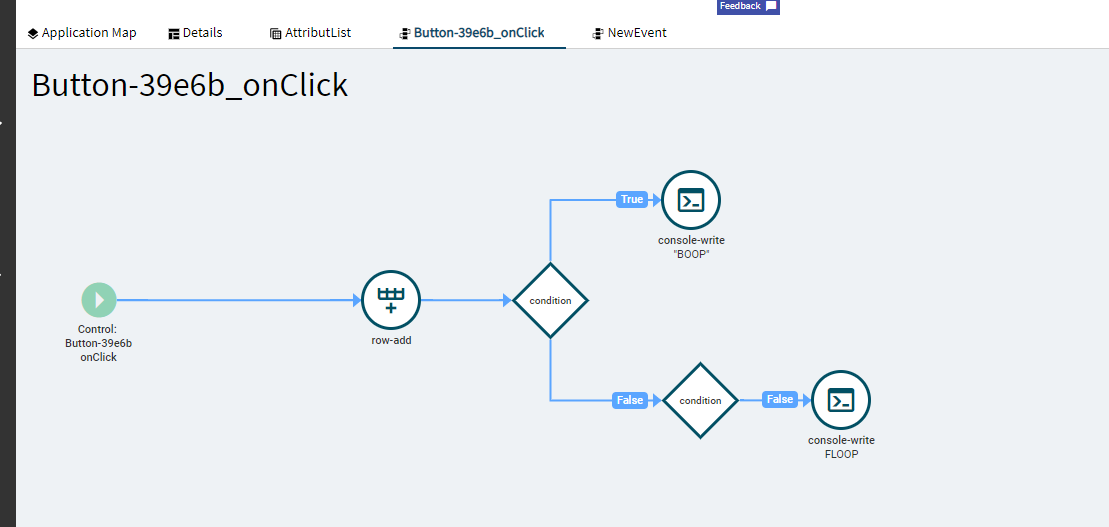
- Create a DataView to hold your available items.

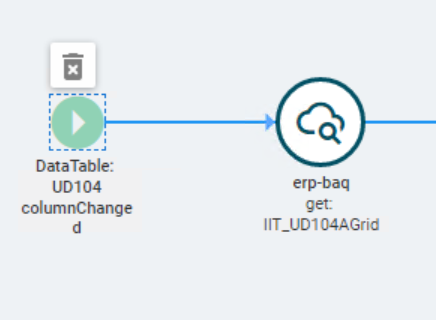
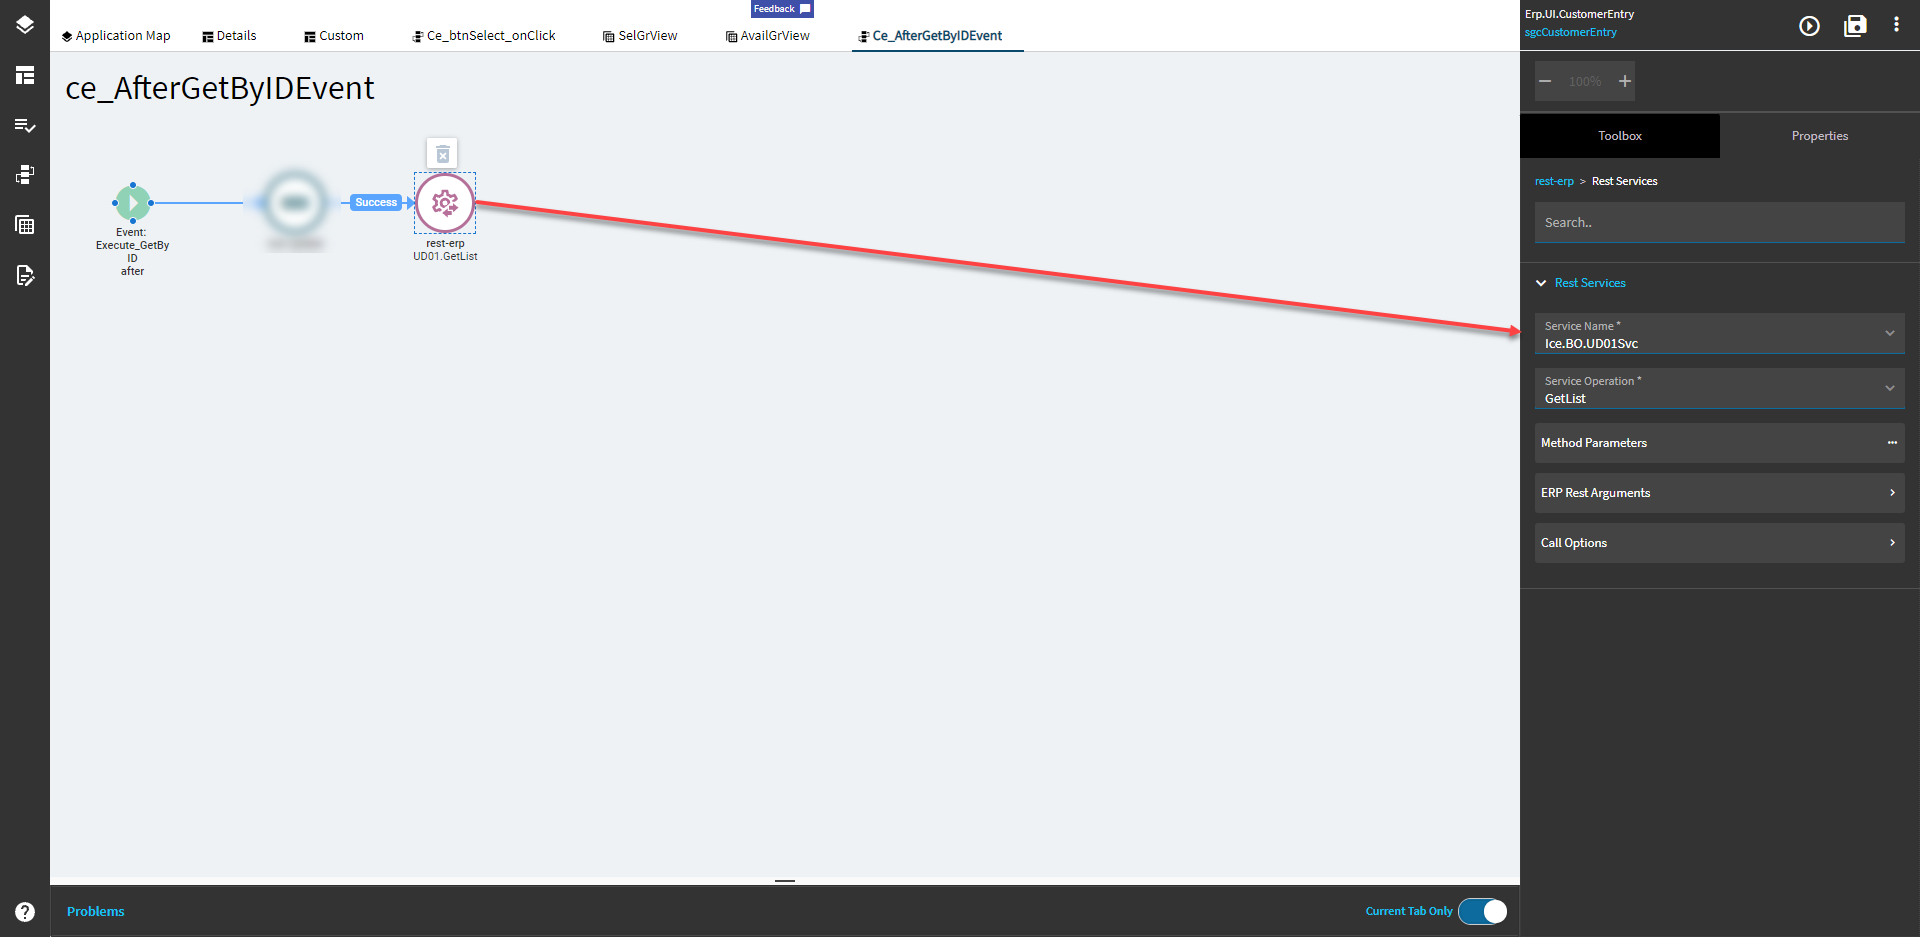
2). Create an event to populate this view. I hooked into the After Execute_GetByID and made a REST call to UD01Svc to populate the view. ( The blurred widget does something else irrelevant to this topic.)
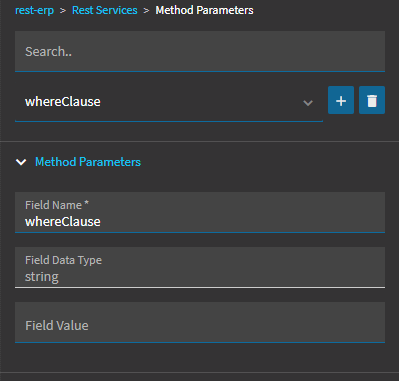
Populate the whereClause as needed. I wanted to bring back all rows, so I left mine blank.
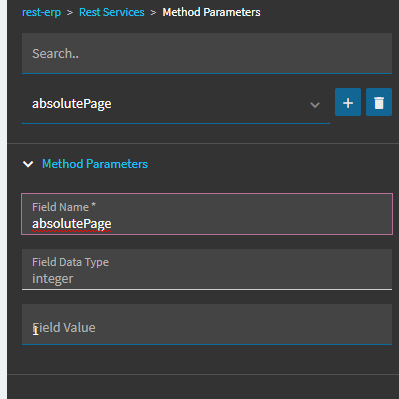
Set a page size that’s reasonable for your server.

Set absolutePage which is going to be which page is returned, for example my page size is 100. If the dataset has 500 records, then it will only return the first 100 if I specify 1 or it will only return 200 - 299 if I specify 2. Leave it at 0 for all.
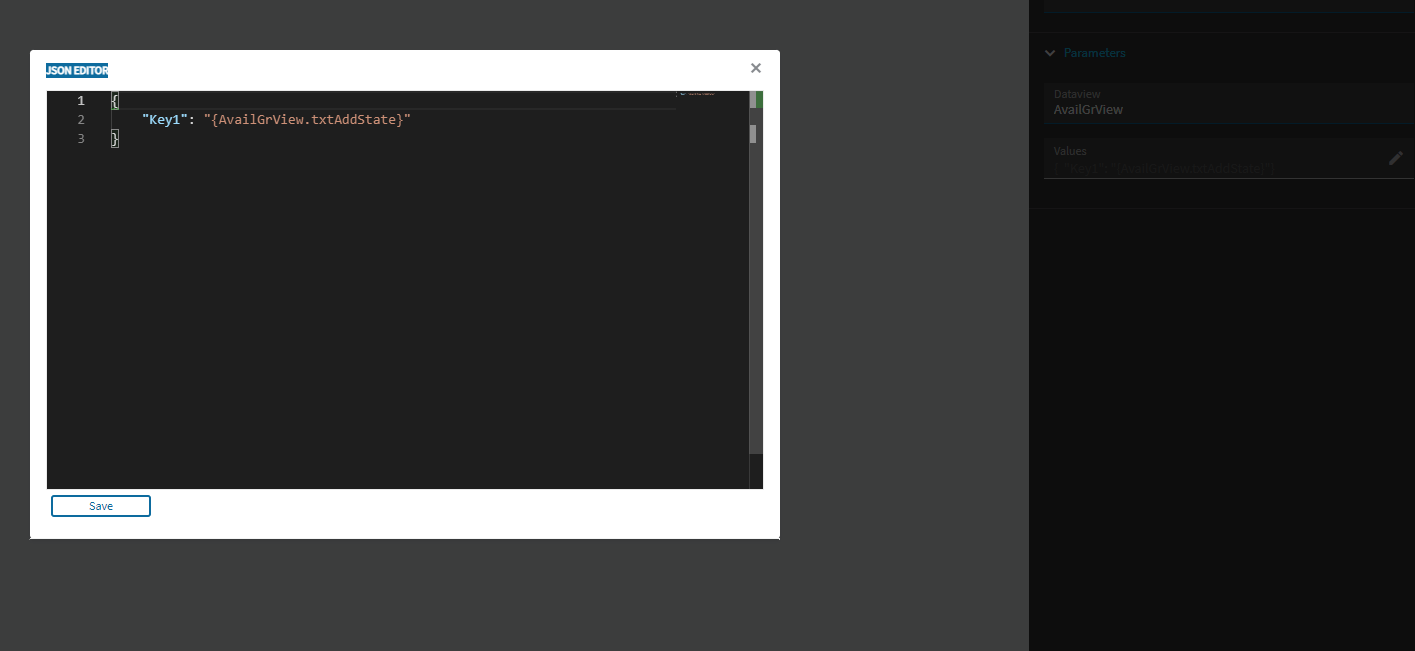
Use the Response Parameter to populate the view:
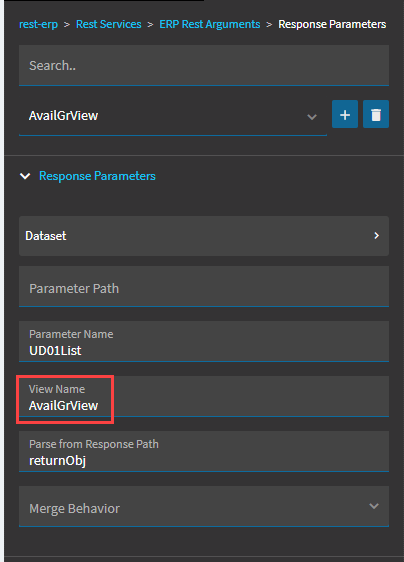
Parameter Name: This is the name of the table from the JSON (Yellow Highlight Below)
View Name: This is the name of the view you want the results dumped into.
Parse from Response Path: This is typically going to be returnObj (purple highlight below) unless it’s a custom REST call.

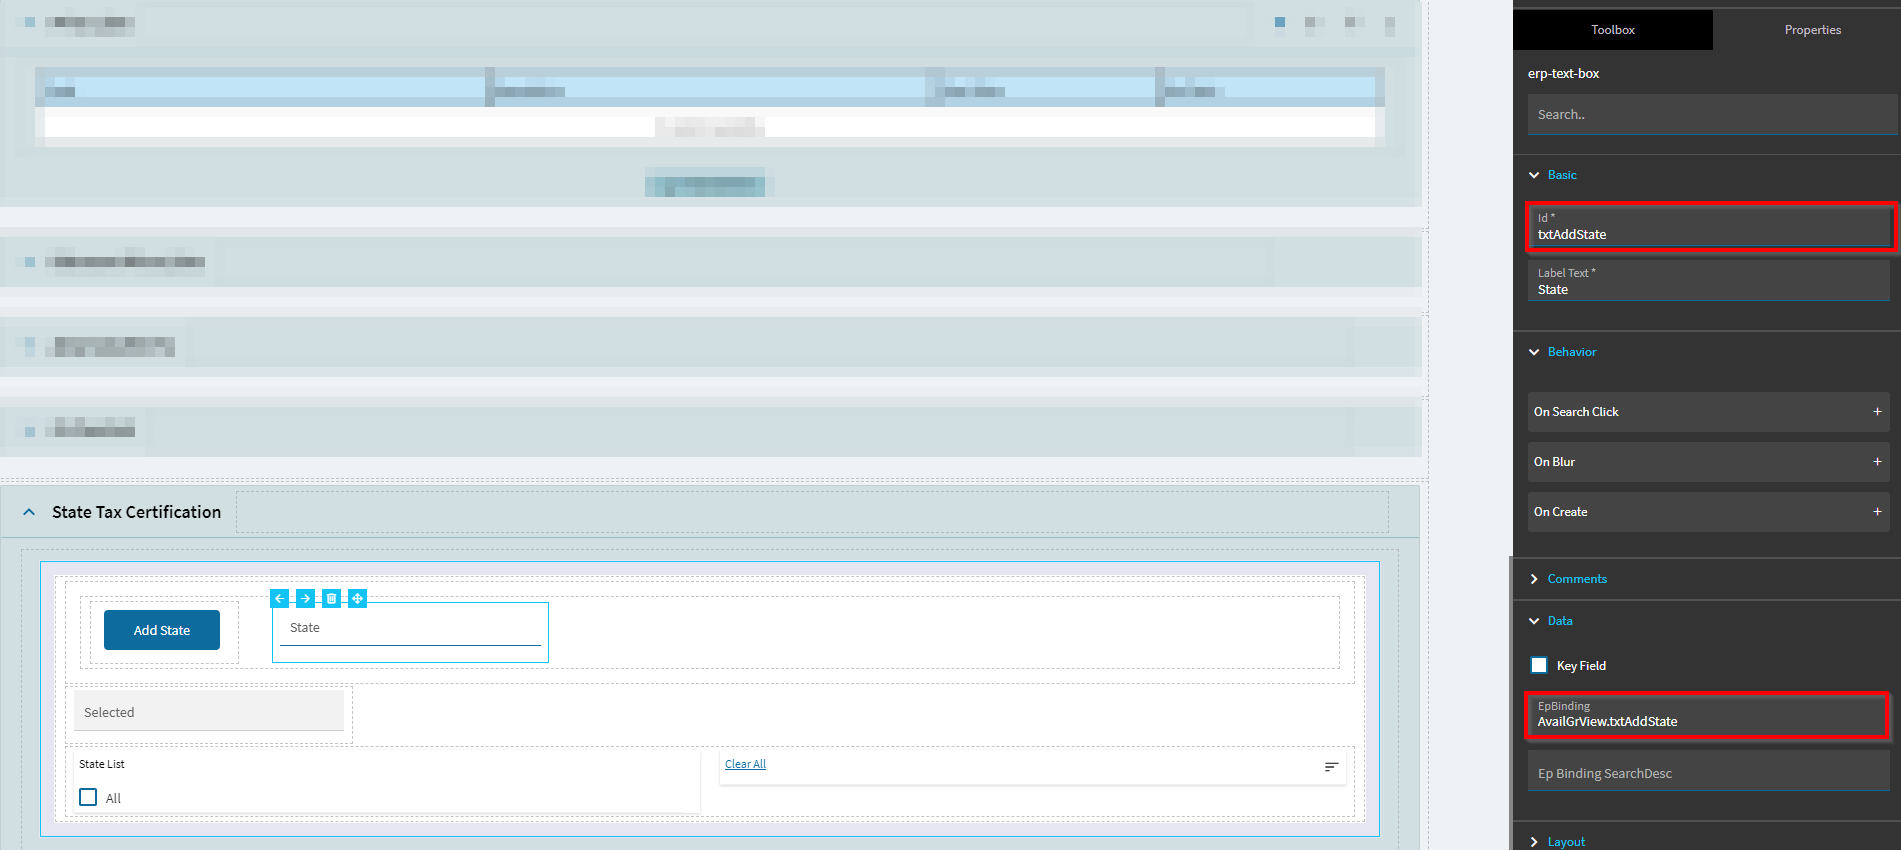
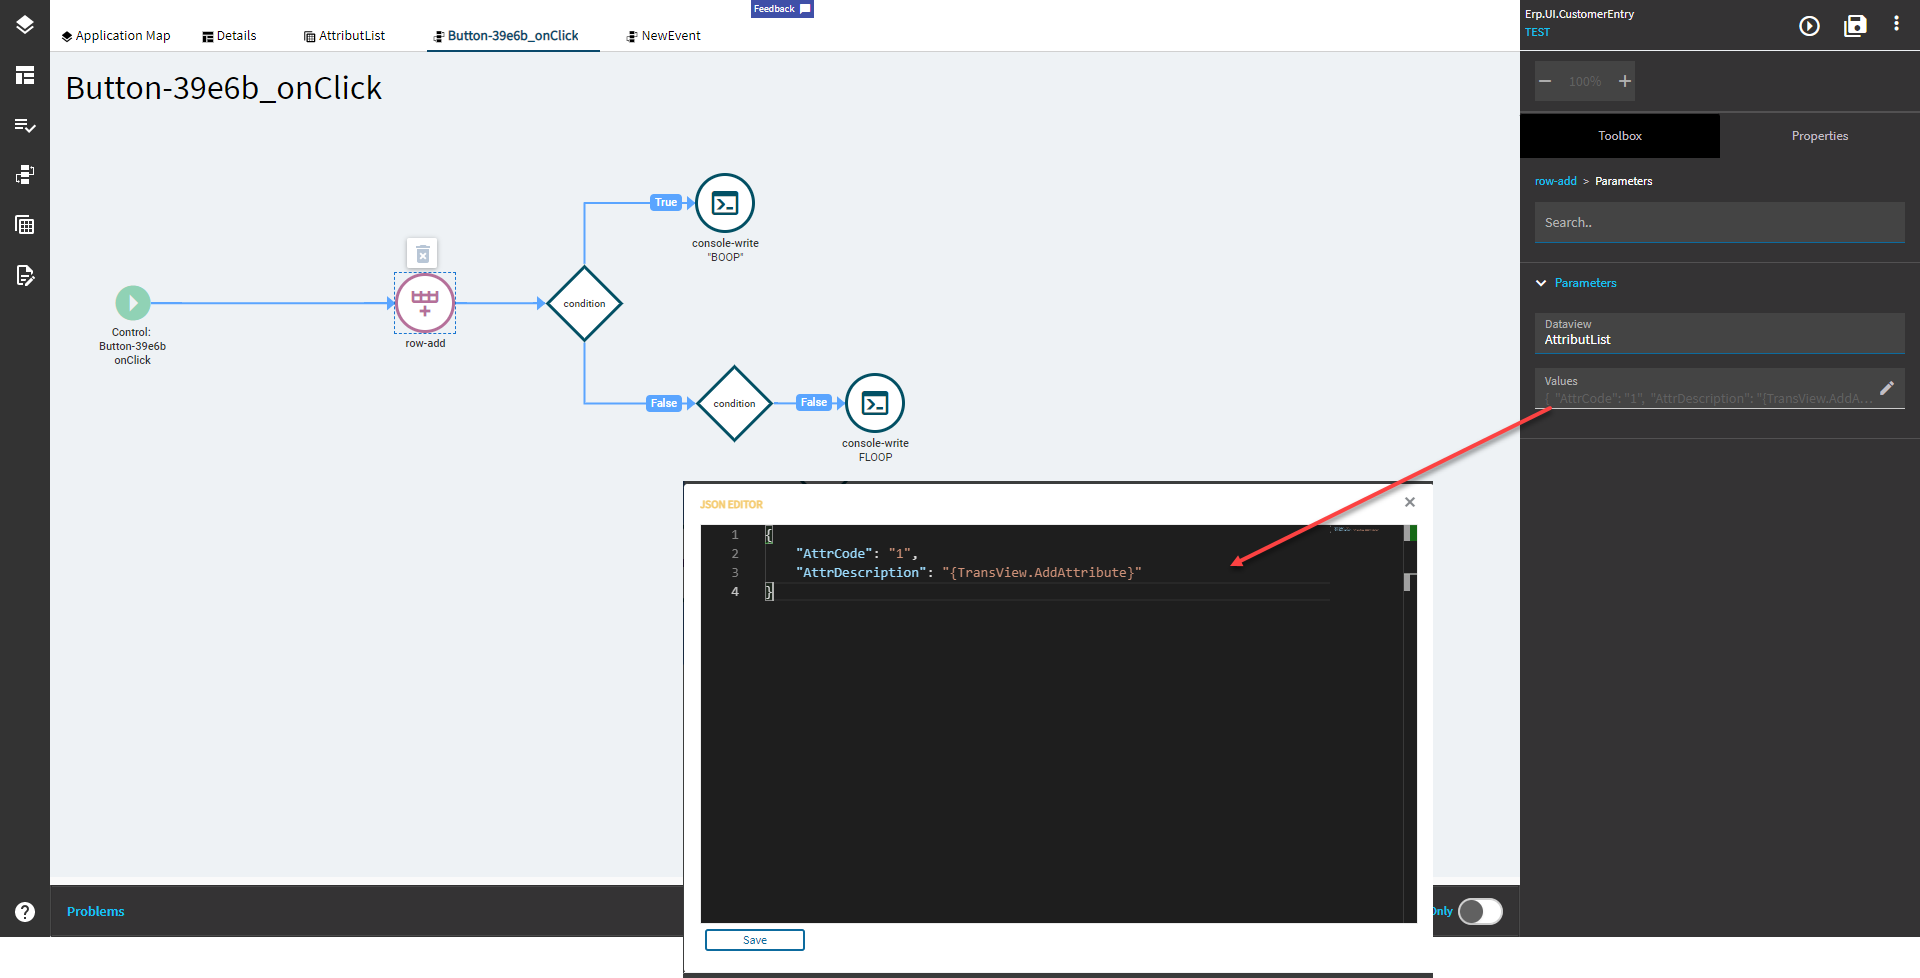
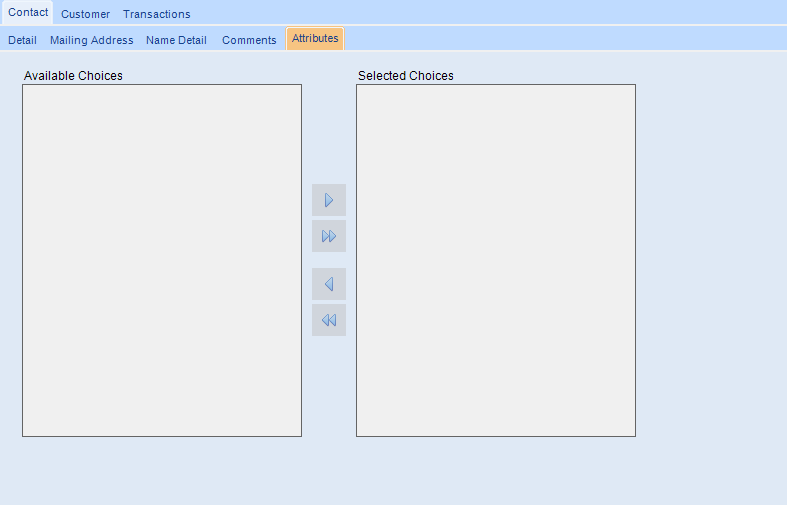
- Go to the Toolbox and add a Selection List to your designer pane.
- Configure the Selection List as follows:
The EpBinding is not imperative here. It’s not populated with data and will only be used if you have rules or events running againstr the control.
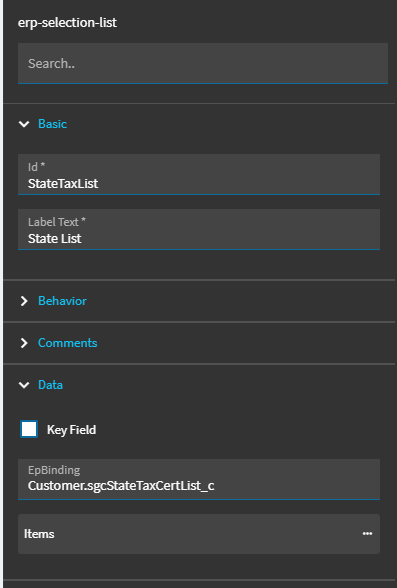
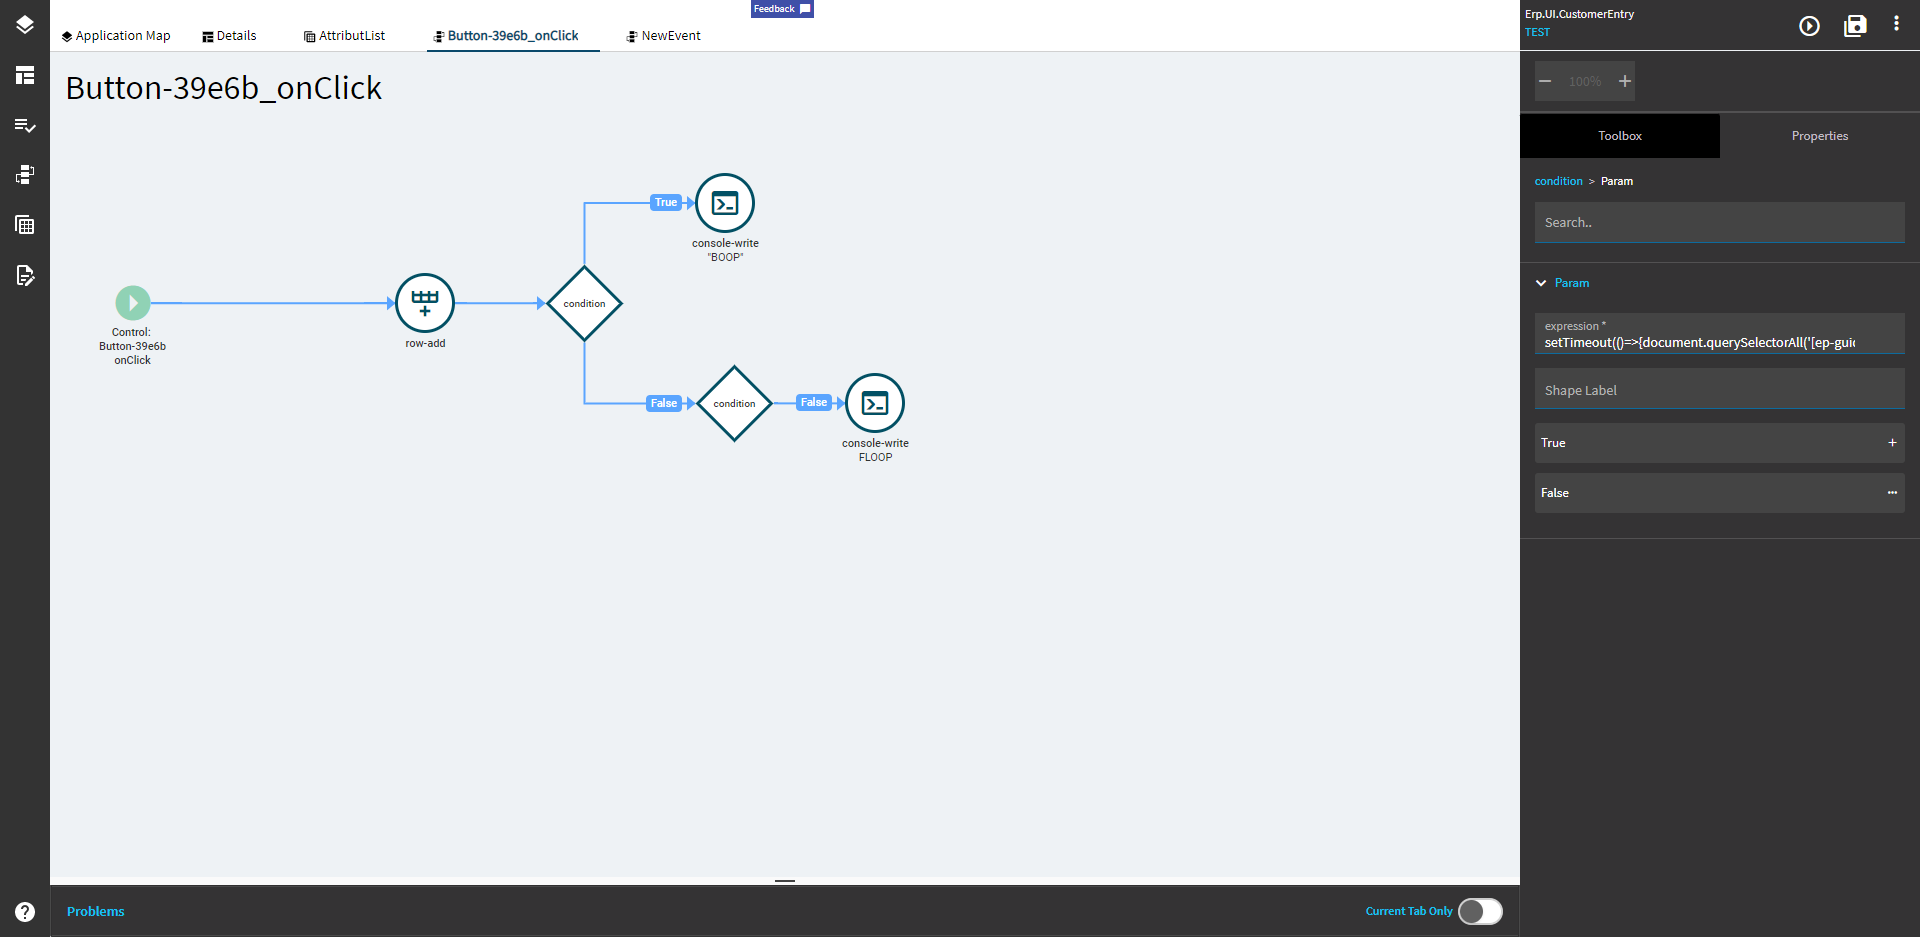
Set the following properties as shown, but relevant for your Views and Columns. Source = Available and Target = Selected.
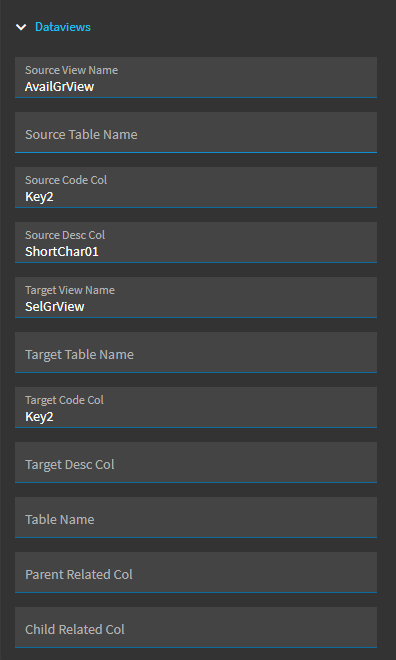
Source View Name: This is the DataView that holds the available options
Source Code Col: Enter the value-based column name from the Source View; this will be stored when selected.
Source Desc Col: Enter the description-based column name from the Source View; this will be what’s displayed on the list control.
Target View Name: This is the name of the DataView where you wanted the selected items to end up.
Target Code Col: This is the column you want the selected data saved to within the Target View Name
Select Dual for Mode Types. This will give you the double column list that displays the available and selected. Specify a number of rows to show. Leave the rest as shown.
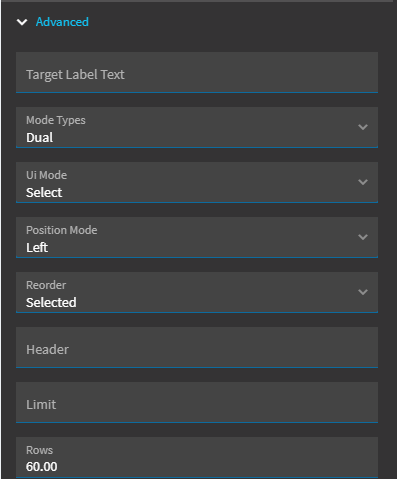
Select the Delimited checkbox and select the delimiter you used in your EpBinding field.
Ours is tilde-based, so SelGrView.Key2 will look like: AK~WI~IL~OH

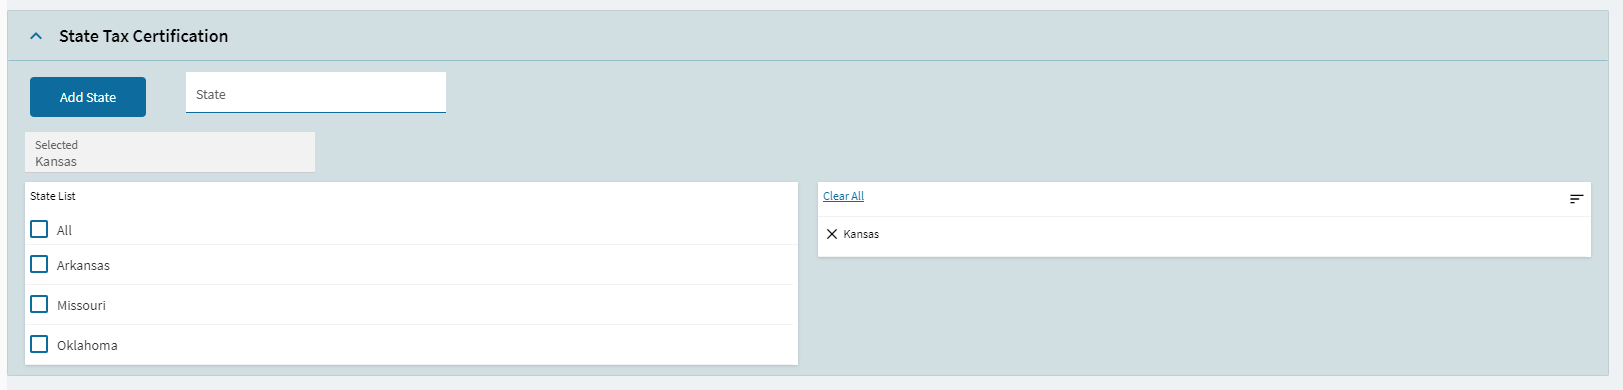
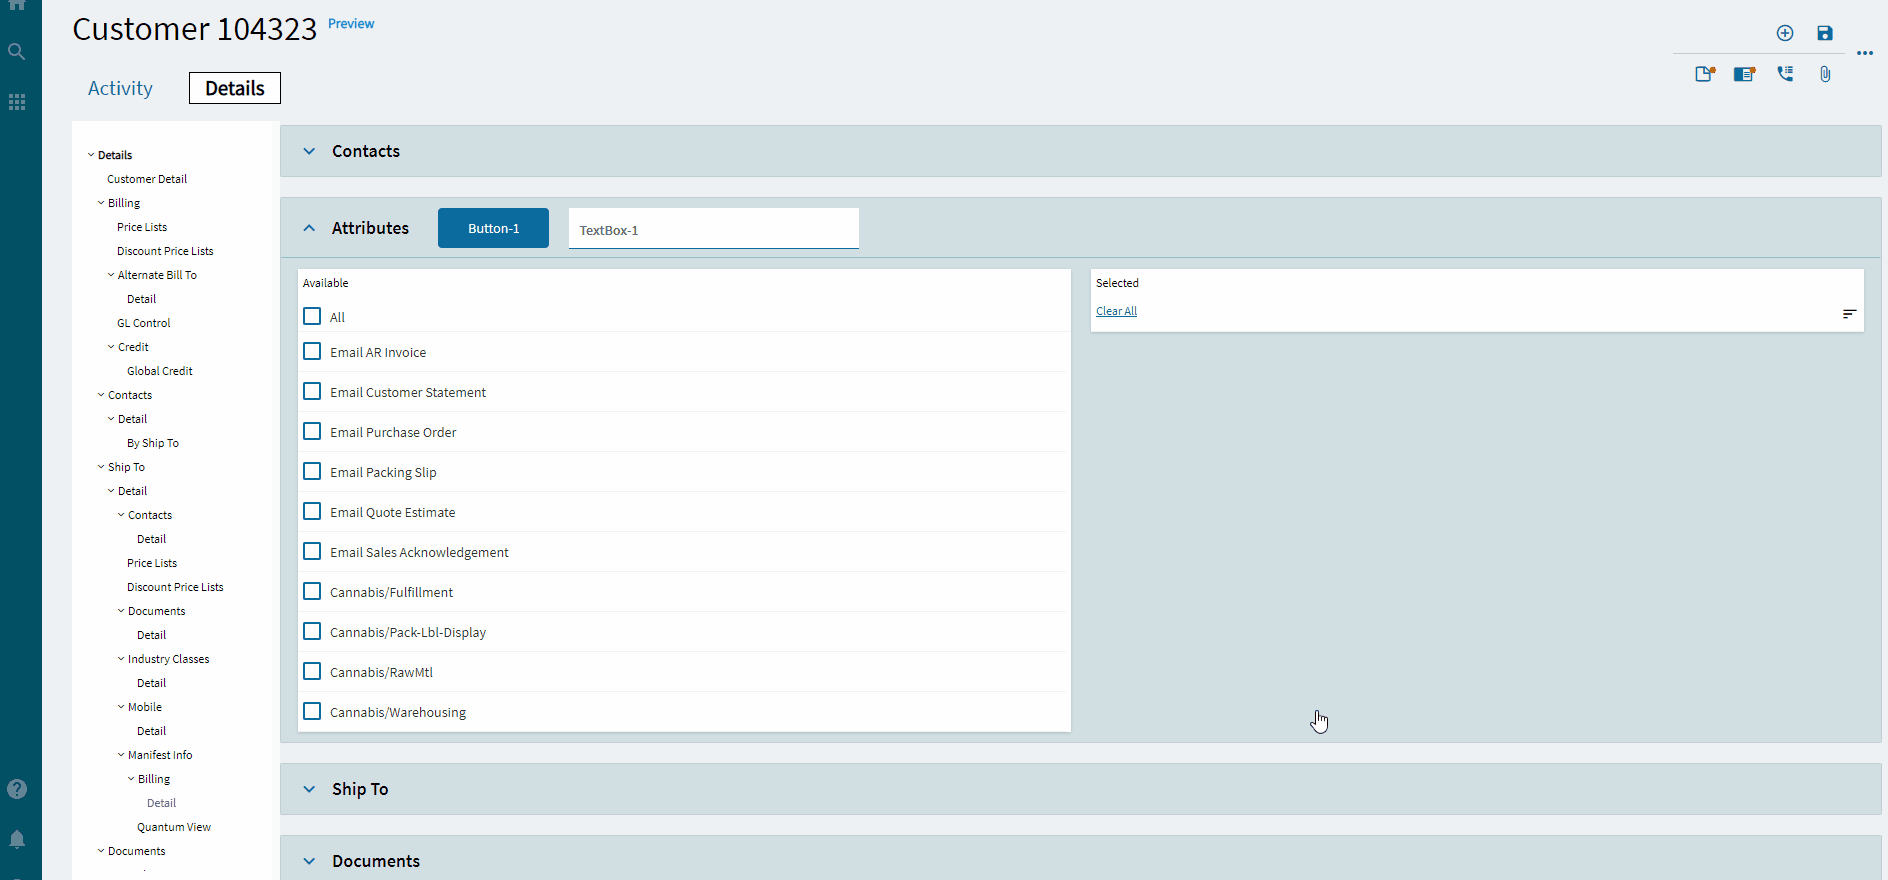
Preview your layer and you should get something like this!
Enjoy!