This example will cover using a function that calls a BAQ that accepts an input paramater and then returns the result dataset as an output parameter from the function to the calling Kinetic app and populates a dataview and displays some of the fields.
-
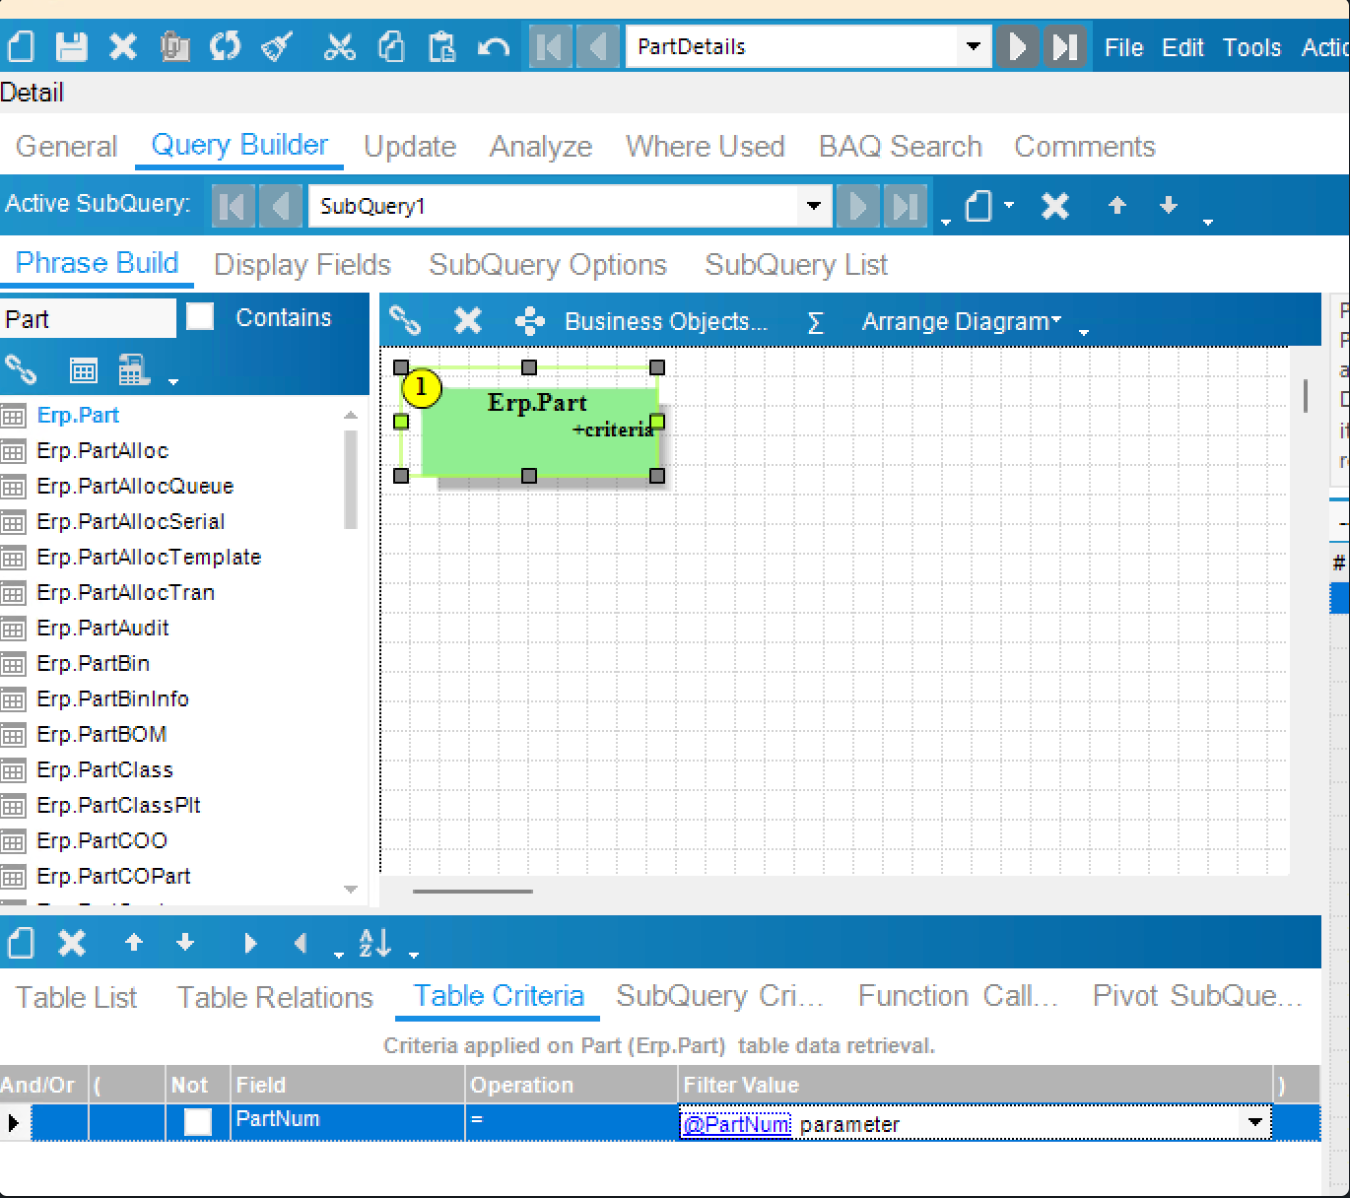
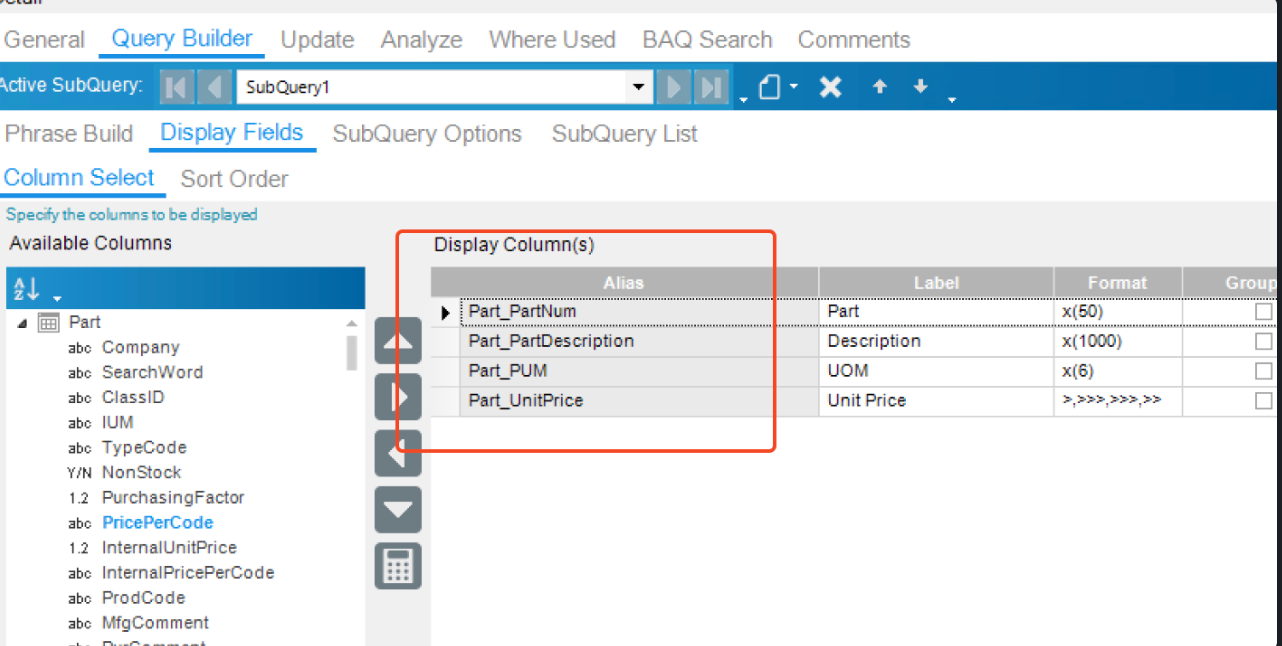
It is assumed that a BAQ has already built and has been configured to accept at least one parameter:
-
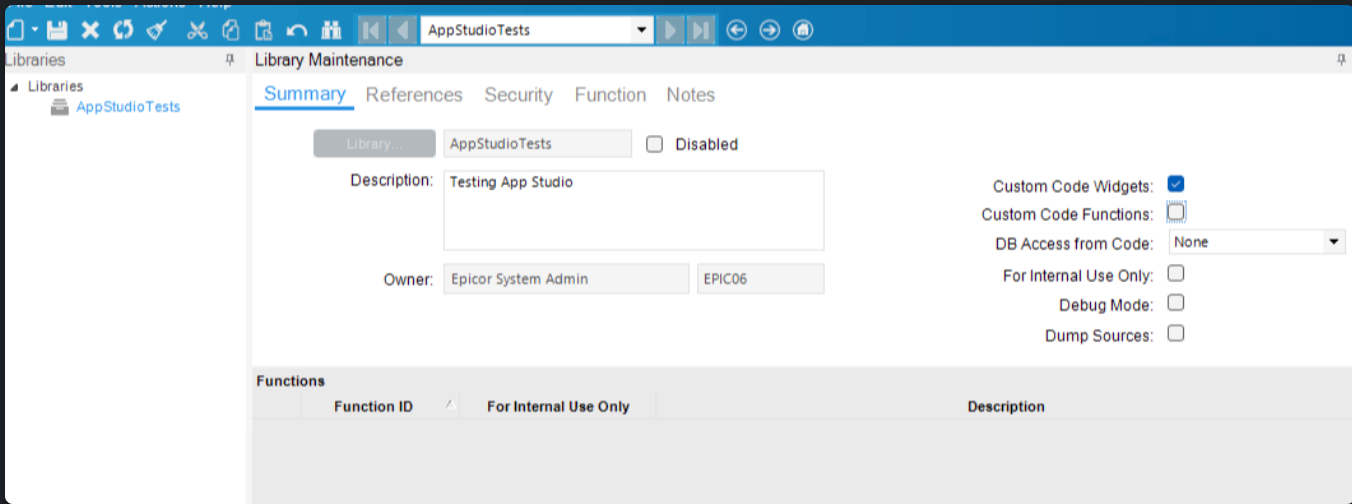
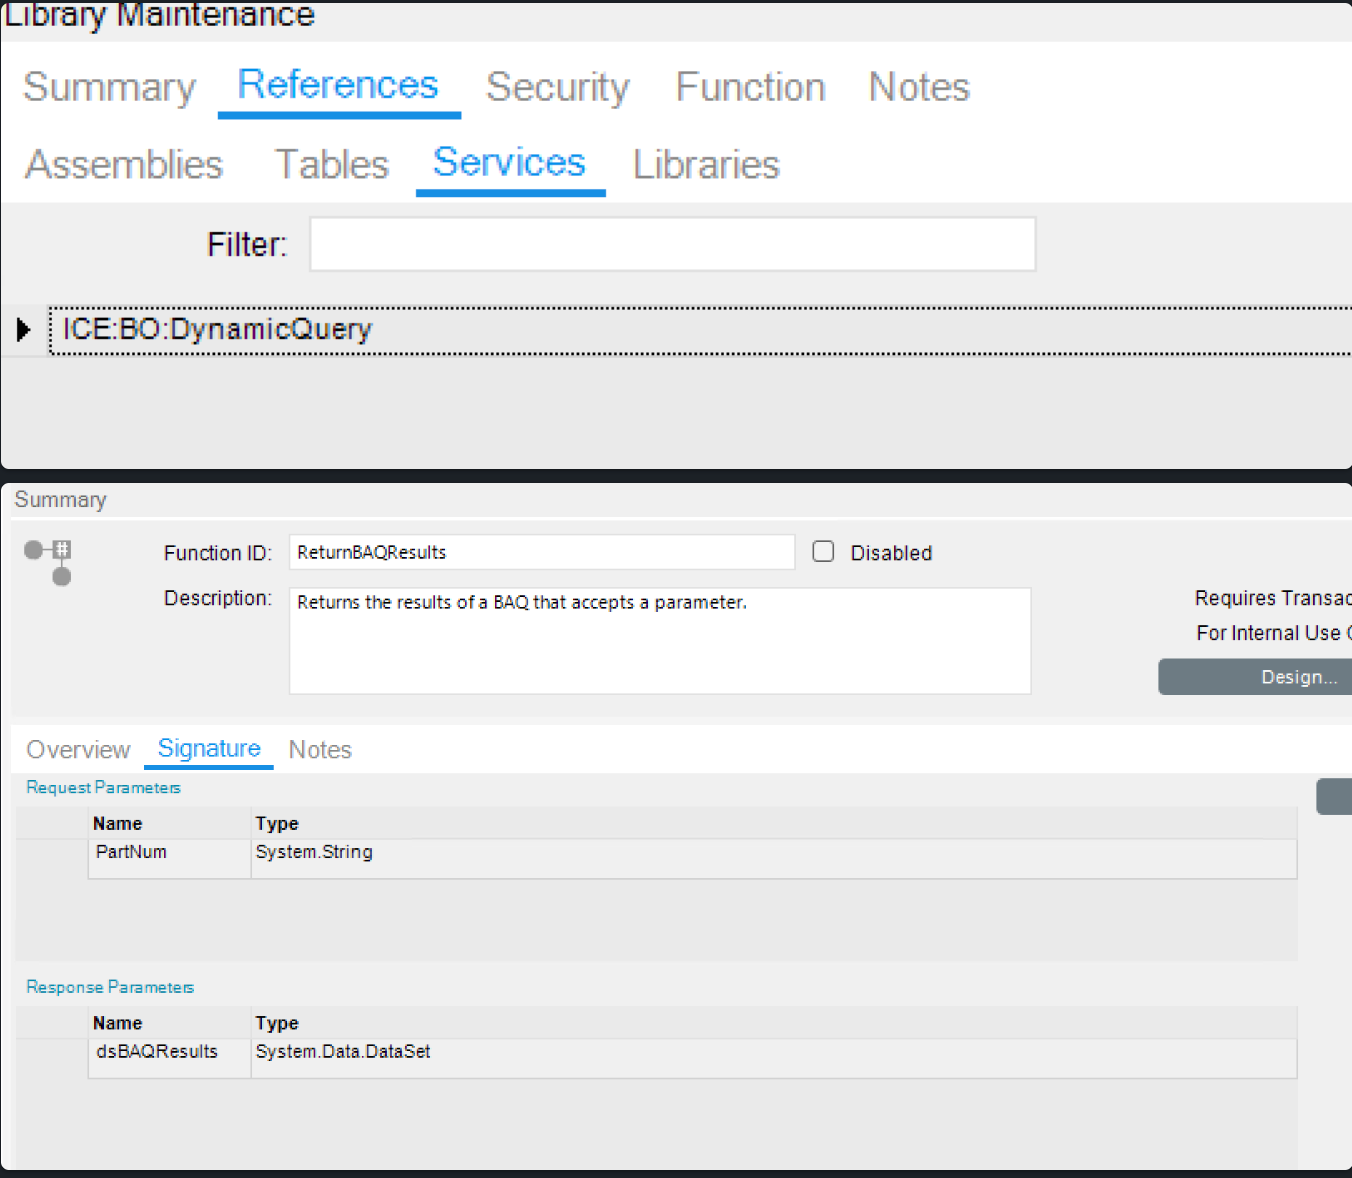
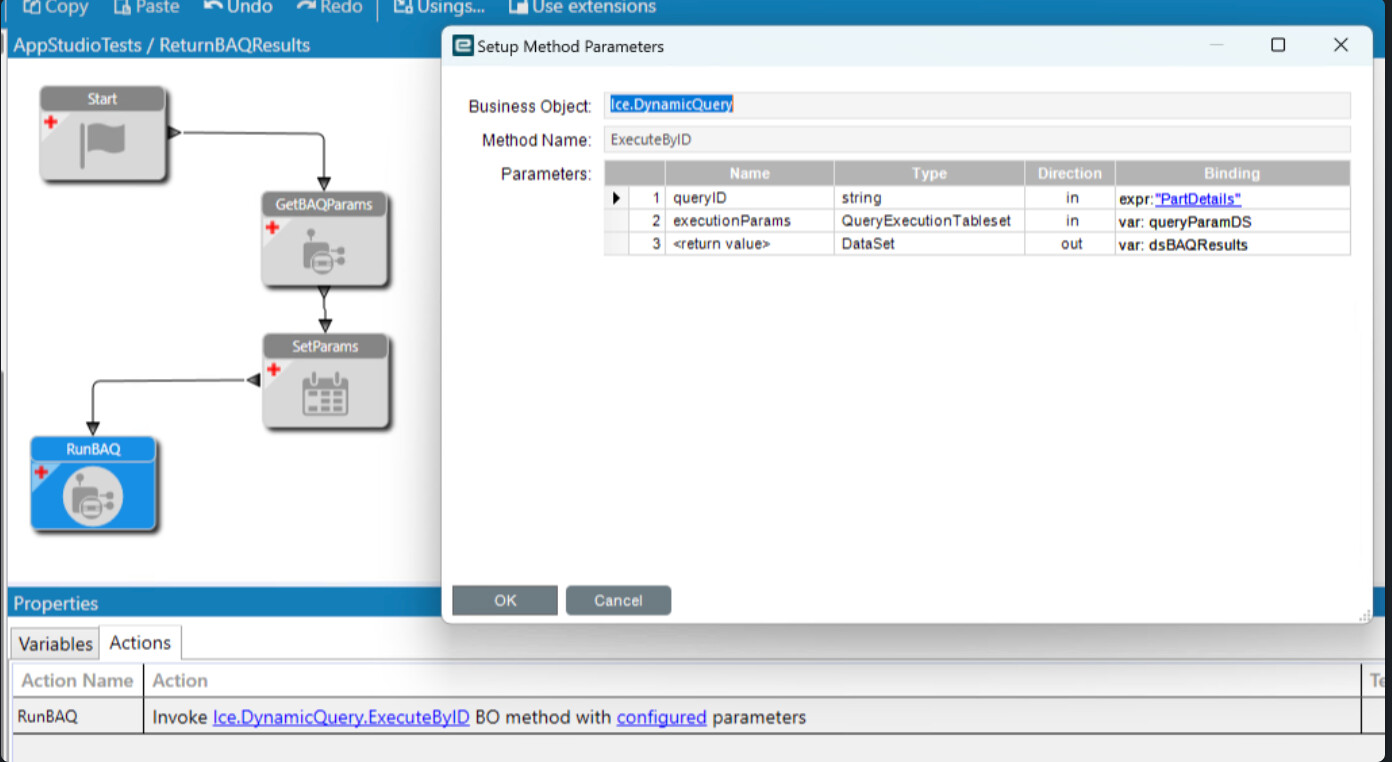
The Epicor Function will be set up as follows (you don’t actually need the “custom code widget” flag):
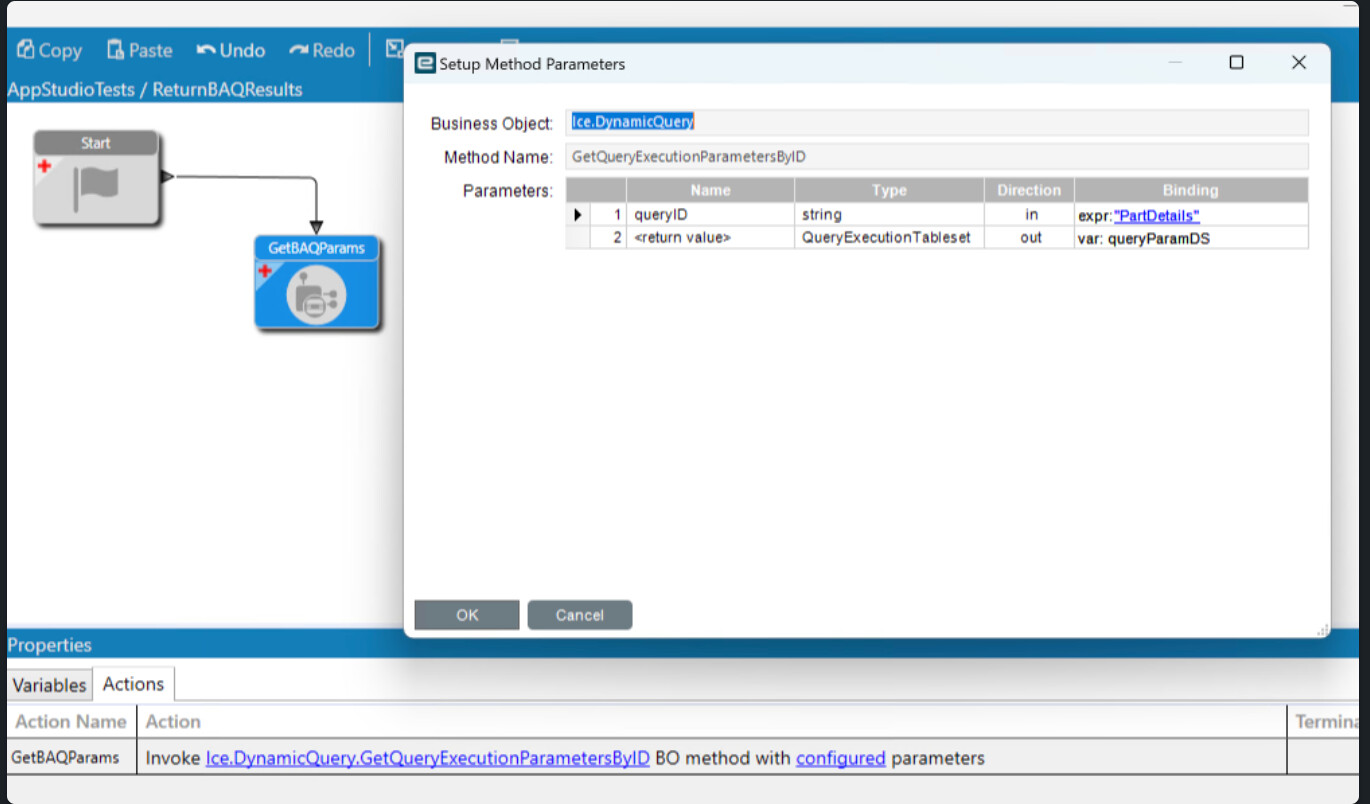
Since we are only passing one parameter, we’ll use the set field widget
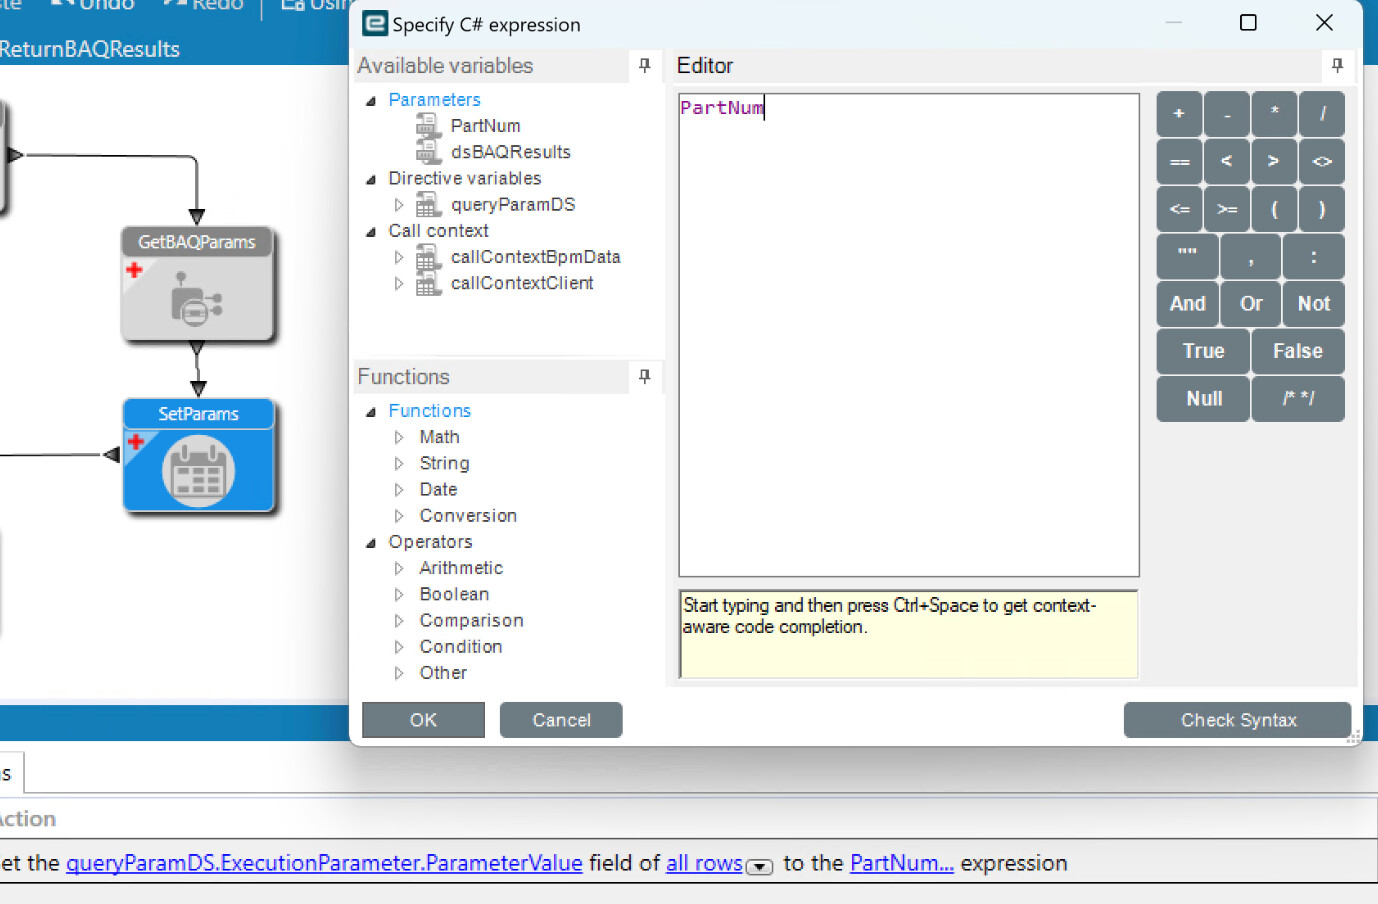
-
Navigate to App Studio for the screen that you will want to call the function from
-
Create a new layer or use an existing one
-
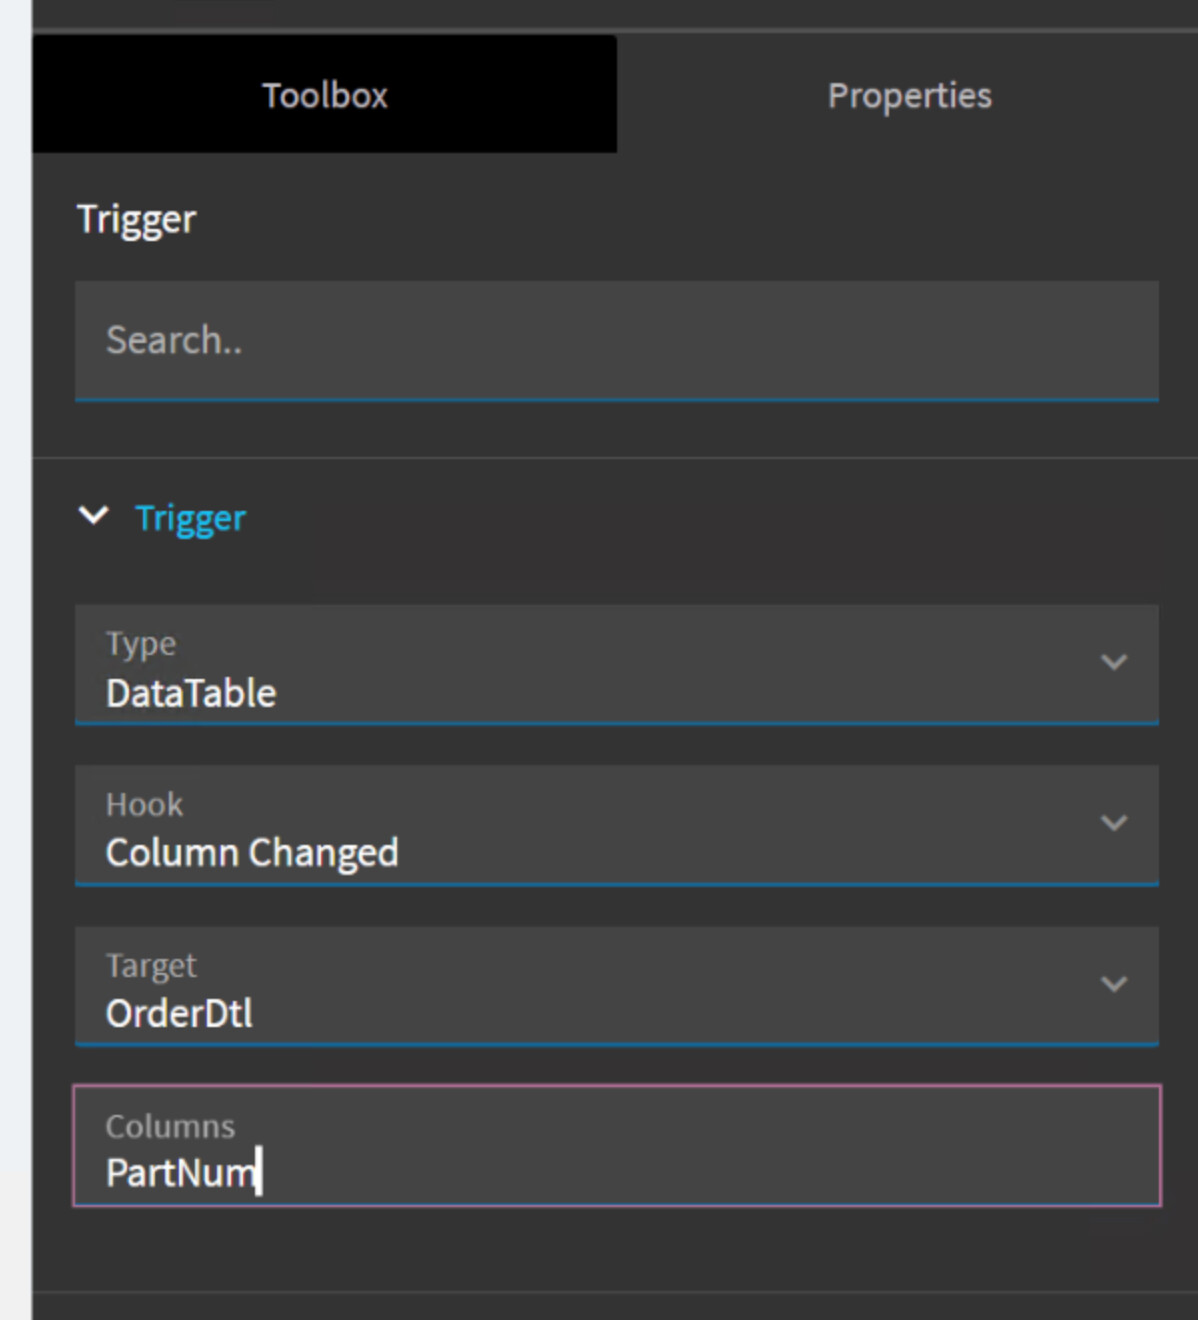
For this example we are going to create an event that triggers when a part number is populated on an order detail line in order entry
-
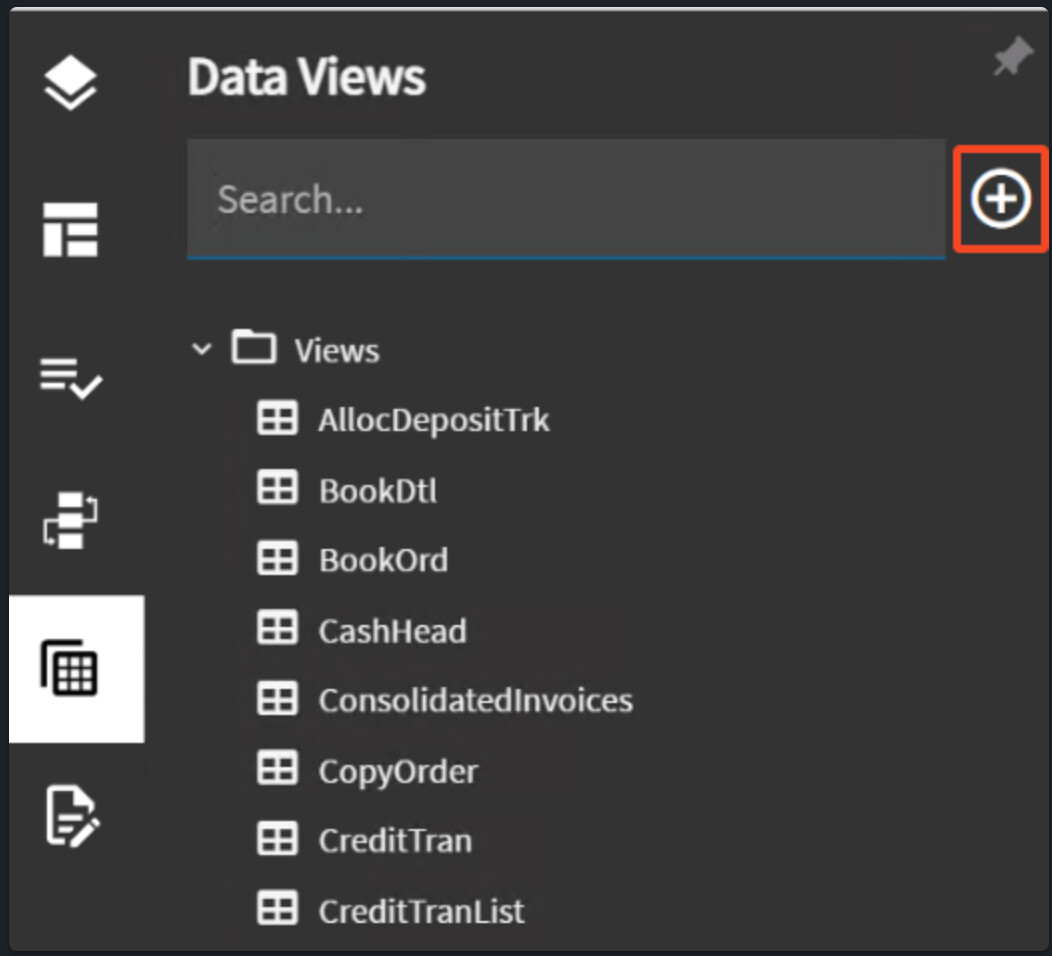
Create a DataView to hold the results of our function response:
1)
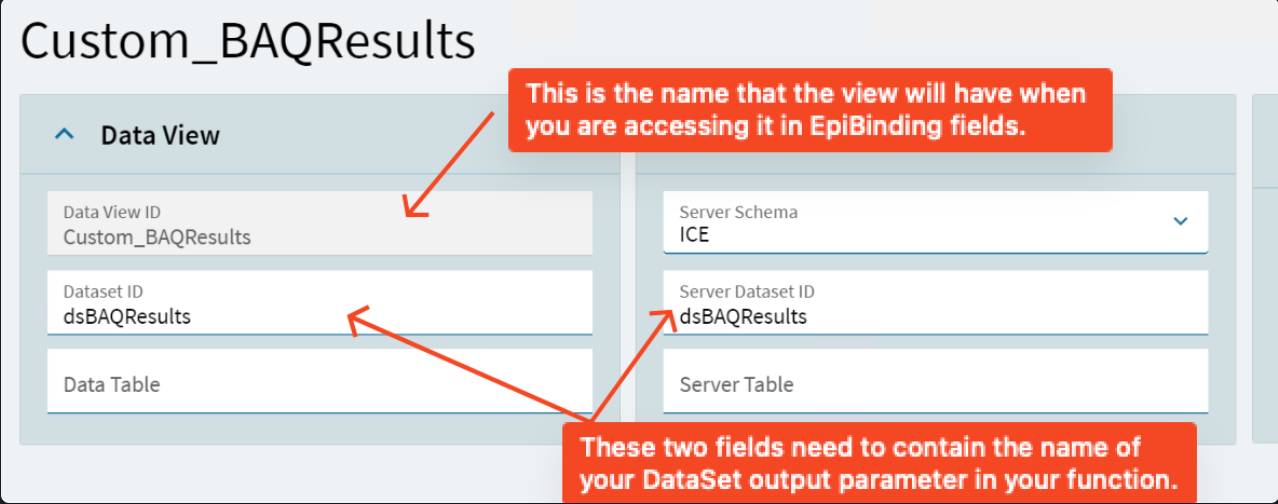
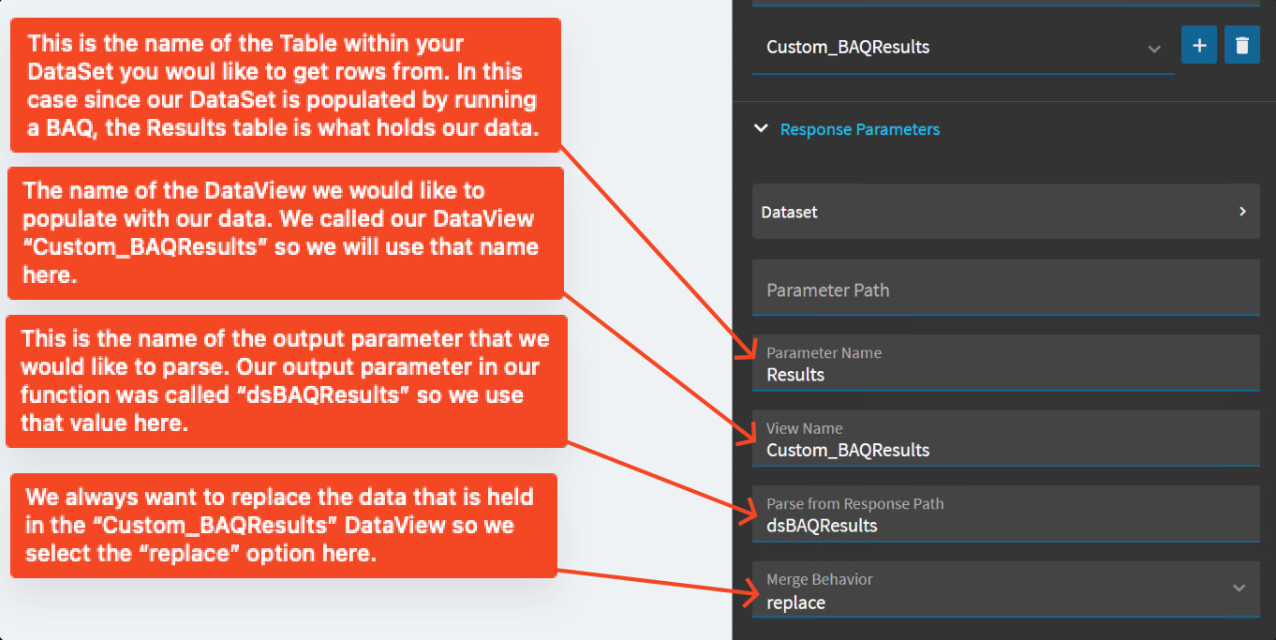
- We populate the DataSetID fields with whatever we called our DataSet output parameter in our function. We called our DataSet output parameter dsBAQResults so we need to use that same value for our DataSetID otherwise Epicor will not be able to parse it and populate our DataView.
- We populate the DataSetID fields with whatever we called our DataSet output parameter in our function. We called our DataSet output parameter dsBAQResults so we need to use that same value for our DataSetID otherwise Epicor will not be able to parse it and populate our DataView.
-
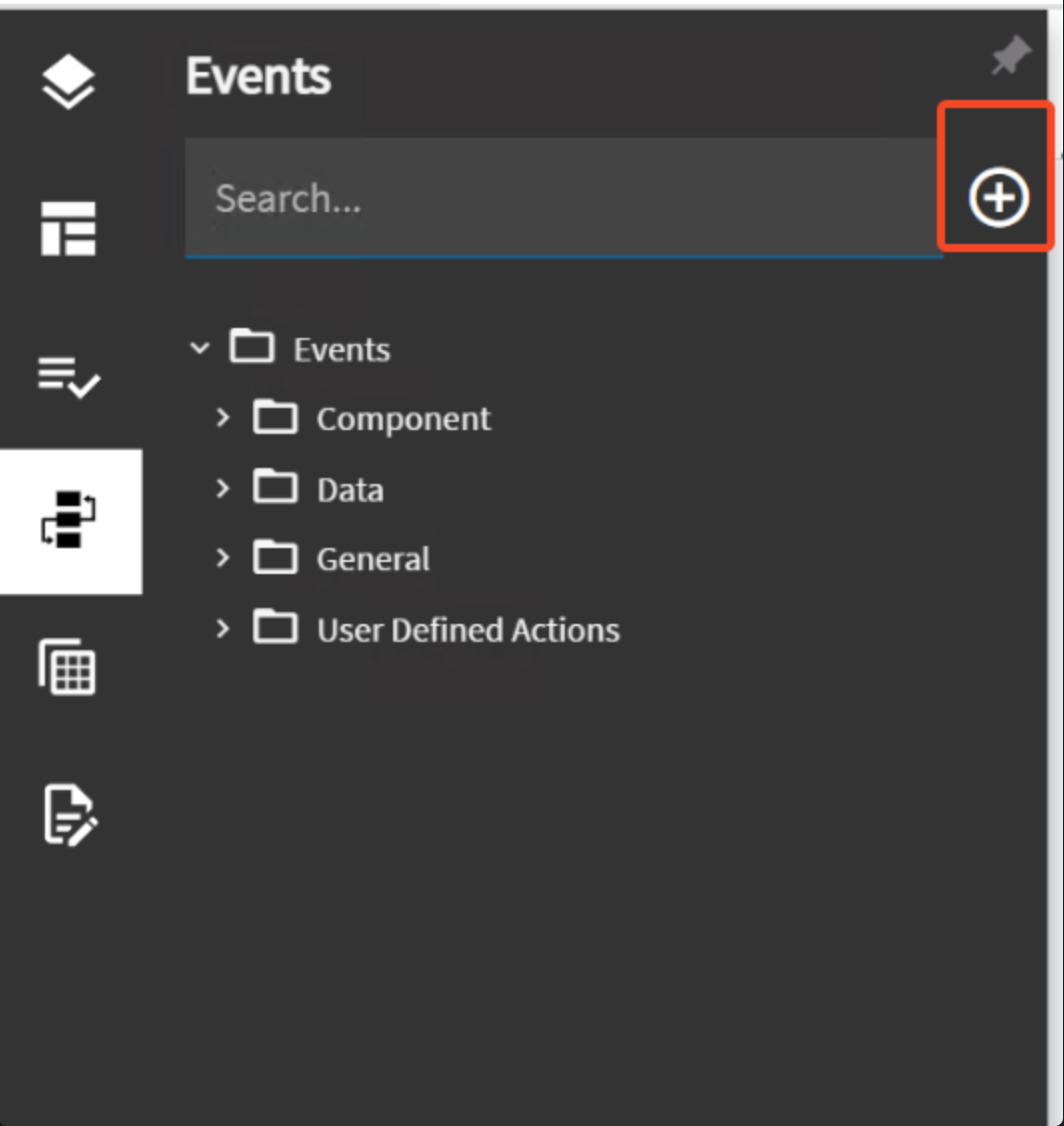
Create a new event:
-
Give the event a name
-
Set the event trigger to the following:
-
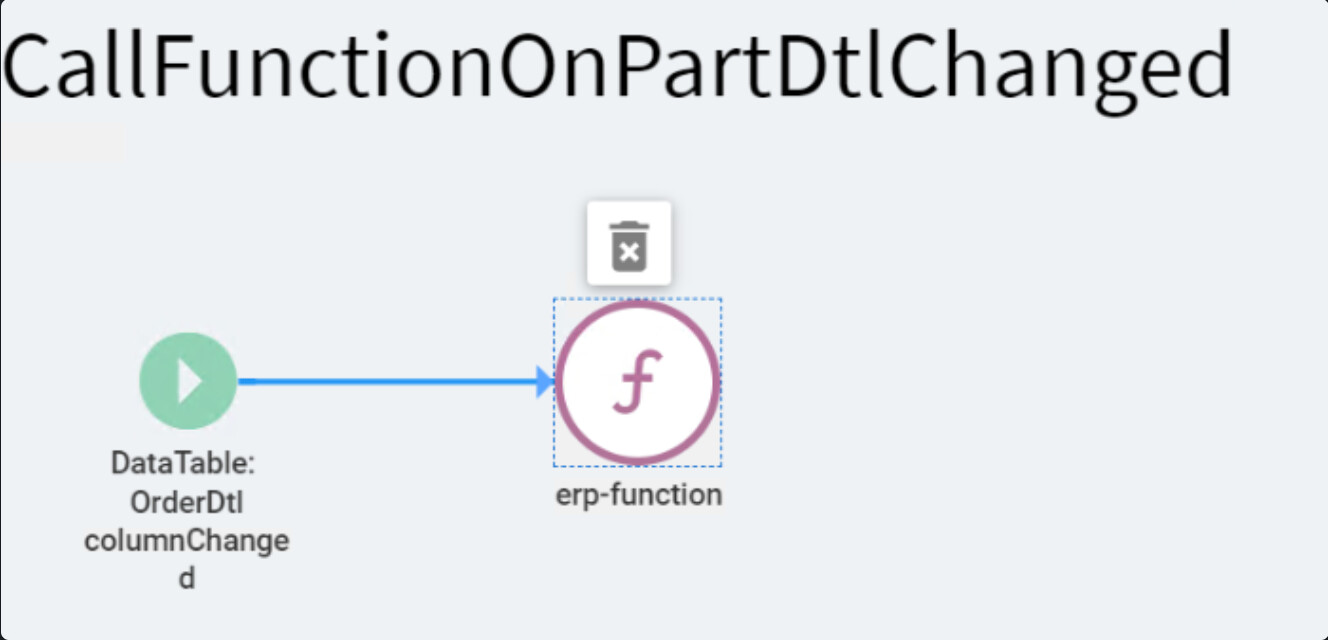
Add an erp-function widget to the designer:
-
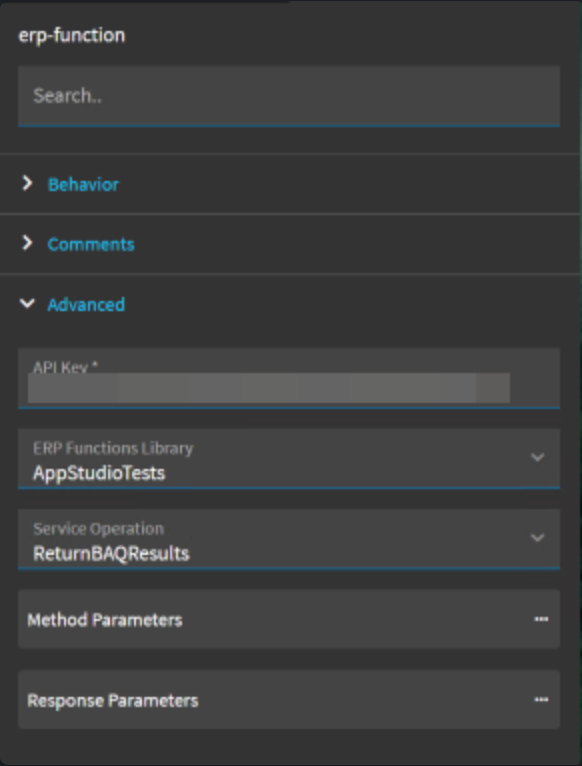
Set it up as follows:
1)Top level settings:
-
Set each method parameter (these are the inputs for your Epicor Function). Note: Earlier versions of Kinetic do not automatically populate your function input parameters, in that case you will just create one Method Parameter in this panel for each Function Input Parameter you have and set the field name and data type to match what is defined in your function.
-
Navigate to the Respose Parameters panel and create a new response parameter (we only have one in this case as we are only returning one thing from our function: the dsBAQResults DataSet)
-
Populate it with the following information:
-
-
Let’s confirm that we are indeed now populating our Custom_BAQResults DataView.
-
Make sure you have saved your changes
-
Click on the Play button on the top right of App Studio to launch your layer
-
Enable Debugging:
-
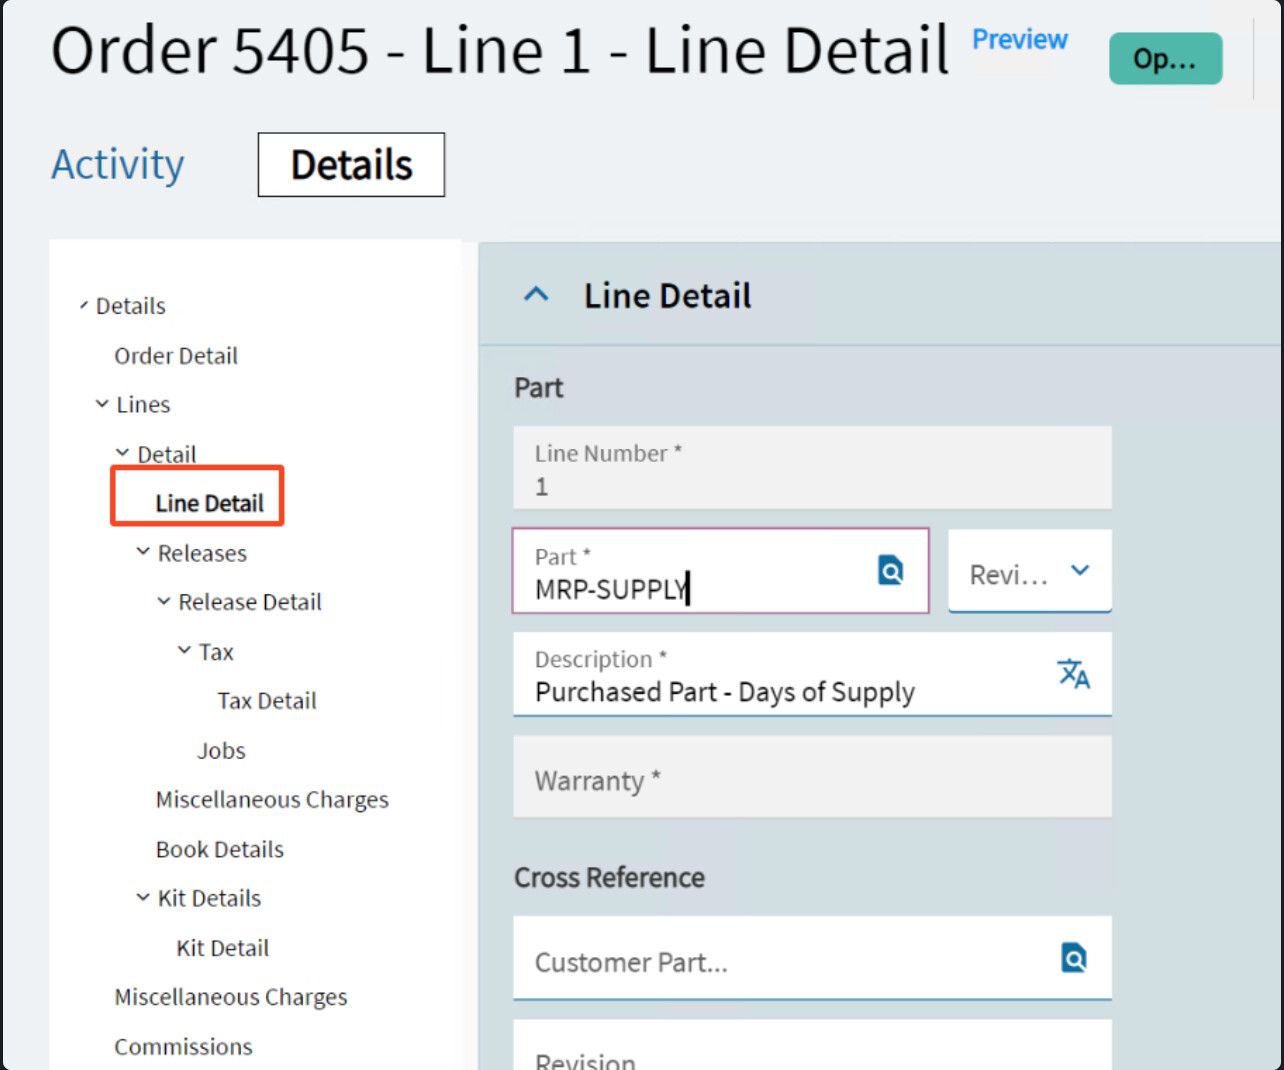
Load in a record and navigate to the Line Detail page:
-
Open the dev tools panel with
Ctrl + Shift + i -
Change the part number or add a line/part if not using an existing line
-
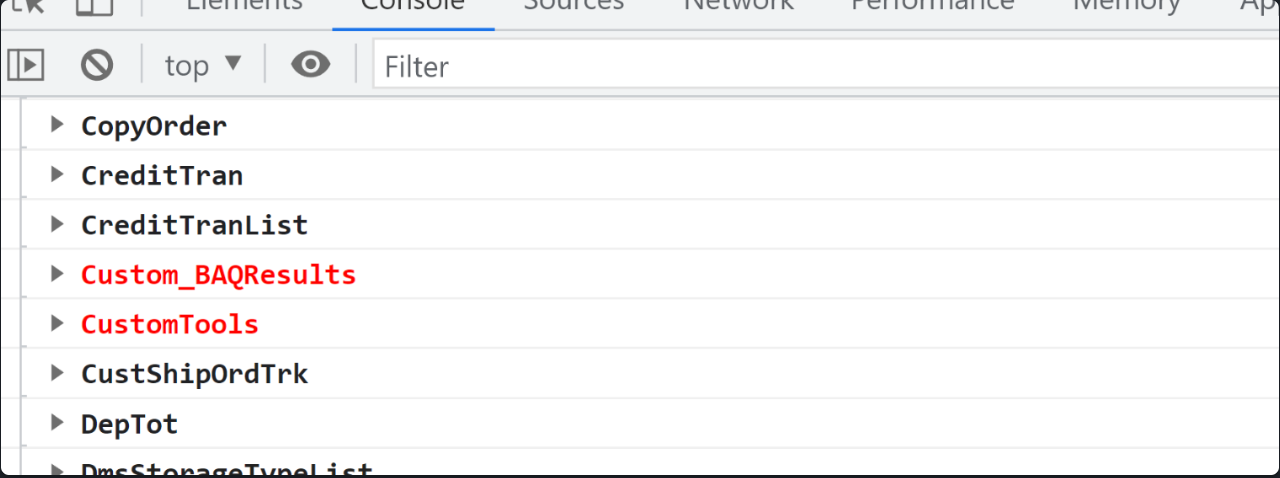
This should have triggered our event, so let’s log our DataViews to the dev console by using
Ctrl + Alt + v:
- The red text indicates that a DataView has been updated
-
Expand the Custom_BAQResults DataView to make sure we populated it:
-
Success!
-
-
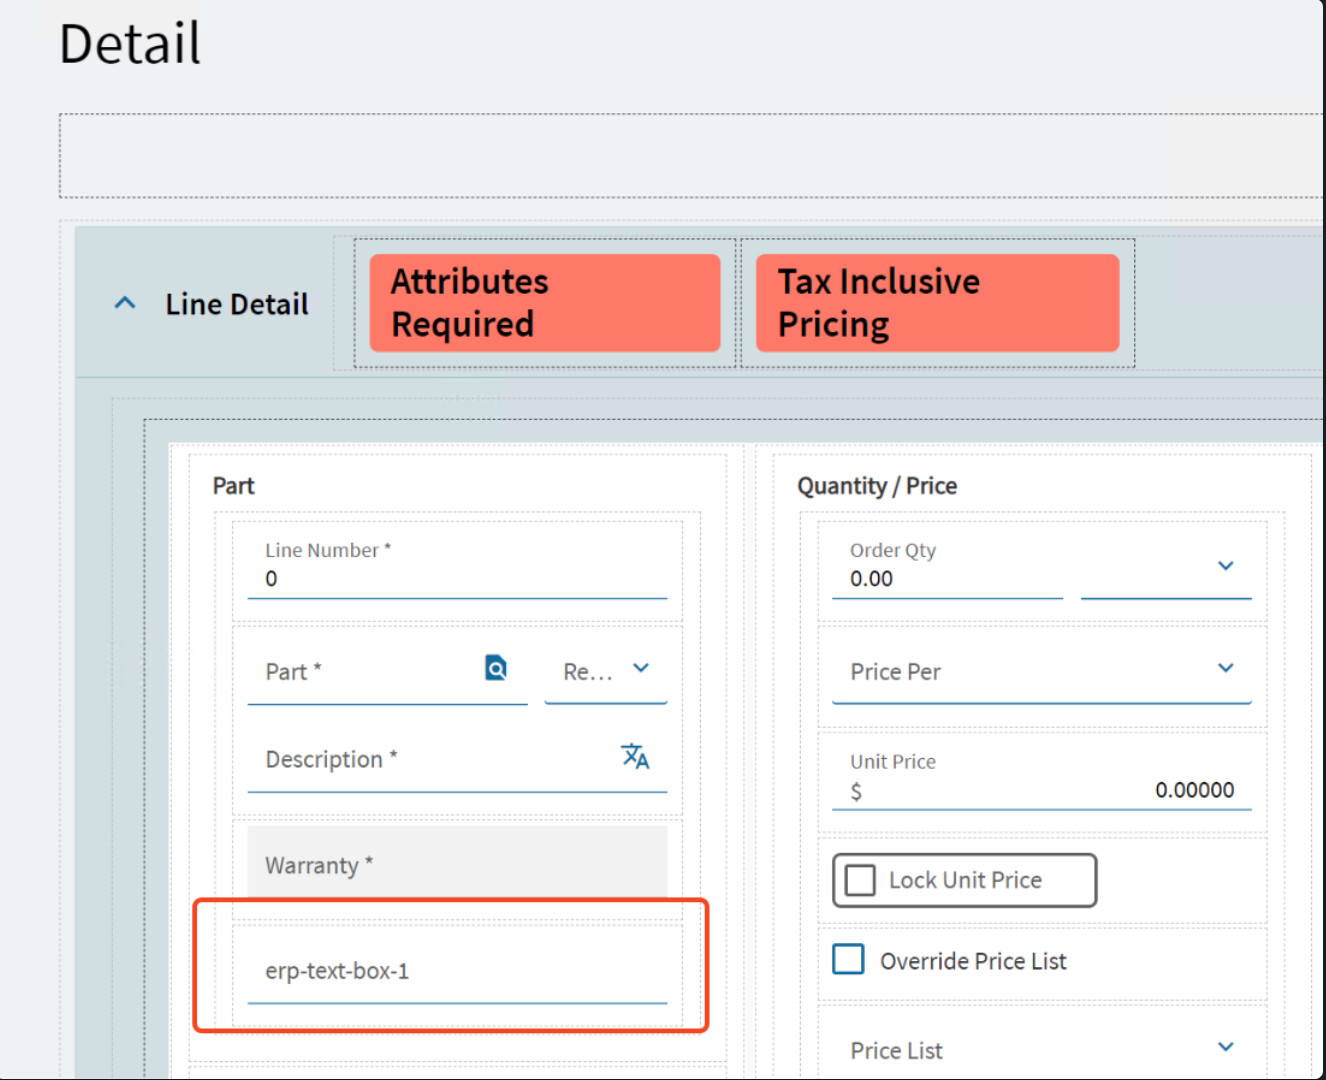
Now we will set up a new field to hold the value of one of our results
-
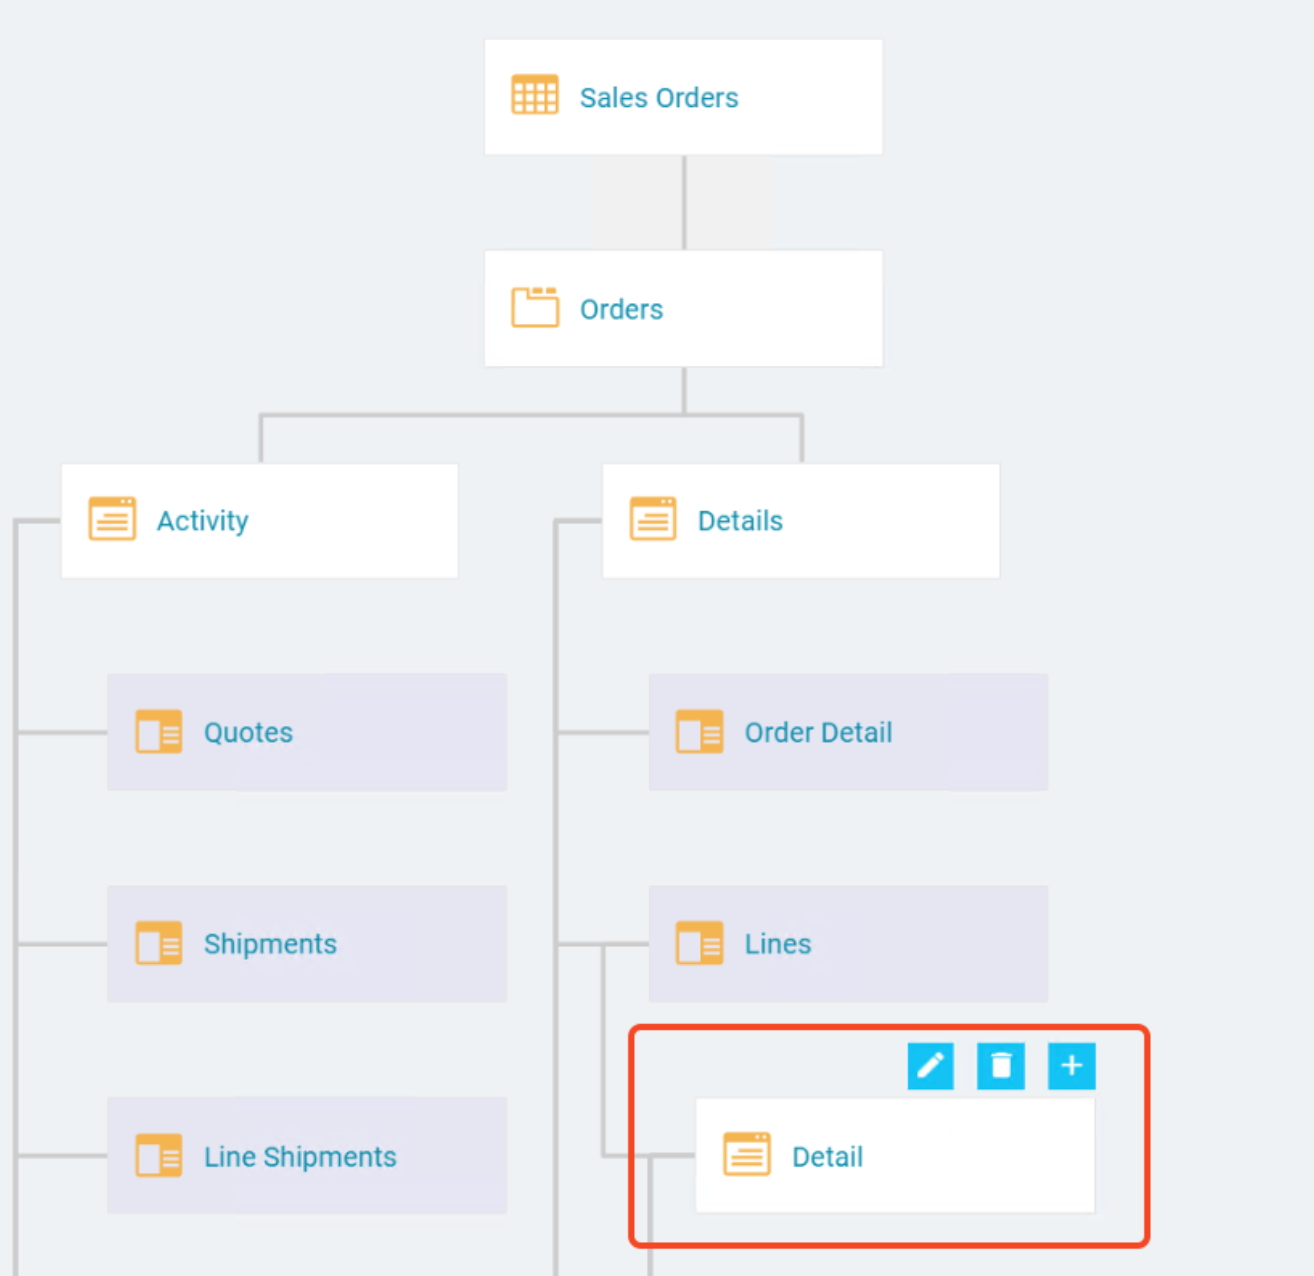
Navigate back to the App Studio tab and on the Application Map, select the Lines → Detail page and click on the Pencil Icon to edit:
-
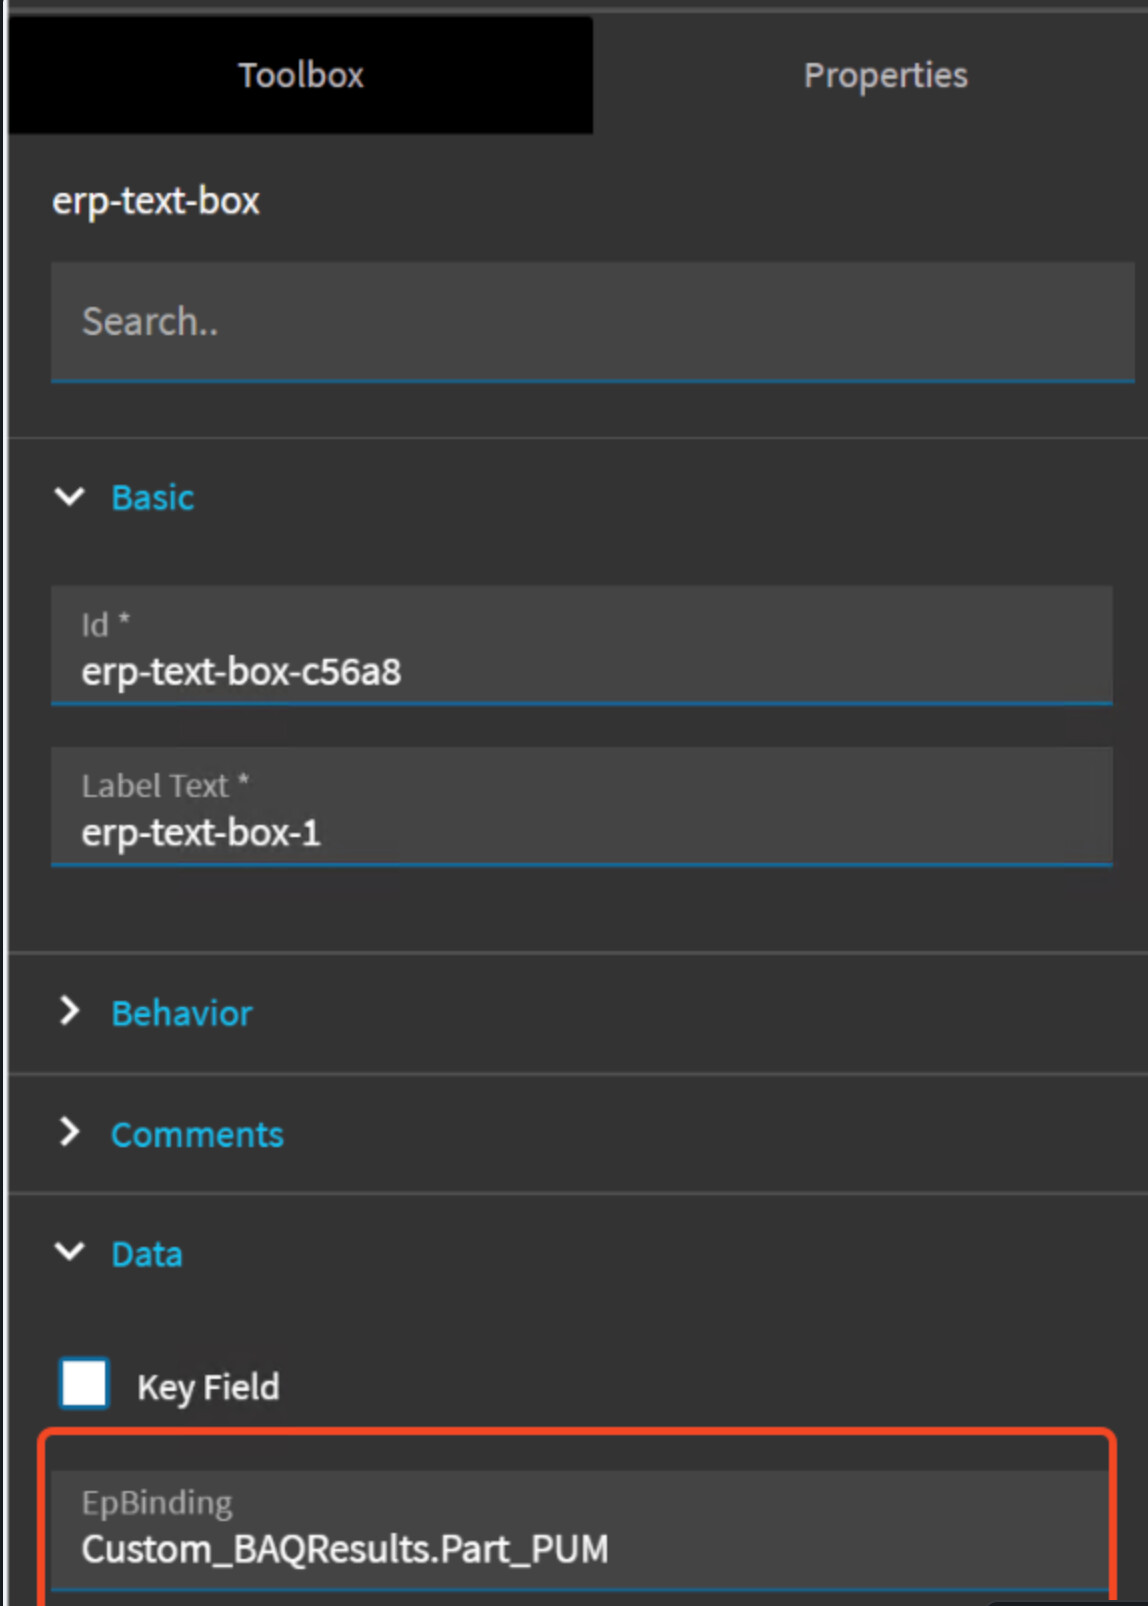
Add a new text box
-
Set the boxes EpiBinding to be one of the columns in our Custom_BAQResults DataView, the names will match the Alias column from our BAQ:
1)
-
Set the EpiBinding of the text box:
-
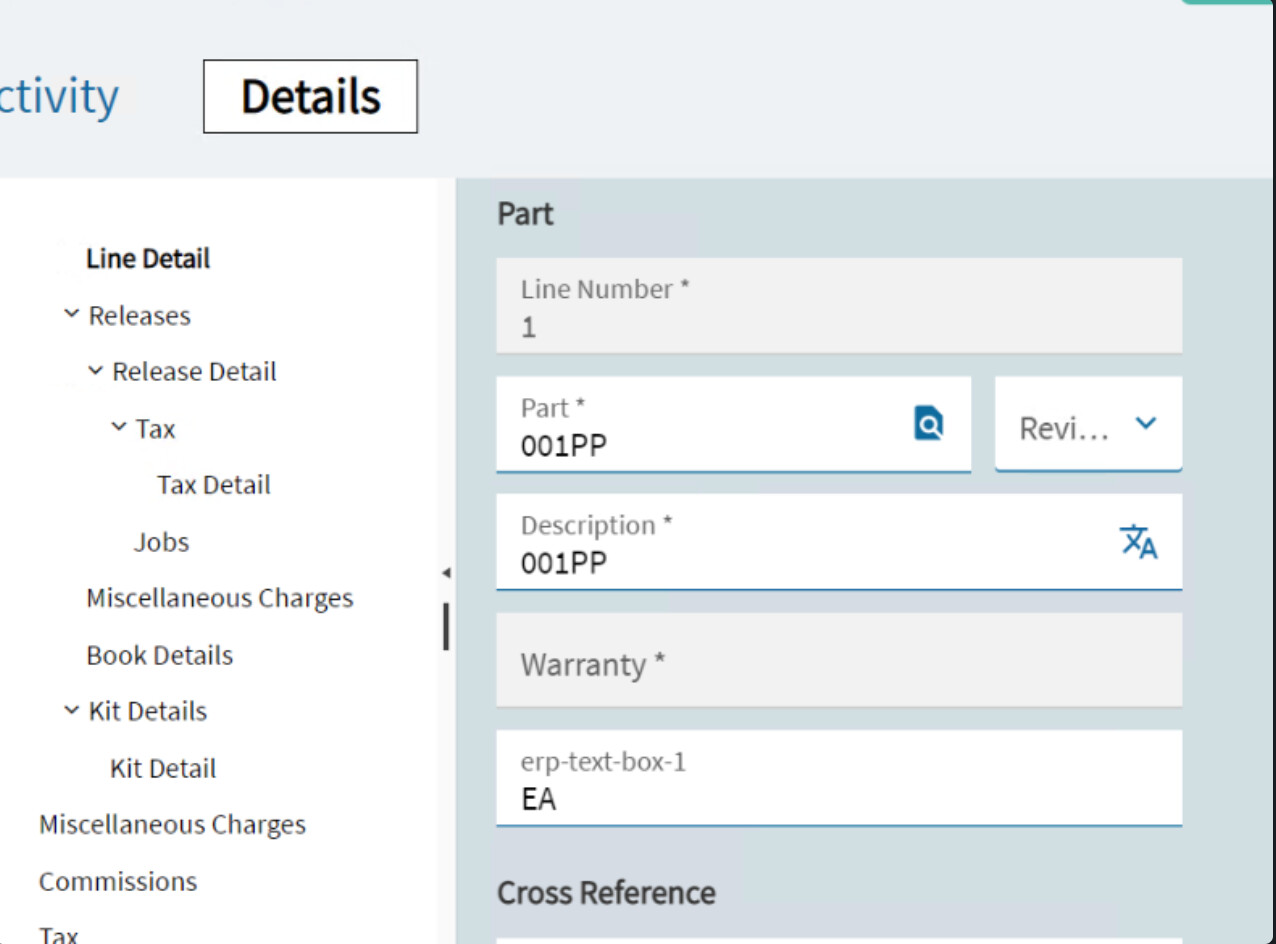
Run the layer to test:
-
-
Success!


Please roast me in the comments for anything I got wrong. ![]()